Assembly Instructions
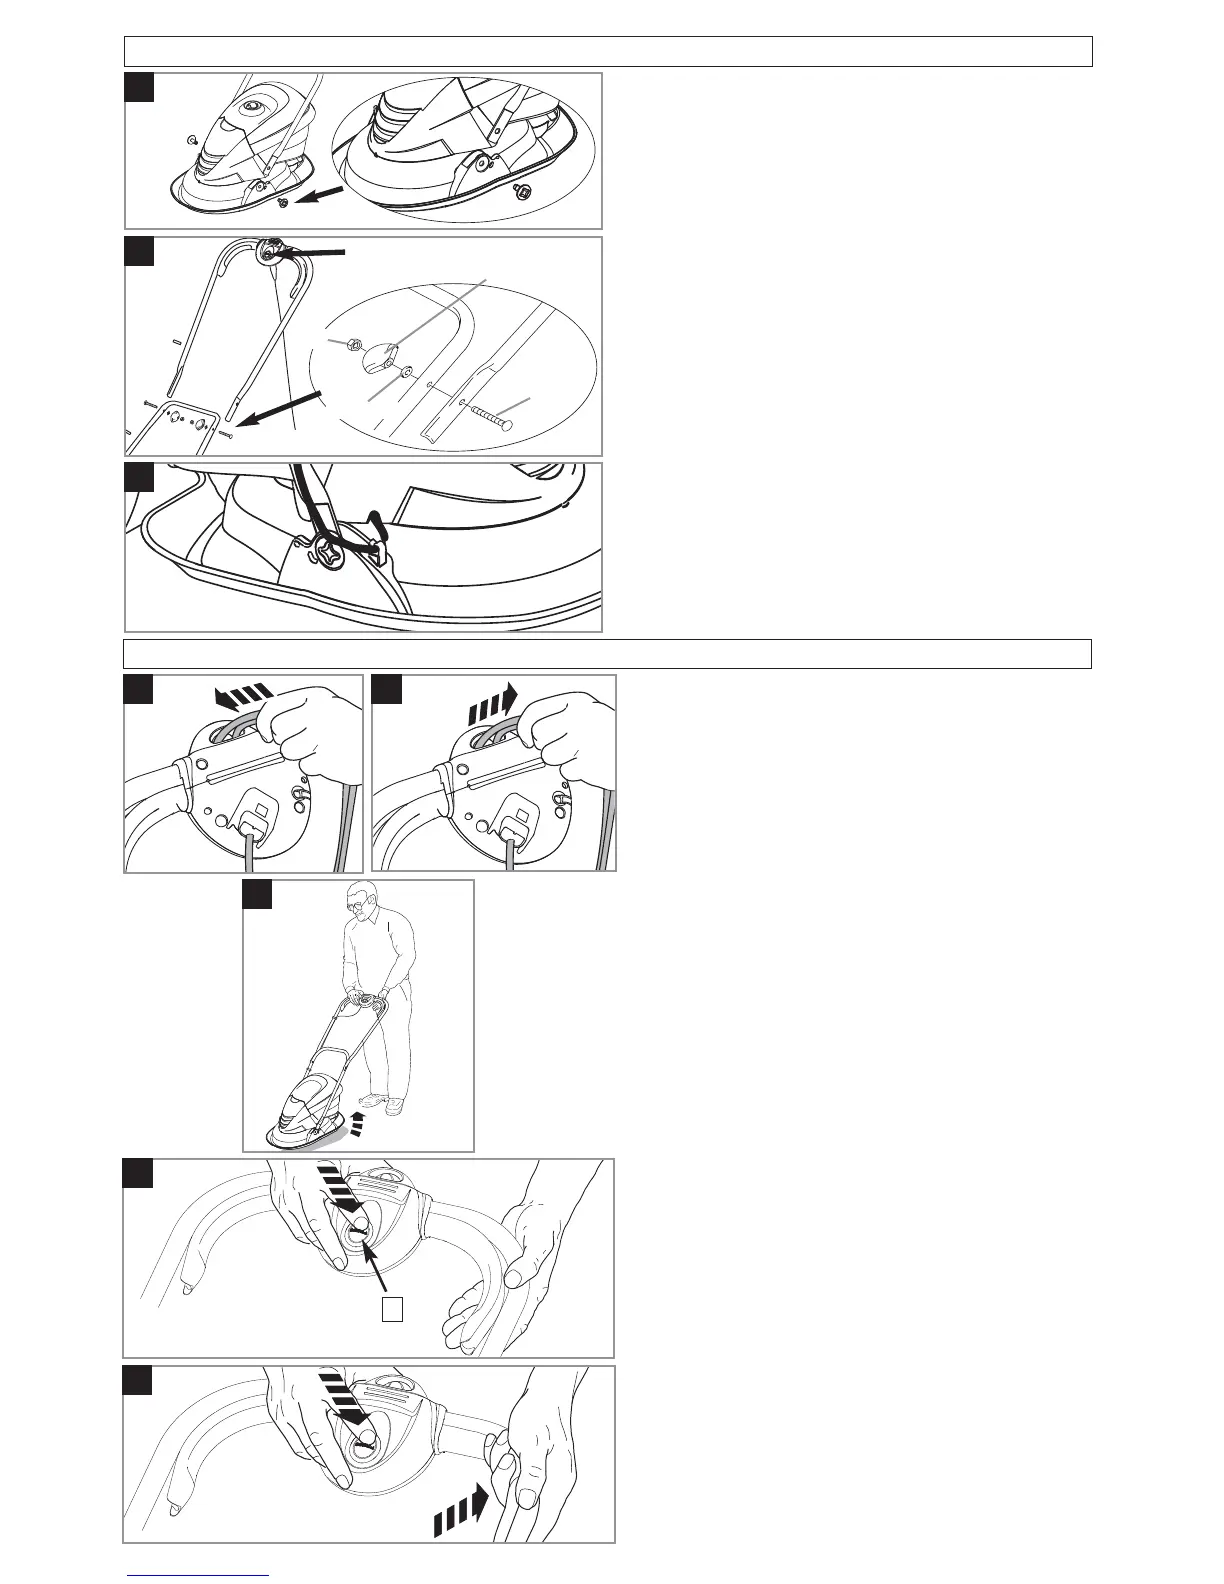
Assembly of lower handle to hood (A)
1. Place the ends of the lower handle into the slots
2. Secure lower handle to hood by firmly pushing fixing
pin through holes in hood and handle (A1).
3. Repeat on the other side.
• NOTE
Should a problem occur when securing handle with
the fixing pin, carefully lever the pin out of location
and repeat steps 1 to 3 above.
Fitting Upper Handles to Lower Handles (B)
1. Ensure the upper handle is located correctly with the
lock-off button on the switchbox uppermost.
2. Ensure the upper handle and the lower handle are
aligned correctly.
3. Insert the nut into the handle knob.
4. Fit the bolts, washers and handle knobs.
5. Fit the cable to the handles with the clips provided
making sure the cable is not trapped between the
upper and lower handles.
Cable clips (C)
1. Fit the cable to the handles with the clips provided.
2. Ensure the the cable is secured under the clip on the
hood.
A
C
Starting and Stopping
Starting
1. Form loop in mains cable and push the loop through
the slot as illustrated in picture (D).
2. To secure, position loop over the hook and pull the
cable back through the slot as illustrated in picture
(E).
3. Connect plug to mains.
4. To prevent a ring being cut in your lawn and to clear
any residual grass in the collection chute, tilt your
lawnmower slightly (F).
• The switchbox is provided with a lock-off button
(G1) to prevent accidental starting.
5. Press and hold the lock-off button (G) on the
switchbox, then squeeze one of the Start/Stop
levers towards the upper handle (H).
6. Continue to squeeze the start/stop lever towards
the upper handle and release the lock-off button.
7. When the product has reached full speed gently
lower it onto the lawn.
• NOTE There are two start/stop levers fitted. Either
one can be used for starting the product.
• IMPORTANT Do not use the start/stop levers inter-
mittently
Stopping
1. To prevent a ring being cut in your lawn, tilt your
product slightly (F).
2. Release the pressure on the Start/Stop lever.
1
B
lock-off
button
bolt
washer
handle
knob
nut
D
F
G
H
E
1