3. OPERATION
DANGER! Risk of physical injury!
Cut injury when the product starts
accidentally.
v Before you connect, adjust or transport the
product, disconnect the mains cable and trans-
port the product by the bottom handle.
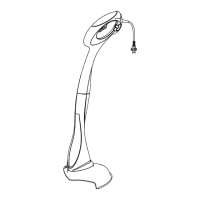
To connect the trimmer [ Fig. O1 ]:
DANGER! Risk of electric shock!
To avoid damage to the mains cable
8
the
extension cable
0
must be inserted into
the cable lock
7
.
v Before you operate the product insert the
extension cable
0
into the cable lock
7
.
1. Loop the extension cable
0
, insert the loop into the
cable lock
7
and pull tight.
2. Connect the plug
8
of the product into the socket
9
of
the extension cable
0
.
3. Connect the extension cable
0
into a 230 V mains
socket.
Work position [ Fig. O2/O3 ]:
1. Hold the product by the handle and the upper shaft
so that the trimmer head
4
is tilted a small distance
forward.
2. Swing the trimmer head
4
in and out of the cutting
area. Take small cuts.
Make sure, the filament does not touch hard objects such
as walls, stones and fences to prevent the filament from
welding together or breaking.
To start the trimmer [ Fig. O4 ]:
DANGER! Risk of physical injury!
Risk of injury if the product does not stop
when you release the start button.
v Do not bypass the safety devices or switches.
For example do not attach the start button
q
to
the handle.
To start:
v Push the start button
q
in the handle.
To stop:
v Release the start button
q
.
To extend the cutting filament (manual filament feed
system) [ Fig. O5/O6 ]:
1. Push and hold the two latches
w
.
2. Pull the filament
5
gently until it reaches the filament
limiter
r
.
3. Release the two latches
w
.
Make sure, the latches
w
are locked in the latches
o
.
4. Check that the filament cassette
t
is correctly
locked (Try to remove the filament cassette
t
without to push the latches
w
).
5. Start the trimmer.
6. The filament
5
is automatically cut to the correct length
with the filament limiter
r
.
If too much filament
5
has been pulled out, push the two
latches
w
and turn the filament cassette
t
anti-clockwise
until the filament
5
is at the correct length.
2. Put the cover
3
on the trimmer head
4
while you
feed the cutting filament
5
through the opening in the
cover
3
.
3. Push the cover
3
into the trimmer head
4
and turn the
cover
3
anti-clockwise (see fig. A3) until it makes a click
(click).
Make sure, the cover
3
is securely in place (try to turn
the cover
3
).
4. MAINTENANCE
DANGER! Risk of physical injury!
Cut injury when the product starts
accidentally.
v Before you maintain the product, make sure that
the mains cable is disconnected.
To clean the trimmer [ Fig. M1/M2 ]:
DANGER! Electric shock!
Risk of injury and risk of damage to the
product.
v Do not clean the product with water or with a
water jet (in particular high-pressure water jet).
The airflow slots must always be clean.
1. Clean the airflow slots
z
with a soft brush
(do not use a screwdriver).
2. Clean all movable parts after each operation. Especially
remove any grass and dirt from the cover
3
.
To replace the filament cassette or the cutting
filament:
DANGER! Risk of physical injury!
Risk of injury from metal cutting parts!
v Do not use metal cutting parts or replacement
parts and accessories not approved by FLYMO.
Only use original FLYMO Filament Cassettes.
You can order Replacement Filament Cassettes from
your FLYMO dealer or directly from the FLYMO
5
41121-85.960.01.indd 541121-85.960.01.indd 5 20.09.21 11:3820.09.21 11:38
 Loading...