Assembly Instructions
B1 B2
C D
1
2
E1 E2
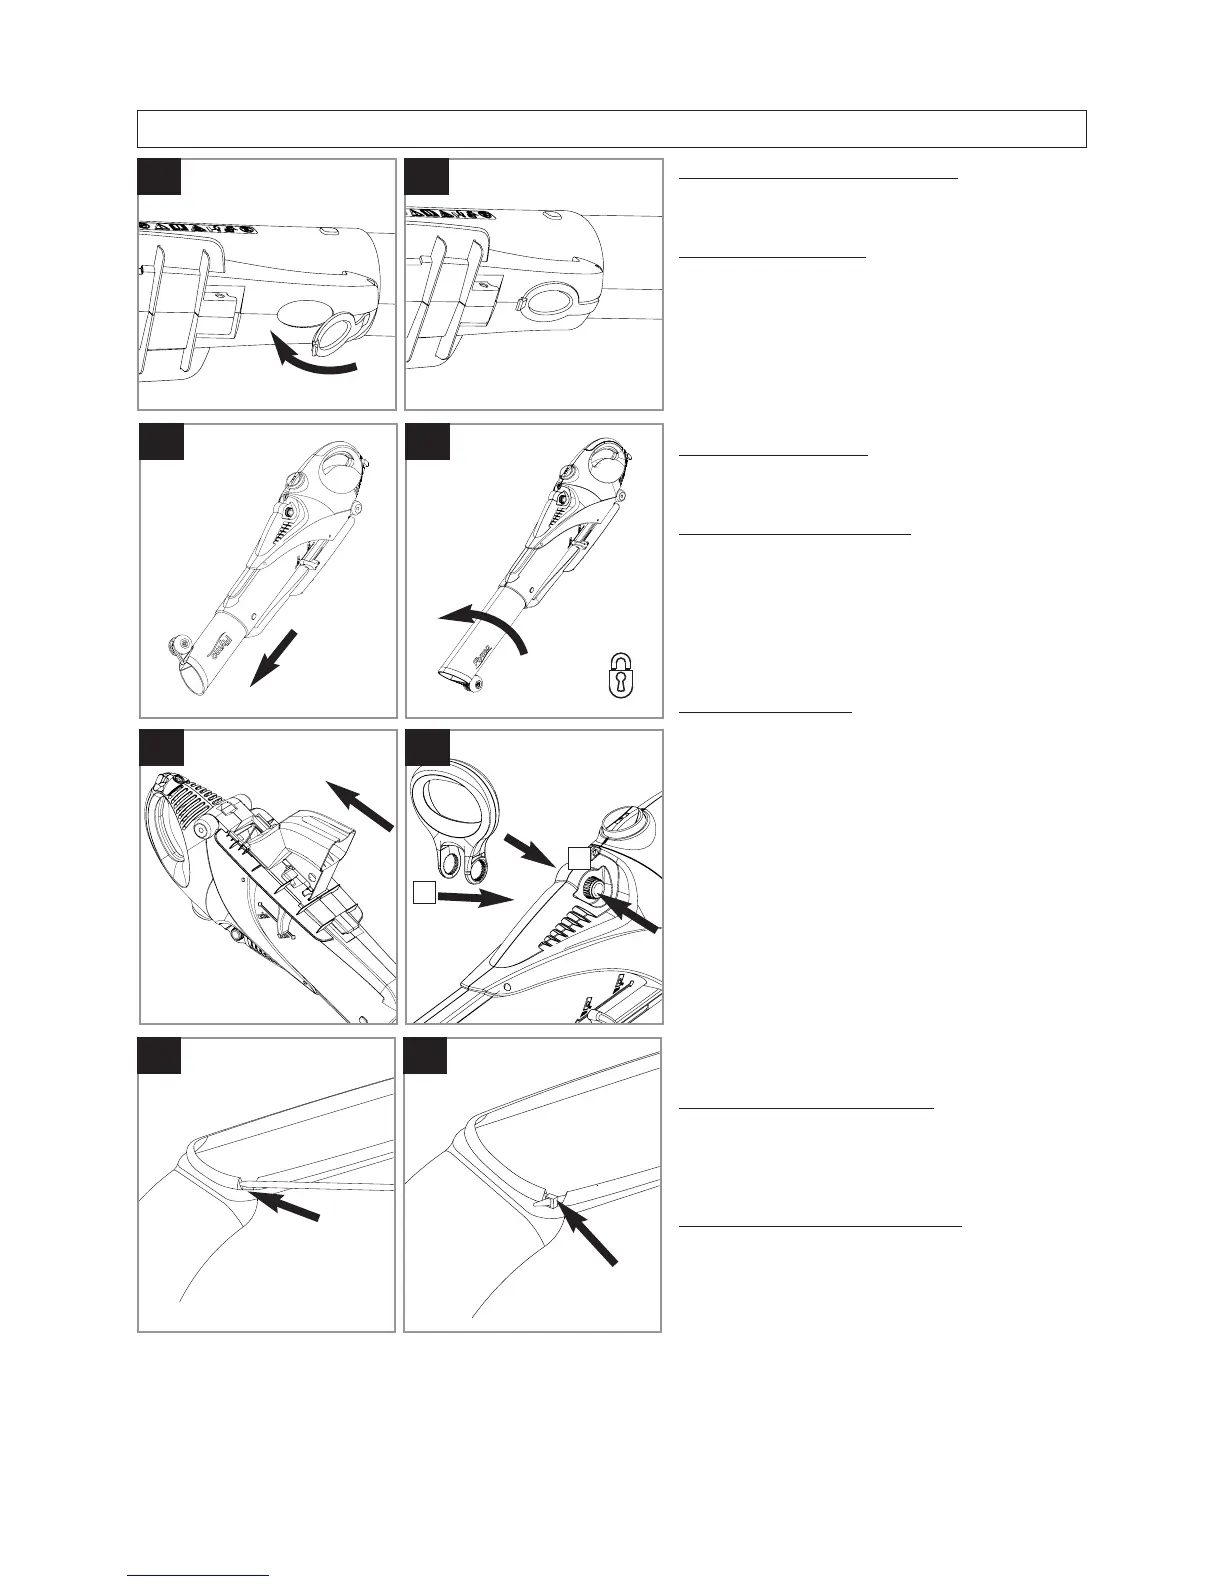
Blockage Clearing Cap (A1) & (A2)
1. Close the Blockage Clearing Cap ensuring it is
secure.
Suction Tube Assembly
1. Extend the lower suction tube to its full length. (B1)
2. Turn the lower suction tube anti-clockwise in the di-
rection of the arrow, approximately 1.5 times, until
it locks into position (B2)
IMPORTANT
When the Suction Tube is locked into the operating
position, this is a permanent fixture. The Suction tube
cannot be pushed back to its packaged position.
Debris Outlet Assembly
1. Fit the Debris Outlet to the underside of the product
as illustrated in Fig C, until it locks into position.
Steady Handle Assembly (D)
1. Depress the two buttons on the sides of the
switch handle.
2. Locate the steady handle over the buttons and
release the buttons.
3. Adjust the steady handle to the most comfort-
able operating position by depressing the but-
tons and moving the handle.
Debris Bag Assembly
1. Slide the Tie Wrap into the top hem of the De-
bris bag (E1)
2. Thread the Tie wrap completely round the hem
and locate the two ends of the Tie wrap to-
gether (E2)
Important:- Do not tighten the Tie Wrap before at-
taching the Debris Bag to the Debris Bag Frame. If
mistakenly done so, use a pointed tool to loosen
the Tie Wrap clip.
3. Attach the Debris Bag to the Debris Bag Frame
as illustrated in Fig E3, ensuring that the Tie
Wrap ends are at the opposite end to the Debris
Bag Frame handle.
4. Once the Debris Bag is located onto the Debris
Bag Frame, pull the Tie Wrap until the Debris
Bag is secure (E4). The excess end of the Tie
Wrap can either be removed or tucked into the
top hem.
Attaching Debris Ba
g to pr
oduct
1. Locate bag frame into clip on the underside of
product. (F1).
2. Lift handle towards product until bag latch lo-
cates and click into place. (F2)
Removing Debris Bag
from Product
1. Gently press bag latch (G1) down.
2. Lower handle of bag frame away from product.
3. Move bag frame forward.
A1 A2
x 1.5 =