16
Updating charger fi rmware
The Charge Control Software automatically checks for new fi rmware each time it is launched
(assuming the computer is connected to the Internet). If new fi rmware is available, it is down-
loaded to your computer. When you are ready to update the charger:
1. Be sure the charger is connected to the computer, and is powered up.
2. Disconnect all packs from the charger.
3. In the Charge Control Software window, click the Firmware tab.
4. Select the fi rmware you want to download.
5. Click Update Firmware.
6. Wait—and do nothing to the PC, charger and interconnection—until updating is complete.
IMPORTANT: During fi rmware downloading, do not disconnect the charger from
power, do not disconnect the charger from the computer, and do not exit the Charge
Control Software.
Confi guring User Presets
The Charge Control Software gives you almost total control over User Presets, including which
ones are available in the charger, the order in which they are displayed, charging characteristics
and the content and order of data screens displayed during charging.
1. Be sure the charger is connected to the computer, and is powered up.
2. In the Charge Control Software window, click the Presets tab. The left panel lists User Pre-
sets stored in the charger, and the right panel lists parameters and screens for the User Preset
selected in the left panel.
3. Then:
To change preset order: In the left panel, drag the preset number up or down.
To prevent a preset from being displayed in the charger: Open the list next to the preset
and click Hide.
To confi gure a preset: Select the preset in the left panel, then...
To change charge characteristics: Click the Properties tab in the right panel, then set
options as needed.
To change charge data screens: Click the Screens tab in the right panel, then...
To show or hide a data screen: Select Show or Hide as appropriate.
To change screen order: Drag the screen number up or down.
4. Click Update Charger.
or
If you don’t want to apply the changes, click Cancel.
Note: The Charge Control Software performs extensive checks to make certain you
have specifi ed permissible charge parameters. If it fi nds errors, it will not download
presets to the charger until the errors are corrected. Errors are displayed in the Errors
tab. To correct an error, double-click the error in the Errors tab; you will be taken to the
corresponding preset property, which you can change to an acceptable value.
5
CHECKING PACK
[chemistry]
Press to Verify
MODE not pressed
Push to Reset
CHARGING Press
MODE for info.
STOP CHARGE?
>Yes
STOP CHARGE?
>No
CHARGER STOPPED
[various charge
data screens]
Press
Press
& Hold
Press
Press
Timeout
Press
[library preset]
Press
[next preset]
Press
Etc.
[last preset]
Press
Press
& Hold
Replace Preset
from Library? >N
Replace Preset
from Library? >Y
Press
Press
Press
& Hold
Overwrite preset selected
in Preset Menu with
selected Library Preset.
or
Create new preset if
EMPTY PRESET was
selected in Preset Menu.
CHOOSE CHG. RATE
Charge @ [value]
Press for
next value
Press
& Hold
Apply selected charge
rate to preset selected in
Preset Menu.
Note: Press ONLY if displayed
chemistry is same as pack chemistry.
Note: Press & Hold when desired
Library Preset is displayed.
Press
& Hold
Elapsed [time]
[chemistry] DONE
Charging
Choose Preset from Library
Choose Charge Rate
Press
& Hold
Press
Press
Press
& Hold
“Reverse Press” to
reverse sequence
“Reverse Press” to
reverse sequence*
Press
Press
Press
& Hold
Press
& Hold
[various charge
data screens]
PACK REMOVED
Disconnect
pack from
charger
Press
Charge complete
Press
& Hold
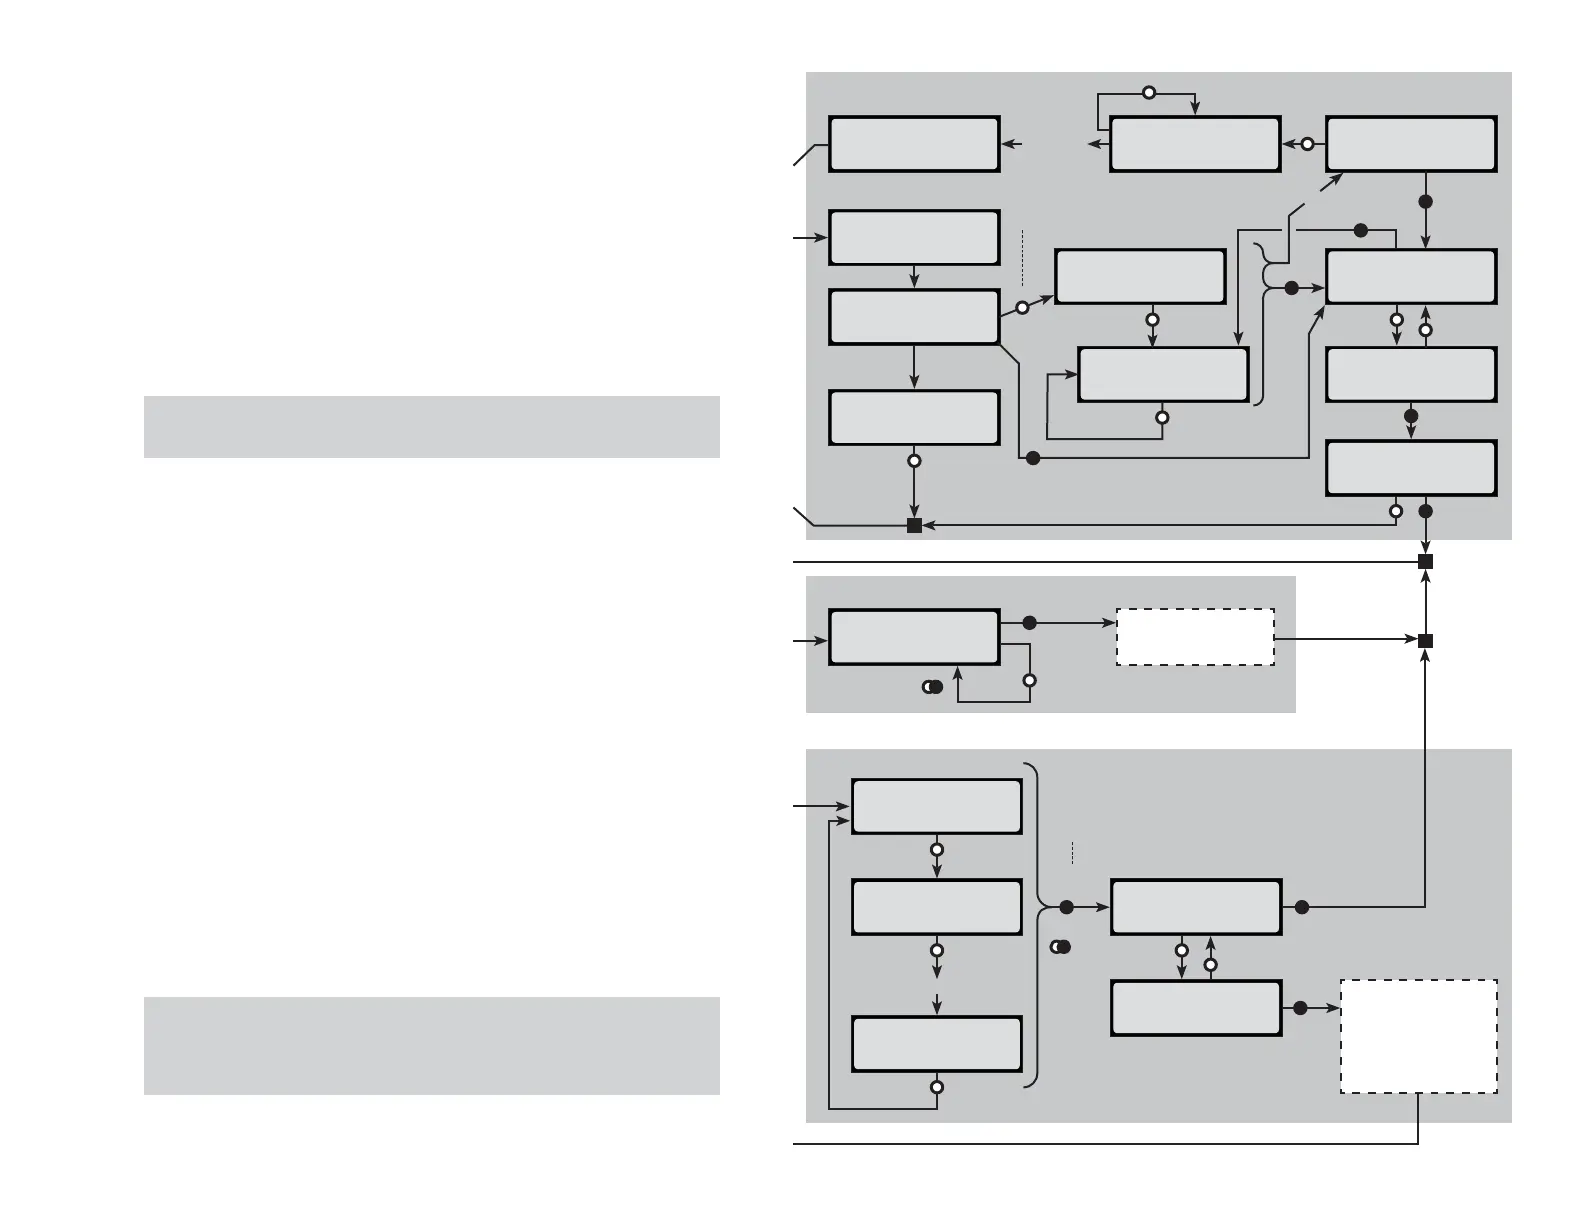 Loading...