www.fmiproducts.com
124384-01A14
REFRACTORY PANEL INSTALLATION
IMPORTANT: Installation of brick
should be done after the re-
place is placed in a permanent
location.
1. Remove screen assemblies and all hard-
ware components out of the rebox. The
bottom panel is preinstalled in the rebox.
Make sure the bottom refractory panels is
centered in the rebox and ush with the
front of the replace.
2. Place cardboard on top of bottom refac-
tory panel as a protection to prevent ship-
ping and scratching during installation of
the other panels.
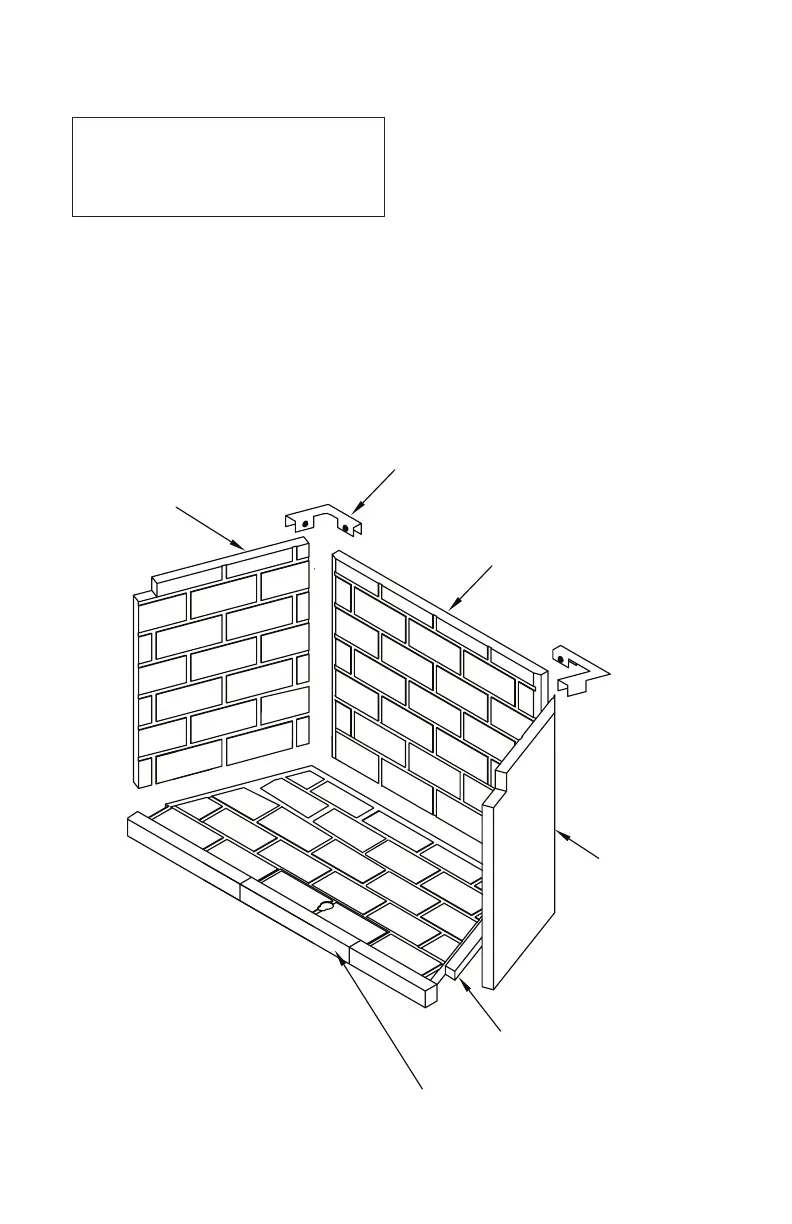
Figure 13 - Installing Refractory Panels
LEFT BRICK
PANEL
PANEL
RIGHT BRICK
REAR BRICK
PANEL
BOTTOM
BRICK PANEL
ASH PANEL
BRACKET (2x)
3. Install rear refractory panel. This panel
has a top and bottom. To determine which
is which, match up the pattern on the rear
panel with the left and right sides before
installing the rear panel. Make sure panel
is center before continuing.
4. Install the right and left refractory panels
with the gas line knockouts orientated
down toward the bottom refractory. Align
the left and right panels with the rear panel
so the grout lines line up.
5. Install the upper corner brackets and
tighten set screws (Figure 13).