Page 9 of 15 ENG 0019.14 Part # 93030
Inside the body is a shaft that may also be dirty. Using a pair of tweezers, remove the
shaft. Remember its orientation inside the valve. Carefully clean the valve stem and
shaft using warm water or alcohol. Replace the shaft back in the valve, ensuring it is in
the proper position. Lubricate the valve stem with a high-temperature lubricating grease
(a small amount will do) and replace the valve and its associated cap. Secure the screw
and replace the control panel.
Cleaning the Burner Orifice
The orifice on the burners should be cleaned at least once a year to remove grease and
carbon build up. The orifice should be removed for cleaning. To clean out the orifice use
compressed air or soak it in alcohol and use a soft bristle brush. Never use metal to
clean the orifice
Turn off the gas before performing any maintenance.
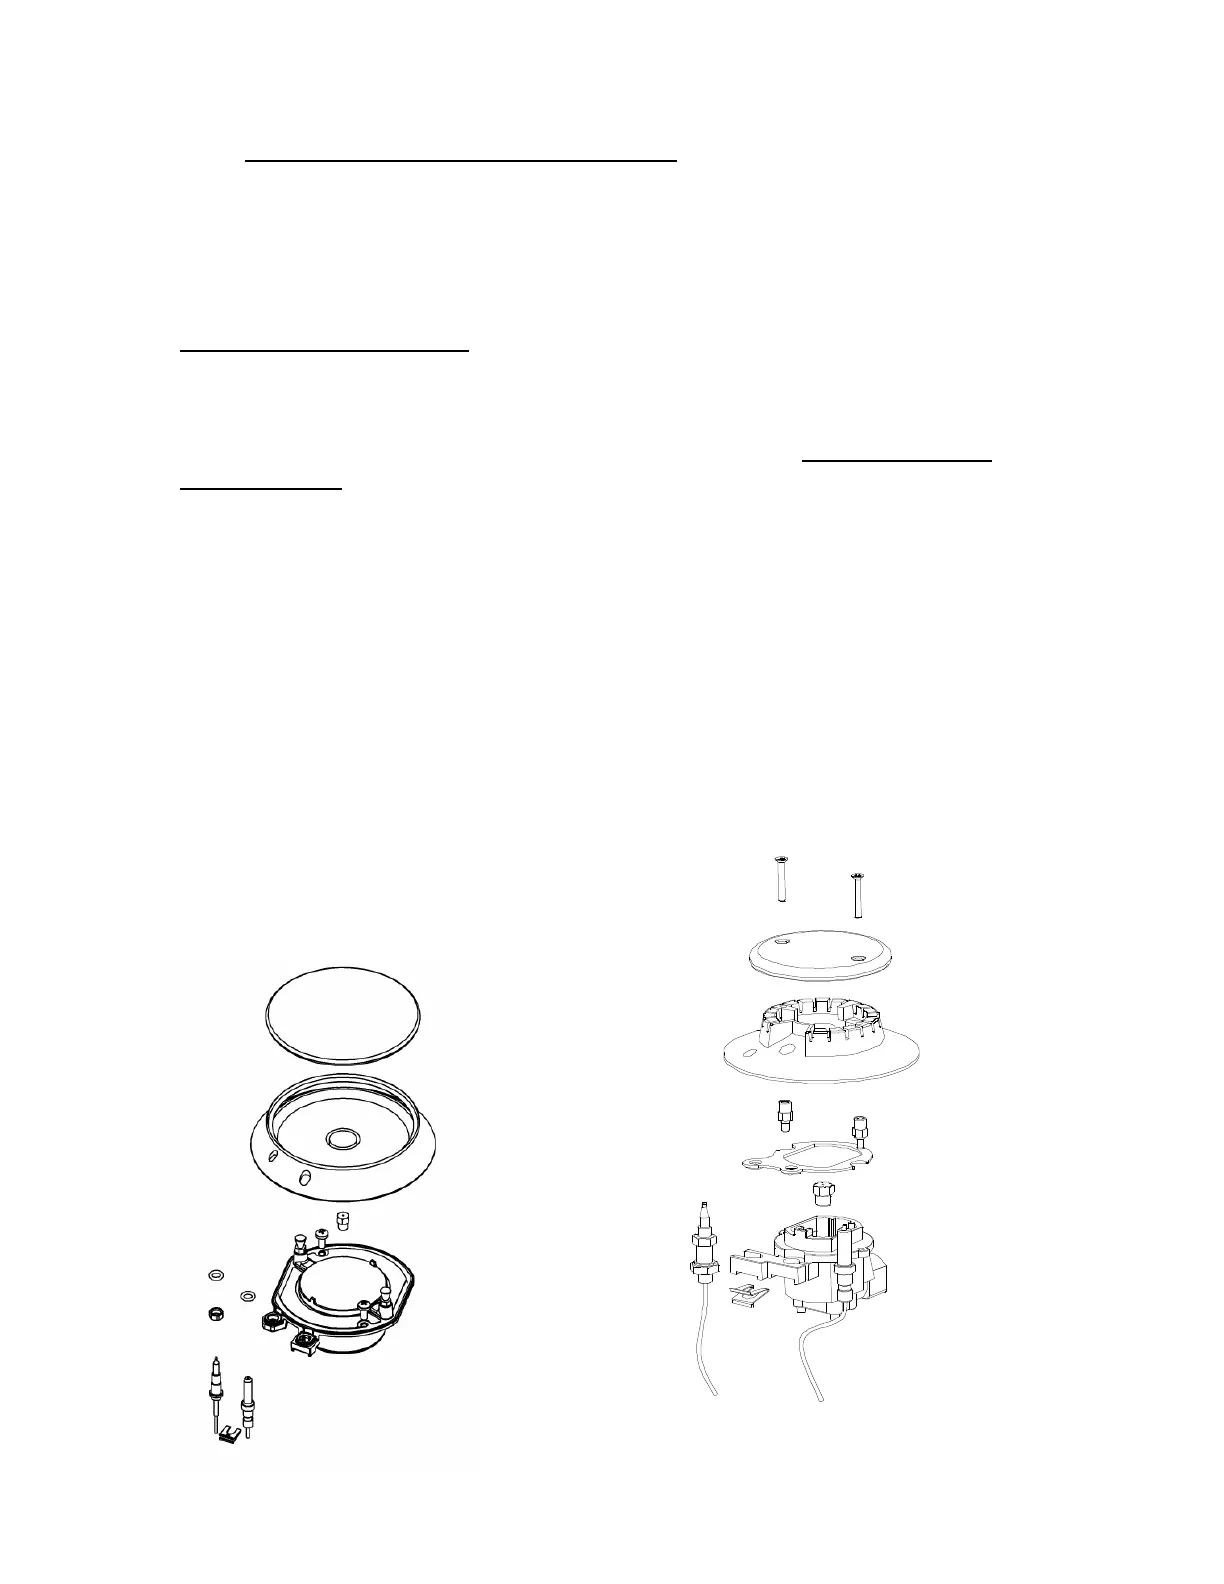
Removal of the top burner orifices:
(This unit will be equipped with either screw down or twist off burner caps)
For units with screw down caps, remove the (2) Phillips head screws and lift of the
burner cap. For units with twist of burner caps, twist the burner cap counter-
clockwise and lift up.
Remove the flame spreader.
Using an 7mm socket unscrew
and remove the brass orifice.
Re-assemble the burner before use
ensuring the burner cap is attached.
Removal of the oven orifice: