Do you have a question about the ForceDoor FS 600 and is the answer not in the manual?
Read and adhere to all safety and installation recommendations for proper use.
Installer must be familiar with local regulations and qualified for installation.
Unqualified personnel must not carry out installations or implement systems.
Installers are responsible for damages due to incorrect installation or non-compliance.
Recommends Photo Beam for enhanced safety and peace of mind.
Ensure garage door is stationary before entering, exiting, or leaving.
Keep hands and clothing clear of the opener and door during operation.
Safety Obstruction System works only on stationary objects.
Appliance not for persons with reduced capabilities; supervise children.
Dispose of waste electrical products responsibly, check local recycling advice.
Damaged supply cords must be replaced by qualified personnel.
Follow all instructions for safety and save them.
Automatic stop/reverse for protection of children, pets, or goods.
Ramps speed up/down for reduced stress and quieter operation.
Automatically closes the door for peace of mind and security.
Learns and re-profiles obstruction force for different door travel stages.
Simple and quick electronic limit setup from control panels.
Terminals available for photo beams, receivers, switches, and safety devices.
L.E.D courtesy light with 3 minutes delay, switches on with each cycle.
Optional battery backup for power failure operation.
Gear motors self-lock for security via disengagement systems.
Manual release system for door operation during power failure.
Rolling Code technology with 433.92Mhz frequency, 4 channels.
Requires minimal 30mm headroom for flush mounting.
Metal bottom plate for increased strength and security.
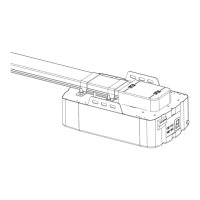
Front panel buttons for open, stop, and close operations.
External fuse for mains power protection.
Garage door must be well-balanced and easy to operate manually.
Opener cannot compensate for a poorly installed or difficult door.
Remove existing locking devices on existing doors to avoid voiding warranty.
An approved electrical outlet must be installed near the opener location.
Minimum 30mm gap required between drive rail and top of garage door.
Strongly recommends Photo Electric safety beams for all installations.
Instructions for mounting the wall and door brackets.
Attach the opener head to the steel track using hanging brackets.
Position track centrally, lift front to door bracket, insert pivot pin.
Lift and support opener head, fix opener and track to ceiling.
Warning: Keep children away during installation to prevent injury.
Fix shuttle, slide towards door, attach arms to door edge.
Lift door until shuttle locks into drive chain/belt.
Assemble 2-part steel track by sliding rails into sleeve.
Assemble 3-part steel track by sliding rails into sleeves.
Cut plastic thread and pull screw rod with chain to end rail position.
Release the nut and spring as shown in Figure 9.
Tighten nut, cut tape and thread to finish rail assembly.
Insert shuttle into aluminium track end, slide along rail.
Use 6mm hexagon bolts to secure rail through cutouts.
Attach the opener head to the track using hanging brackets.
Position track centrally, lift front to door bracket, insert pivot pin.
Lift and support opener head, fix opener and track to ceiling.
Warning: Keep children away during installation to prevent injury.
Attach arms to door edge, lift door until shuttle locks into chain.
Assemble battery and bracket, fix with screws.
Connect the battery to the opener.
Set the desired open and close positions for the door.
Pairing hand transmitters with the opener.
Procedure to delete all stored remote transmitter codes.
Adjust the force sensitivity for obstruction detection.
Configure the automatic closing time for the garage door.
Enable or disable the photo electric safety beam function.
Using external push button switches for door operation.
Using O/S/C terminals for adding external buttons.
Connecting and using the flash light function with specific voltage.
Ensures door only opens if the pass door is closed.
How to disengage and re-engage the door shuttle manually.
Check door balance, working parts, and reversing sensitivity regularly.
Procedure for replacing the LED light bulb.
Safety notice: Disconnect power before replacing the light bulb.
Improper door operation can shorten opener life and void warranty.
Technical specifications for the FS 600 model.
Technical specifications for the FS 1000 model.
Technical specifications for the FS 1200 model.
| Brand | ForceDoor |
|---|---|
| Model | FS 600 |
| Category | Garage Door Opener |
| Language | English |