1010 11
5. Press the transceiver rmly into the cage socket with
your thumb.
6. Verify that the transceiver is latched correctly by grasping
the sides of the transceiver and trying to pull it out
without lowering the extraction lever.
If the transceiver cannot be removed, it is installed and
latched correctly.
If the transceiver can be removed, reinsert it and press
harder with your thumb.
If necessary, repeat this process until the transceiver is
securely latched into the cage socket.
To remove the SFP transceivers
1. Ensure that you are properly grounded.
2. If applicable, disconnect the ber-optic cable from the
transceiver connector and install a clean dust plug in the
transceiver’s optical bores.
3. Pull the extraction lever out and down to eject the
transceiver. If you are unable to use your nger to open
the lever, use a small at-head screwdriver or other
similar tool to open the lever.
4. Hold the sides of the transceiver and carefully pull it away
from the cage socket.
5. Replace the cap on the SFP cage socket and place the
removed SFP transceiver into an antistatic bag.
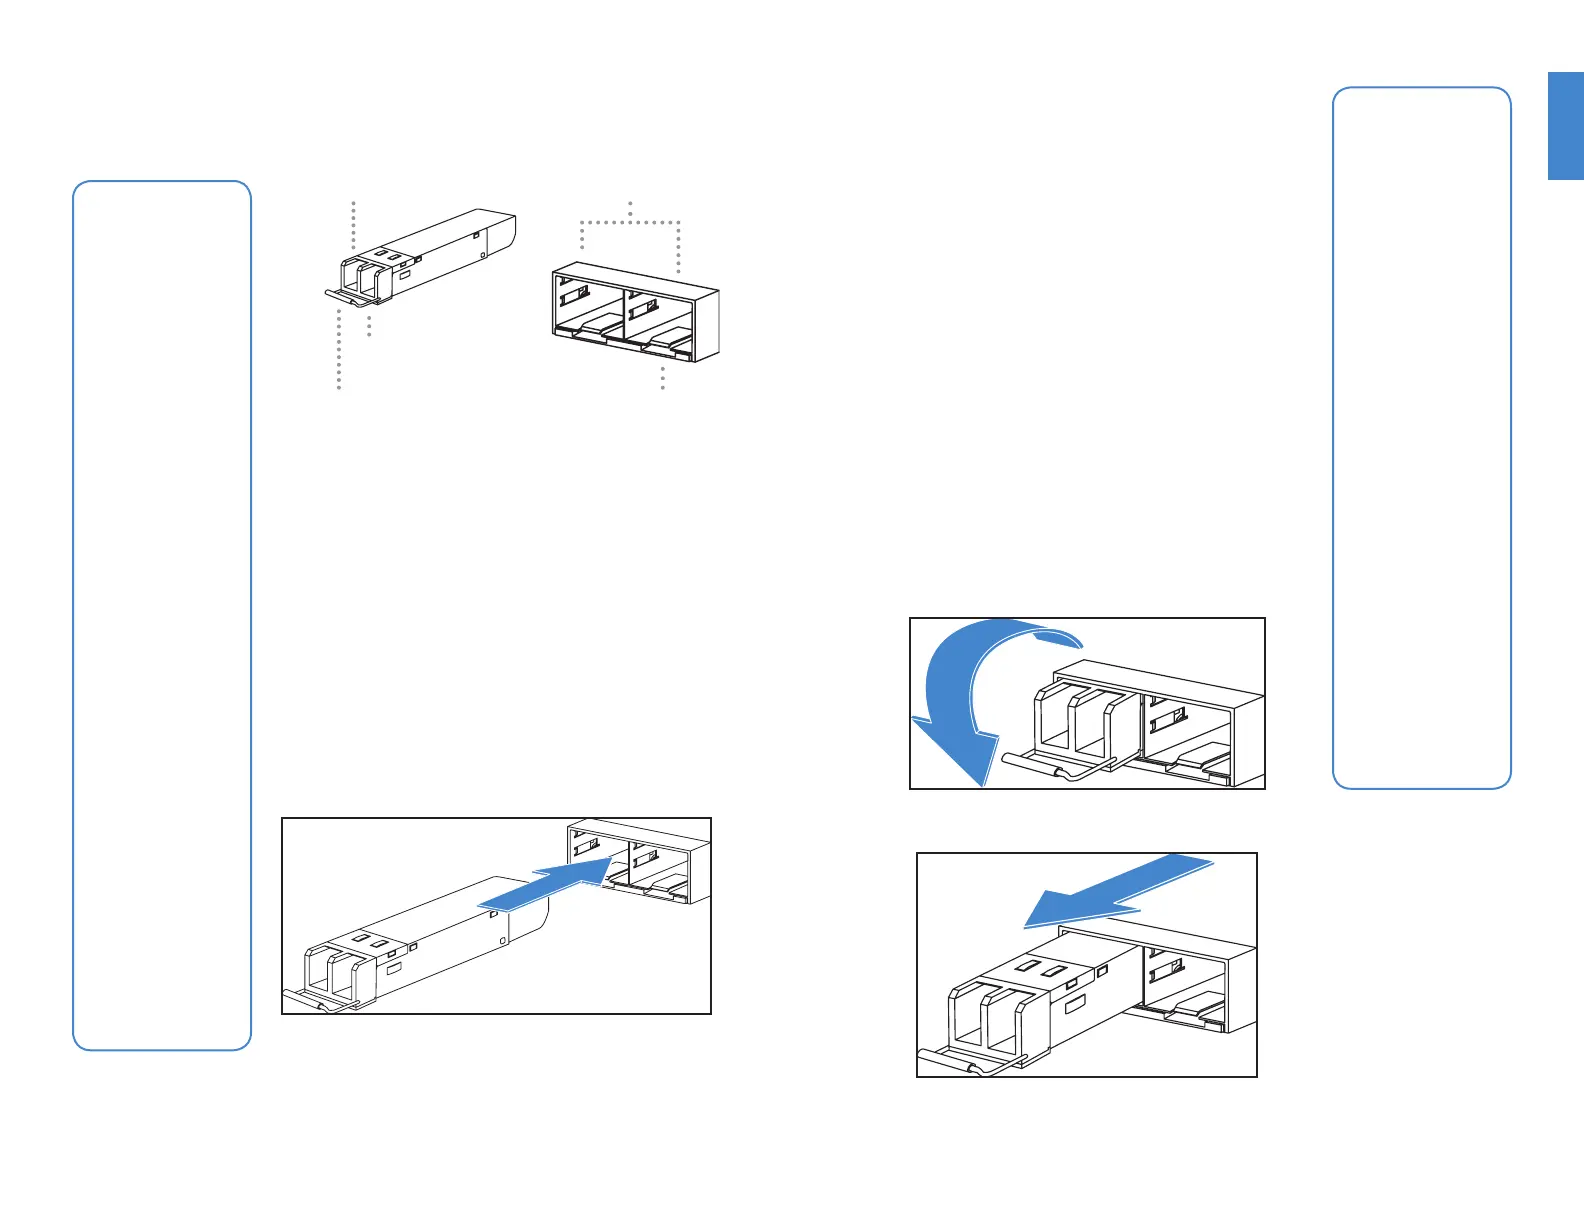
To install the SFP transceivers
1. Ensure that you are properly grounded.
2. Remove the caps from the SFP cage sockets on the
front panel of the unit.
3. Position the SFP transceiver in front of the cage socket
opening and ensure that the transceiver is correctly
oriented. When the transceiver is correctly oriented, the
extraction lever will be level with the socket latch.
Note: SFP cage socket orientation may vary. Ensure that
the SFP transceiver module is correctly oriented each
time that you are inserting a transceiver.
4. Hold the sides of the SFP transceiver and slide it into the
cage socket until it clicks into place.
Caution: SFP
transceivers are
static sensitive
devices. Use
an ESD wrist
strap or similar
grounding device
when handling
transceivers.
Do not install
or remove SFP
transceivers while
ber-optic cables
are still attached.
This can cause
damage to the
cables, cable
connectors,
and the optical
interfaces. It may
also prevent the
transceiver from
latching correctly
into the socket
connector.
Note: Installing
and removing
SFP transceivers
can shorten their
useful life. Do not
install or remove
transceivers more
than is necessary.
SFP Transceivers
Caution: Do not
force the SFP
transceivers into
the cage slots.
If the transceiver
does not easily
slide in and click
into place, it may
not be aligned
correctly or may
be upside down.
If this happens,
remove the SFP
transceiver, realign
it or rotate it and
slide it in again.
Note: Follow
proper ber-
optic handling
procedures when
installing and
removing
SFP transceivers
to ensure the
devices remain
clean and are not
damaged.
SFP Cage Sockets
Socket Latch
Transmit Optical Bore
Extraction Lever
Receive Optical Bore
 Loading...