The factors that entail better results with the drill presses are the type of material, hole’s size,
the type of bit or miller and the cutting quality desired. The smaller the bit is, the faster the
necessary speed must be. Speed must be higher when processing soft materials than hard
metals. Use the recommended speed for the bit you are using and for the material to be cut
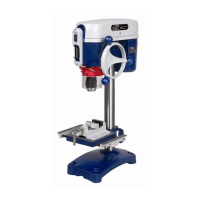
F11-951 DRILL PRESS
The spindle of this drill press can turn at 5 different speed levels: 580, 850,1220, 1650 e 2650
RPM. You can obtain the lowest speed by placing the belt on the smaller step of motor’s pulley
and on the biggest of spindle’s pulley, as illustrated in fig. 11. Fig. 12 illustrates how to put the
belt on the different steps of the pulleys in order to obtain the five different speed levels.
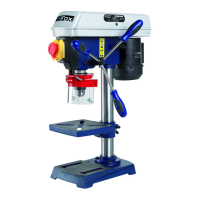
F11-991 DRILL PRESS
The spindle of this drill press can turn at 5 different speed levels: 425, 560, 645, 730, 790, 860,
1275, 1350, 1600, 1710, 2060, 2545 RPM. Fig. 29 illustrates how to put the belt on the different
steps of the pulleys in order to obtain the twelve different speed levels. For this model, in
addition to the pulley of the motor and the pulley of the spindle, there is a third intermediate
pulley.
1. Switch off the drill press and disconnect it from the power supply.
2. Unscrew the screw of the protection box of the belts (A) and open the cover (B) fig. 13.
3. Loosen the belt by loosening the tensioning locking knob (C) fig. 13 (in F11-991 model
there are two knobs) and push the motor towards the back side of the drill press.
F11-951 DRILL PRESS
4. For F11-951 drill press place the belt (D) in the grooves of spindle’s and motor’s pulleys
that correspond to the desired speed level, as illustrated in fig. 13.
F11-991 DRILL PRESS
5. For F11-991 drill press place the two belts according to the desired speed level. Fig. 29
indicates the possible speed combinations according to the position of the two belts.
6. After placing the belts on the pulleys, push the motor towards the back side until they are
correctly stretched, then tighten belt tensioning knob (C) fig. 13 (or two knobs for F11-
991 drill press). Belts must be stretched enough to prevent them from slipping out. If the
tensioning is too high, the life of the belt, of the pulleys and of the bearings would
decrease. The tensioning is correct when the belt (D) can be bent by hand about 2,5 cm
from its normal position between the pulleys.
7. Close the cover and fix it with its screw. If the cover is not closed the drill press does not
start, since the safety micro switch under the cover does not activate.
SPEED SELECTION AND BELT TENSIONING