For more information visit
WWW.FOXINT.COM
Designed & Developed in the UK • FOX is a Registered Trade Mark • Made in China
INSTRUCTIONS
F INSTRUCTIONS
INSTRUCTIES
D ANLEITUNG
I ISTRUZIONI
H UTASÍTÁS
ИНСТРУКЦИИ
NÁVOD
INSTRUKCJA
NÁVOD
4
4
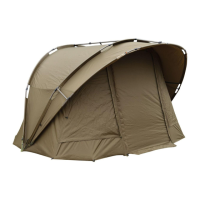
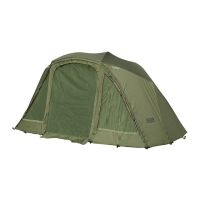
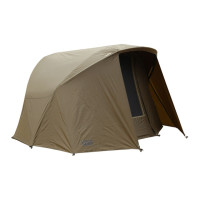
Attach and tension the frame support poles from the rear. Start at the front rib and work towards the back.
F
Attachez et mettez en tension les barres de tension du cadre en partant de l’arrière. Partez de l’arceau avant et avancez vers l’arrière.
Bevestig de frame support stokken en zet ze op spanning. Start bij de voorste rib en werk zo naar de achterkant.
D
Befestigen und spannen Sie die Rahmenstützstangen von hinten. Beginnen Sie an der vorderen Rippe und arbeiten Sie nach hinten.
I
Fissate e tensionate i pali di supporto del telaio dalla parte posteriore. Partite dalla stecca frontale e procedete verso la parte posteriore.
H A sátor mögé állva helyezze be a feszítő pálcákat. Az első pálcával kezdje, aztán haladjon hátrafelé.
Прикрепите и натяните несущие стойки рамы сзади. Начните с передней части и продвигайтесь к задней.
Stoupněte si k zadní části bivaku, připevněte a napněte tyče podpůrné konstrukce. Začněte od přední části a pokračujte směrem dozadu.
Zamocuj i rozłóż rozpórki podtrzymujące pałąki. Zacznij od przedniego pałąka i idź w kierunku tyłu.
Postavte sa k zadnej časti bivaku, pripevnite a napnite tyče podpornej konštrukcie. Začnite od prednej časti a pokračujte smerom dozadu
.
3
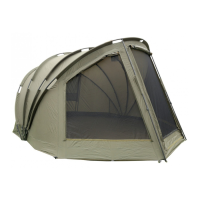
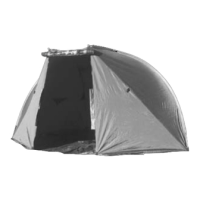
Peg the back pegging points to secure the bivvy in position.
F Arrimez le bivvy au sol aux points d’ancrage arrière.
Zet de achterkant vast met haringen.
D Befestigen Sie die hinteren Laschen mit Häringen um das Bivvy in seiner Position zu sichern.
I Piantate i picchetti posteriori per assicurare il bivvy in posizione.
H
A hátsó rögzítési pontok lecövekelésével fixálja a sátor pozícióját.
Пришпильте колышками заднюю часть палатки к земле для закрепления палатки в рабочем положении.
Zajistěte kolíky fixační body v zadní části přístřešku.
Aby ustawić namiot, wkręć wkręty w punkty mocujące z tyłu namiotu.
Zaistite kolíky fixačnými bodmi v zadnej časti prístrešku.
2
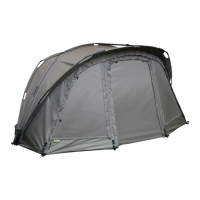
Attach the two tension straps.
F Attachez les deux sangles de tension.
Bevestig de twee tension straps.
D Befestigen Sie die beiden Spanngurte.
I Fissate le due cinghie di pensionamento.
H Csatlakoztassa a két feszítő pántot.
Прикрепите два натяжных ремня.
Připněte napínací popruhy.
Zamocuj dwa paski napinające.
Pripnite napínacie popruhy.
1
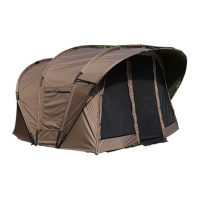
Lay the bivvy out and join the poles ensuring they are fully pushed together.
F Etalez le bivvy et joignez les sections arceaux en s’assurant de les pousser à fond.
Spreid de bivvy uit en verbind de stokken, zorg dat ze volledig in elkaar zitten.
D Legen Sie das Bivvy auf den Boden und stecken Sie die Stangen zusammen, wichtig ist, dass diese vollständig ineinandergeschoben werden.
I Dispiegare il bivvy sul terreno e unire i i pali, assicurandosi che siano perfettamente inseriti l'uno nell'altro.
H Fektesse a sátrat a földre illessze össze a csöveket meggyőződve arról, hogy azok teljesen össze legyenek dugva.
Разложите палатку и соедините опоры, убедившись, что они соединились правильно.
Vyjměte bivak z obalu a spojte bezpečně tyče dohromady.
Rozłóż namiot i połącz pałąki, upewniając się, że są one wsunięte do końca.
Vytiahnite bivak z obalu a bezpečne spojte tyče dohromady.
For more information visit
WWW.FOXINT.COM
Designed & Developed in the UK • FOX is a Registered Trade Mark • Made in China
INSTRUCTIONS
F INSTRUCTIONS
INSTRUCTIES
D ANLEITUNG
I ISTRUZIONI
H UTASÍTÁS
ИНСТРУКЦИИ
NÁVOD
INSTRUKCJA
NÁVOD
1
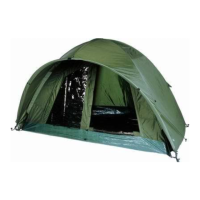
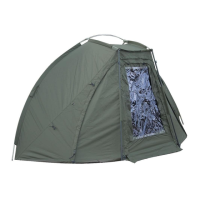
To fit the optional inner dome start by laying it in the bivvy and clip and toggle it around the edges starting at the back working forward.
F Pour fixer le dôme interne commencez par l’étendre à l’intérieur du bivvy puis arrimez-le à l’aide des crochets en commençant par les angles, d’abord à
l’arrière puis à l’avant.
Om de optionele binnentent te monteren, leg deze in de bivvy en clip deze vast op de randen, begin achteraan en werk zo naar voren.
D Um das optionale Innenzelt zu montieren, dieses im Bivvy auslegen und dann mit den Clips und Bändern an den Ecken befestigen, dabei von der
Rückseite ausgehend nach vorne arbeiten.
I
Per posizionare la cellula interna opzionale, partite stendendola all’interno del bivvy, fissandola ai punti del perimetro esterno partendo dal retro verso la parte frontale.
H
A megfelelő felhelyezéshez fektesse a belső részt a sátorba és csatlakoztassa a peckeket a helyükre az alsó élek mentén hátulról kezdve és előrefelé haladva.
Чтобы собрать внутренний купол, вложите его в палатку и начните пристёгивать его вдоль кромок, начиная с задней части и продвигаясь вперёд.
Pro připnutí vnitřní ložnice do přístřešku, položte ložnici na zem a začněte ji postupně připínat po švech zezadu směrem dopředu.
Aby dopasować opcjonalną wewnętrzną kopułę, rozłóż ją wewnątrz namiotu i przymocuj wzdłuż brzegów, zaczynając od tyłu i przechodząc do przodu.
Pre pripnutie vnútornej spálne do prístrešku, položte spálňu na zem a začnite ju postupne pripínať po švoch zozadu smerom dopredu.
3
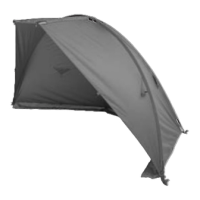
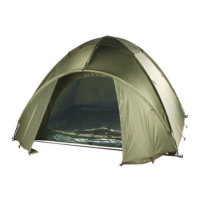
The inner dome can be used with or without the front of the bivvy. If using without the front pull the front of the inner dome out and peg into position.
F
Le dôme interne peut être utilisé avec ou sans le panneau avant du bivvy. Si vous l’utilisez sans, tirez le panneau avant du dôme vers l’avant et arrimez-le au sol.
De binnentent kan met of zonder de voorkant van de bivvy worden gebruikt. Zonder voorkant trek je de voorzijde van de binnentent naar buiten en zet
vast met haringen.
D Das Innenzelt kann mit oder ohne die Vorderseite des Bivvys verwendet werden. Bei der Verwendung ohne Vorderseite den vorderen Teil des
Innenzeltes nach vorne ziehen und mit Häringen in die richtige Position bringen.
I
La cellula interna può essere utilizzata con o senza la parte frontale del bivvy. In caso di utilizzo senza la stessa, tirate il frontale della cellula interna in fuori e picchettate in posizione.
H A belső rész a sátor elejével együtt és anélkül is használható. Ha nem használja a sátor első részét, feszítse meg majd cövekelje le a belső rész elejét.
Внутренний купол может быть использован с или без передней части тента. Если использовать без передней части, натяните переднюю часть
внутреннего купола и приколите его, как показано на рисунке.
Vnitřní ložnici lze používat společně s předním panelem bivaku, ale i bez něj. Pokud ji používáte bez předního panelu bivaku, pak její přední část napněte a zakolíkujte.
Wewnętrzną kopułę można stosować wraz z przednim panelem lub bez niego. Jeśli używamy namiotu bez przedniego panelu, należy pociągnąć przód
wewnętrznej kopuły i przymocować ją do podłoża.
Vnútornú spálňu je možné používať aj spoločne s predným panelom bivaku, ale aj bez neho. Pokiaľ ju používate bez predného panelu bivaku, potom jej
prednú časť dobre napnite a zakolíkujte
Work up along the seams of the inner dome connecting the remaining toggles to the loops on the bivvy.
F Continuez l’arrimage en suivant les arêtes vers le haut.
Bevestig de extra clips langs de naden aan de lussen van de bivvy.
D Arbeiten Sie entlang den Nähten des Innenzeltes nach oben und verbinden Sie die restlichen Bänder mit den Schlaufen am Bivvy.
I Lavorate seguendo le cuciture della cellula interna, collegando i rimanenti punti di ancoraggio agli anelli del bivvy.
H A varrások mentén fölfelé haladva csatlakoztassa a maradék peckeket a sátron található fülekbe.
Работайте вдоль швов, подсоединяя оставшиеся пуговицы к петлям на палатке.
Připínejte kolíky do smyček, které se nacházejí na švech vnitřní ložnice.
Następnie przymocuj kopułę specjalnymi kołeczkami wzdłuż szwów namiotu do pętelek namiotu.
Pripínajte kolíky do slučiek, ktoré sa nachádzajú na švoch spálne.
2
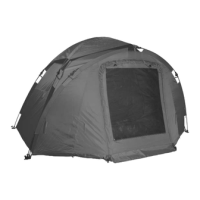
If using with the front clip and toggle the inner dome to the front panel.
F Si vous utilisez le panneau avant du bivvy, fixez le dôme sur celui-ci.
Gebruik je de voorkant wel, clip de binnentent dan vast aan het voorpaneel.
D Wenn mit der Bivvyfront gearbeitet wird, das Innenzelt mit Bändern und Schlaufen an der Front befestigen.
I In caso di utilizzo con la parte frontale del bivvy, fissate la cellula interna con gli appositi punti di ancoraggio al pannello frontale.
H Amennyiben használja a sátor első részét, rögzítse a belsőt a csat és a pecek segítségével.
Если используете с передней частью, пристегните внутренний купол к передней панели.
Pokud ložnici používáte společně s předním panelem, připněte ji pomocí kolíčků a smyček k přednímu panelu.
Jeśli z kolei używamy namiotu z przednim panelem, należy przymocować wewnętrzną kopułę do przedniego panelu.
Pokiaľ spálňu používate spoločne s predným panelom, pripnete ju za pomoci kolíkov a slučiek k prednému panelu.
4
1 Man 2 Man
INNER DOME