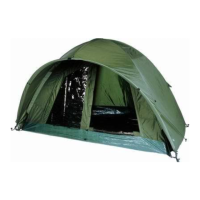
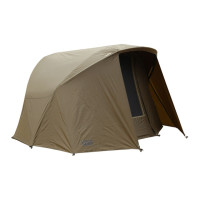
Assembly Instructions
• Remove the shelter from the carryall. Unfold all
the sections of pole so it is lying fully opened
out on the oor of the swim.
• Pole sections are elasticated. Locate the pole
sections together, ensuring no material is
trapped or pinched in the joints and spigots are
fully located. Repeat until all the poles are
assembled.
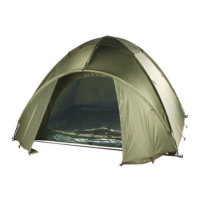
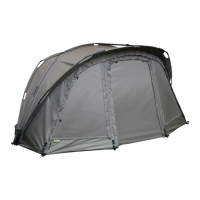
• To ex the shelter into shape locate the tension
straps between opposite ends of the poles.
Clip the Karabiners on to the metal D rings on
the opposite side of the shelter.
• Adjustable tension bars should then be
positioned and clipped into place along the top
of the shelter and tensioned between the rigid
poles, helping ensure water cannot collect in
heavy rain. Note: The back pole needs to be
slotted into place at one end to create the
required tension.
• Peg down the shelter, starting with the centre
rear pegging point then alternately pegging the
poles each side. Lastly, peg the door and the
additional pegging points at the rear of
the shelter.
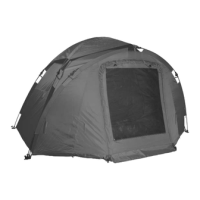
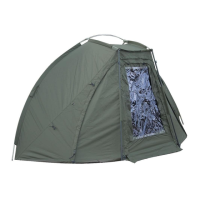
• Secure the groundsheet using the snap buckles
on the inside of the frame and attach to the
groundsheet. The doorway is denoted by
two elasticated loops, D rings & logo.
• To pack away, rst remove the tension bars,
then remove the pegs and unclip the Karabiner
tension straps. Poles should easily disassemble
with gentle pressure to pull the sections apart.
• Once all the poles are disassembled, the
shelter should be laid on the oor and pole
sections folded inwards until the shelter is the
length of the carryall. It can then be rolled up.
Always ensure no material from the cover is
trapped between pole joints when the shelter is
folded and rolled away. Note: The back pole can
be removed from the socket to release tension
when packing away.
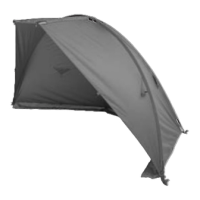
• In times of windy conditions attach the guy
ropes to the rib of the Reex between the rst
break in the material tunnel at the front and
rear ribs only.
Aftercare
All tents and shelters must be dried before pack-
ing away. Shelters stored wet or damp will quickly
mould, affecting the performance of the fabric
and invalidating the guarantee.
In adverse weather your shelter must be dried as
quickly as possible after use. Ideally, re-erect your
shelter and allow to dry thoroughly inside and out.
If space does not permit, unfold the shelter on
the oor to allow maximum contact with the air,
turning every few hours to allow all the moisture
to dry away.
Never remove pegs by pulling a pegging point or
the material around it. Always pull pegs directly
out. In tough ground use another peg to lever
pegs free.
Due to re risk never use naked ames inside a
tent or shelter. Always cook or boil water outside
your shelter in a well ventilated area. Never use
stoves or burners as space heaters.
Zips should never be forced. Zips normally only
jam when dirty. Wet and brush away any dirt or
grit from the teeth of the zip.
Mud or grit should be cleaned from both male
and female ends of the pole sections to prevent
them becoming jammed or tight.
For more information visit
WWW.FOXINT.COM
Designed & Developed in the UK
FOX is a Registered Trade Mark
INSTRUCTIONS
darumherum zieht. Immer die Häringe direkt
herausziehen. Bei schwerem Grund mit einem
anderen Häring nachhelfen.
Wegen Brandgefahr niemals offene Flammen
in einem Zelt oder Shelter verwenden. Bitte
immer außerhalb des Shelters in einem gut
durchlüfteten Bereich kochen. Niemals mit
Kochern versuchen zu heizen.
Reißverschlüsse nicht zu stark ziehen.
Sie verklemmen normalerweise nur bei
Verschmutzung. Einfach befeuchten und den
Dreck von den Reißverschlusszähnen wegputzen.
Von den Hülsen und Steckverbindungen der
Stangen Schlamm oder Dreck wegputzen, um
ein Verkannten zu verhindern.
I Istruzioni di montaggio
• Estrarre lo shelter dalla sacca di trasporto.
Spiegare tutte le sezioni dei pali in modo che
risulti completamente aperto sul suolo, nella
posizione prestabilita per pescare.
• Le sezioni dei pali sono elasticizzate.
Assemblare le sezioni dei pali assieme,
assicurandosi che il telo non rimanga
intrappolato nei giunti e che gli innesti siano
completamente inseriti. Ripetere l’operazione
sino a che tutti i pali sono stati assemblati.
• Per ettere lo shelter nella forma voluta,
localizzare le fasce di tensionamento sul lato
opposto dello shelter. Agganciare i ganci agli
anelli metallici a “D” sul lato opposto dello
shelter.
• Le barre tensionatrici regolabili dovrebbero
poi essere posizionate e bloccate nell’apposita
sede nella parte superiore dello shelter, quindi
messe in tensione fra i pali rigidi, assicurando
che l’acqua non si raccolga in caso di pioggia
battente. Nota: il palo posteriore necessita di
essere spostato in posizione in una estremità
per creare il tensionamento richiesto.
• Picchettare lo shelter, partendo dalla parte
centrale posteriore, picchettando poi in modo
alternato ogni lato. Per ultimi, picchettate la
porta e i punti di ancoraggio addizionali
presenti sul retro dello shelter
• Fissare il tappeto utilizzando i punti di ancor
aggio presenti nella parte interna del telaio.
Il lato rivolto verso la porta è identicabile dalla
presenza di due anelli elastici, anelli a “D” e dal
logo.
• Per smontare lo shelter, rimuovere le barre
tensionatrici, poi togliere i picchetti e sganciare
le fasce di tensionamento dagli anelli a “D”.
I pali dovrebbero essere agevolmente
smontabili con una semplice pressione per
separare le singole sezioni.
• Una volta smontati i pali, lo shelter dovrebbe
essere adagiato sul terreno e le sezioni dei pali
ripiegate verso l’interno no a che lo shelter
non ha raggiunto le dimensioni della sacca di
trasporto. Può successivamente essere
riavvolto su sé stesso. Assicurarsi sempre
che il tessuto non rimanga intrappolato tra i
giunti dei pali quando lo shelter viene smontato
e riavvolto su sé stesso. Nota: il palo
posteriore può essere rimosso dalla sua sede
per diminuire il tensionamento quando la tenda
viene smontata.
• In condizioni di forte vento, ssate i tiranti
anche all’intelaiatura esterna della Reex in
corrispondenza delle zone libere dalla
copertura che trovate sull’arco frontale e su
quello posteriore.
Cura e manutenzione
Tutte le tende e gli shelter dovrebbero essere
ben asciugati prima di essere riposti nella sacca
di trasporto. Tende riposte nella sacca ancora
bagnate o umide, daranno origine in breve tempo
alla formazione di muffa, che pregiudicherà le
caratteristiche del telo, invalidando la garanzia
sul prodotto.
In caso di condizioni meteo avverse, il vostro
shelter dovrebbe essere asciugato nel minor
tempo possibile dopo l’uso. L’ideale sarebbe
rimontarlo nuovamente e lasciarlo asciugare
perfettamente all’interno e all’esterno. Se lo
spazio disponibile non ve lo consente, stendete
lo shelter al suolo per consentire il massimo
contatto con l’aria, girandolo ogni 2/3 ore
per consentire all’umidità di essere totalmente
rimossa.
Non cercate mai di rimuovere un picchetto
afferrando e tirando un punto di ssaggio o
il tessuto che si trova in prossimità dello stesso.
In caso di terreni duri, utilizzare un altro
picchetto per fare leva ed estrarlo.
A causa del rischio di incendio, non utilizzate mai
amme all’interno dello shelter. Cucinate sempre
all’esterno dello shelter, in un’area ben ventilata.
Non utilizzate mai stufette o altri dispositivi simili
per riscaldare l’ambiente interno.
Le cerniere non dovrebbero mai essere forzate.
Le cerniere normalmente si inceppano solo
quando sono sporche. Tenete pulite le zip e i
denti delle stesse, rimuovendo con cura polvere,
fango o sabbia.
Fango o detriti dovrebbero essere rimossi dalle
estremità dei pali, siano essi “maschi” o
“femmine”, per garantire un assemblaggio
sempre agevole e afdabile.