For more information visit
WWW.FOXINT.COM
Designed & Developed in the UK • FOX is a Registered Trade Mark • Made in China
INSTRUCTIONS
F INSTRUCTIONS
INSTRUCTIES
D ANLEITUNG
I ISTRUZIONI
H UTASÍTÁS
ИНСТРУКЦИИ
NÁVOD
INSTRUKCJA
NÁVOD
INSTRUCTIONS
F INSTRUCTIONS
INSTRUCTIES
D ANLEITUNG
I ISTRUZIONI
H UTASÍTÁS
ИНСТРУКЦИИ
NÁVOD
INSTRUKCJA
NÁVOD
3
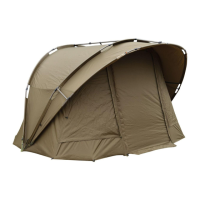
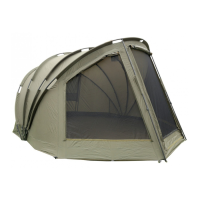
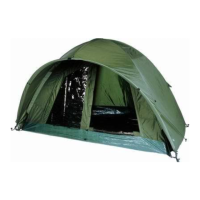
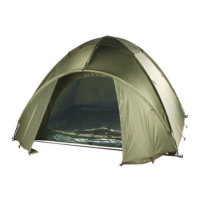
Peg the remaining pegging points to give a nice porch area for additional storage.
F Arrimez les boucles supplémentaires à l’aide de vrilles pour créer un porche spacieux et pratique.
Zet de overige bevestigingspunten vast met tentharingen, zodat er een mooie poort ontstaat voor extra opslagruimte.
D Befestigen Sie die verbleibenden Verankerungspunkte, um so ein Vorzelt als zusätzliche Lagerfläche zu erhalten.
I Fissate i punti di ancoraggio rimanenti per creare un’area veranda, aumentando lo spazio utile a disposizione.
H Cövekelje le a ponyvát a hátralévő pontokon, így plusz tárolóhelyekhez juthat.
Растяните покрытие, использовав все остальные петли, чтобы создать тамбур для дополнительного хранения.
Zakolíkujte zbývající kotvící body a tím zvětšíte úložný prostor.
Wkręć wkręty w pozostałe punkty mocujące, dzięki czemu powstanie przedsionek na dodatkowy sprzęt.
Pre pripnutie vnútornej spálne do prístrešku , položte spálňu na zem a začnite ju postupne pripínať po švoch postupne zozadu smerom dopredu.
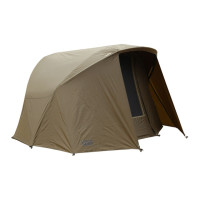
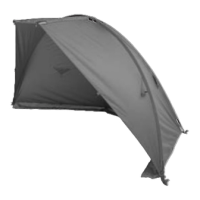
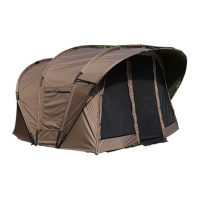
Throw the skin over the top of the bivvy fitting the top of the open front over the peak.
F Jetez la surtoile par-dessus le bivvy avec le dessus du côté ouvert par-dessus le toit avant du bivvy.
Gooi de skin over de bivvy met de open voorkant over de luifel.
D Werfen Sie die Haut über die Oberseite des Bivvys, dabei die offene Vorderseite über der höchsten Stelle anpassen.
I Posizionate il sovratelo sul bivvy facendo attenzione ad orientare la parte superiore aperta del frontale sulla parte anteriore del bivvy.
H Dobja a ponyvát a sátor tetejére. A nyitott rész nézzen előrefelé.
Накиньте СКИН сверху на палатку, прикрепив его напротив вершины открытой передней части.
Přehoďte přehoz přes vrchní část bivaku tak, aby otevřená přední strana byla usazena na přední kšilt.
Narzuć narzutę na namiot tak, aby górna część otwartego przodu znajdowała się nad daszkiem.
Na zvýšenie cirkulácie vzduchu rozopnite zadné ventilačné okná a vyrolujte ich podľa potreby.
1
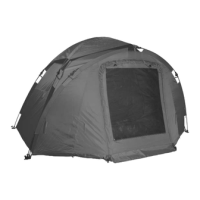
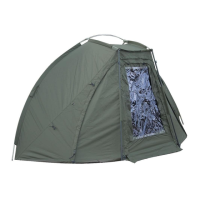
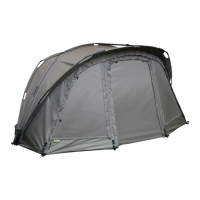
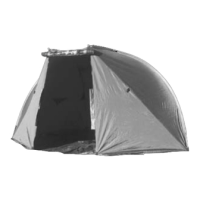
Attach the elastic loops of the skin over the bivvy pegs starting from the back to the front.
F Attachez les boucles élastiques de la surtoile sur les vrilles de votre bivvy en commençant par l’arrière.
Bevestig de elastische lussen van de skin over de tentharingen. Werk vanaf de achterkant naar de voorkant van de bivvy.
D Befestigen Sie die elastischen Schlaufen der Haut über den Bivvy Pegs, von hinten nach vorne.
I Fissate gli anelli elastici del telo aggiuntivo ai picchetti del bivvy partendo dalla parte posteriore verso quella frontale.
H Akassza a ponyva gumis rögzítőit a sátor cövekeihez. Haladjon hátulról előrefelé.
Прикрепите эластичные петли верхнего покрытия к колышкам, начиная сзади палатки.
Připevněťe elastické smyčky přehozu přes kolíky bivaku. Začněte od zadní části a pokračujte směrem dopředu.
Zamocuj elastyczne pętle narzuty na wkręty mocujące. Zacznij od tyłu i idź do przodu.
Na zvýšenie cirkulácie vzduchu rozopnite zadné ventilačné okná a vyrolujte ich podľa potreby.
2
BIVVY SKIN
BIVVY SKIN