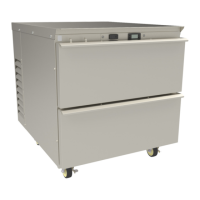
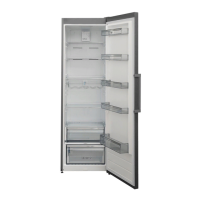
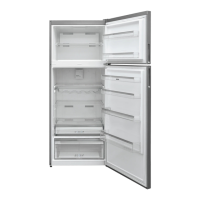
This document outlines the operation and installation procedures for the Franke 2-Drawer Refrigerator, available in 18” and 30” models. This refrigerator is designed to provide convenient, temporary, point-of-use access to fresh proteins at a grill station. The instructions provided apply to both models, though the 30" model is primarily shown in the figures.
Function Description
The 2-Drawer Refrigerator serves as a temporary storage solution for fresh proteins, ensuring they remain at optimal temperatures for food safety and quality at a grill station. It features two refrigerated drawers, each equipped with specially designed organizers to facilitate efficient storage and retrieval of items. A digital temperature controller allows users to monitor and adjust the unit's internal temperature, ensuring precise control over the storage environment. The unit is designed for commercial use and operates with R-290 (Propane) refrigeration systems.
Usage Features
Power ON/OFF: The refrigerator is equipped with a main power ON/OFF switch located on the front of the unit, above the two drawers. This switch is protected by a guard to prevent accidental toggling. It is crucial to keep the power switch ON when the unit is in use to prevent spoilage of stored food products.
Temperature Control: The unit's temperature is managed by a digital temperature controller. Factory preset temperatures are recommended for normal operation, but users can adjust the temperature within a range of 33°F to 41°F (0.6°C to 5.0°C). To adjust the temperature, users press the SET button, then use the UP and DOWN arrow buttons to select the desired setting, and finally press the POWER button twice to save the new setting. It's important to monitor the unit to ensure it reaches the desired operating temperature.
Drawer Operation: The drawers are designed for easy removal and reinstallation, which is beneficial for cleaning and maintenance. To remove a drawer, users first unload all contents, then locate and push down the drawer locks on the front of each slider, pulling them forward until they spring upward. The drawer front can then be slightly lifted and pulled forward to detach it. Reinstallation involves pushing the drawer sliders back into their rails, gently setting the drawer rails onto the rollers, and pushing the drawer in until completely closed. The drawer lock must then be pushed upward and simultaneously towards the back of the drawer to secure it.
Store Opening and Closing: For store opening, the main power switch is toggled ON, and the drawers are allowed to reach operating temperature before loading with wares and product. For store closing and daily cleaning, the power switch must be turned OFF, all remaining product should be transferred to appropriate cold storage, and the unit should be cleaned according to the store's Planned Maintenance Manual.
Clearance: A minimum of 2 inches of clearance must be maintained between the refrigerator and any nearby equipment to ensure proper ventilation and operation.
Maintenance Features
Cleaning: The unit's interior surfaces and drawers should be wiped down before initial loading. For daily cleaning, the drawers can be easily removed. It is critical to avoid using water jets or steam cleaners, and to prevent cleaning agents or water from entering louvers, vents, electrical compartments, or air filters. Dripping wet cloths or wet mops should not be used near the equipment.
Condenser Coil Maintenance: If the unit is running but not reaching target operating temperatures, a dirty or clogged condenser coil could be the cause. The condenser coil should be cleaned using a soft bristle brush, as detailed in the store's Planned Maintenance Manual.
Drawer Gasket Inspection: Frost building up around the drawer openings may indicate damaged or incorrectly installed door gaskets. These should be verified and replaced if cracked or damaged to maintain proper sealing and temperature control.
Troubleshooting: The manual provides a troubleshooting guide for common issues such as the unit not running, not reaching target temperatures, product being above target temperature, frost buildup, or product freezing. Solutions range from checking the power switch and circuit breaker to adjusting the controller's set point temperature and cleaning the condenser coil. If problems persist, technical support can be contacted.
Component Replacement: Only original equipment manufacturer (OEM) parts should be used for service, maintenance, or installation work to ensure proper functioning and safety. Unauthorized modifications or repairs are strictly prohibited and can lead to an improperly functioning unit.
Label Integrity: All labels on the unit must be kept intact and replaced immediately if removed or damaged.
Professional Service: All service work, especially concerning R-290 refrigeration systems, must be performed ONLY by factory-authorized service personnel who are certified technicians or tradespersons with the requisite knowledge, skills, ability, and training. This is crucial due to the life-threatening hazards of fire, explosion, electric shock, and arc flash associated with these systems.
Defrosting: The unit should be defrosted naturally to avoid puncturing or damaging the refrigeration circuit.
Handling: Caution must be exercised when handling or moving refrigerated equipment to prevent damage to the refrigeration tubing, which could lead to leaks. Appropriate personal protective equipment (PPE) should always be worn when servicing or handling equipment, especially when dealing with hot refrigeration discharge lines.