7
GB
1
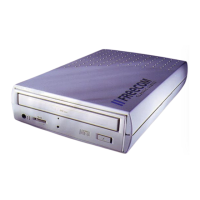
CHAPTER 1: Start Up - Hardware installation
1. Connect the USB cable to the Freecom device.
2. Connect the power connection to the Freecom drive.
3. Then insert the power adapter of the Freecom device into a power socket.
4. Connect the USB connection to your computer.
5. You can now begin software installation.
Note: You can plug the USB Cable into your computer and unplug it
while the computer is running ("hot plug & play"). Remove the cable
from the computer when doing so, never remove the cable from the
drive when the computer is on.
Start Up - Hardware installation
USB Cable
Freecom CLASSIC
CD-ROM / CD-RW
PC
Power
adapter
Note: In the event of no sound when an audio CD is placed into the
Freecom Classic CD-ROM / CD-RW, „Enable Digital CD audio for this CD-
ROM device“ from within Device Manager, or connect an audio cable
between the Classic CD-ROM / CD-RW and your „Audio In“ socket on your
sound card.