6
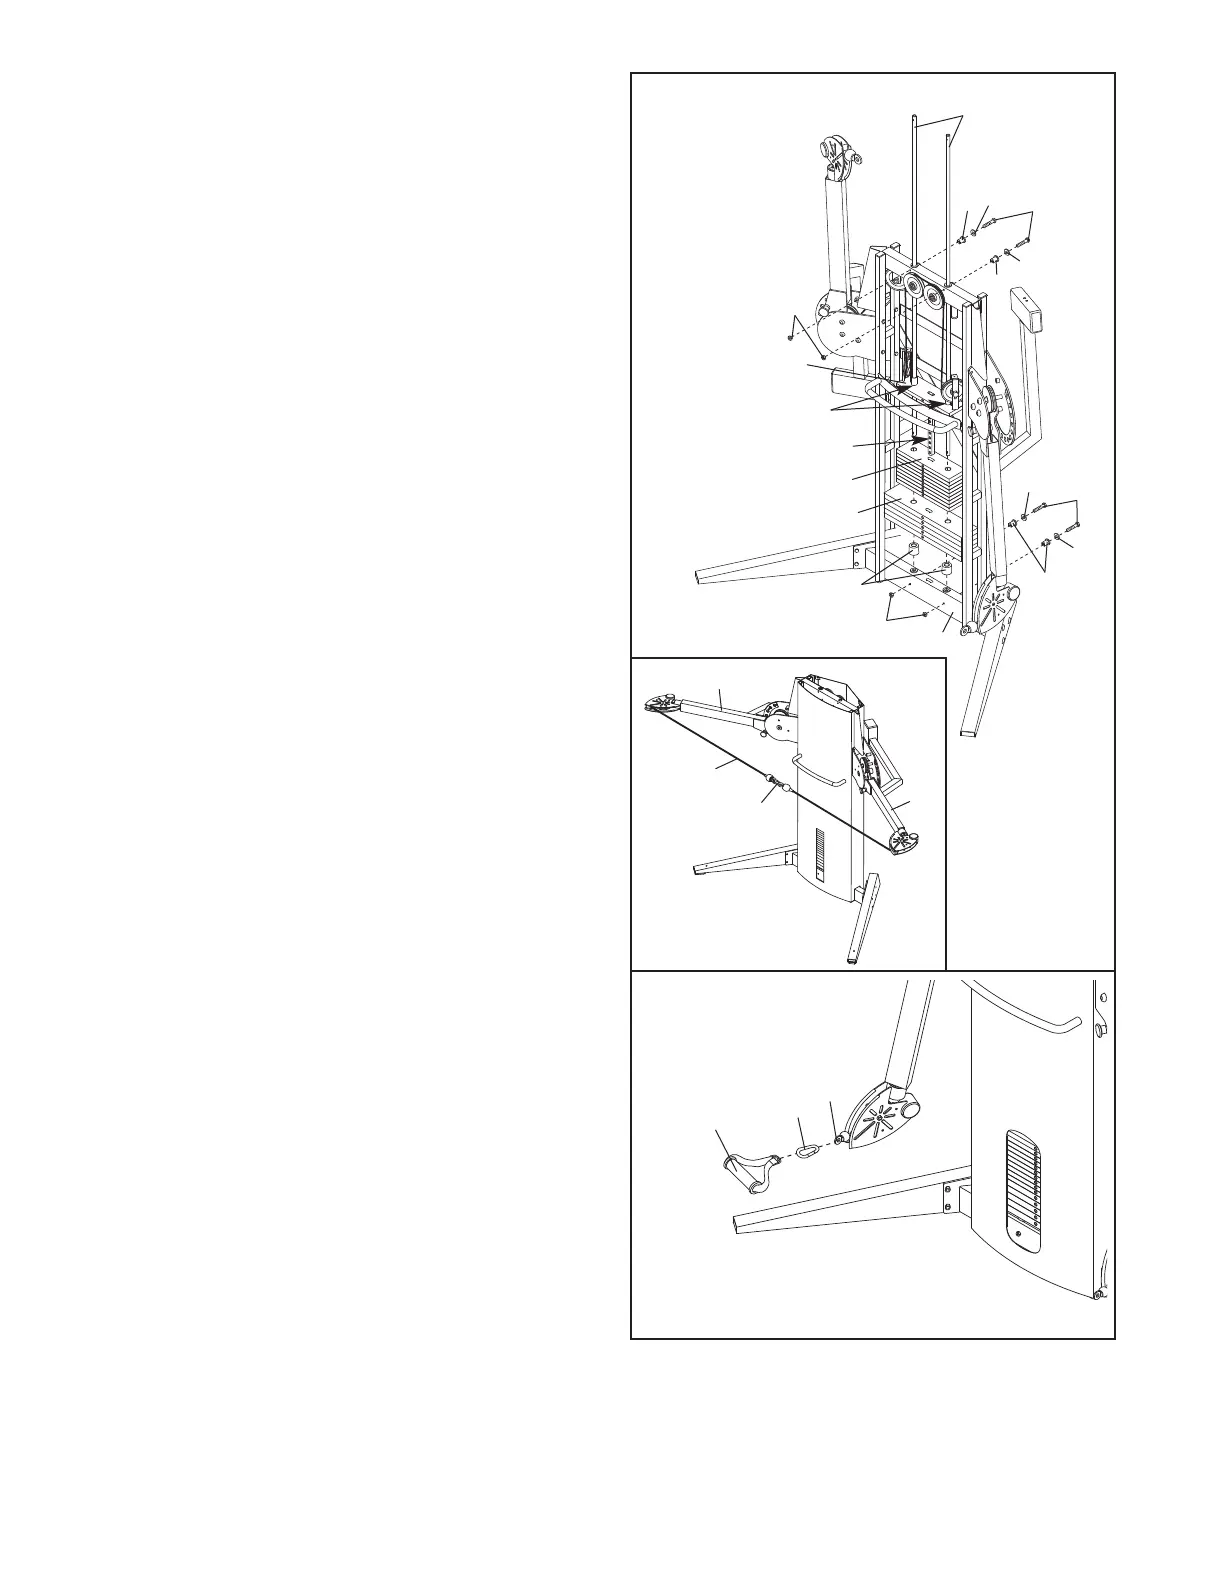
2. Remove the Shroud (not shown) from the back of
the weight system. (Note: For clarity, the cover
o
n the Frame [1] is not shown; the cover can-
not be removed.)
Remove the four indicated M6
x
64mm Bolts (59) from the Frame. Next, remove
the Weight Guides (16).
Lubricate the insides of the welded tubes on the
Top Weight (15) with grease.
See the inset drawing. Position the Arms (19,
20) as shown (see ADJUSTING THE ARMS on
page 7). Connect the ends of the Cable (33) with
two Cable Clips (10) as shown.
Set the wide ends of the two Weight Bumpers (4)
over the indicated holes in the base of the Frame
(1). Insert the two included dowels (not shown)
into the Weight Bumpers and the Frame. Next,
slide the five 20-pound Weights (13) and the nine
10-pound Weights (14) onto the dowels.
Make
sure that the Weights are stacked in order
with the 10-pound Weight marked “1 5” on
top, and the 20-pound Weight marked “15
100” on the bottom.
Remove one of the dowels (not shown) from the
stack of Weights (13, 14). Next, insert one of the
Weight Guides (16) into the Frame (1) and the
stack of Weights. Repeat with the other Weight
Guide. Secure the Weight Guides to the Frame
with the four M6 x 64mm Bolts (59), four M6
Washers (81), four Weight Guide Spacers (5),
and four M6 Nylon Locknuts (60).
Disconnect the ends of the Cable (33) and lower
the Top Weight (15) so that the weight selector is
inserted into the middle hole in the stack of
Weights (13, 14).
Make sure that the cable traps are oriented as
shown on page 9.
Replace the Shroud (not
shown).
3. Attach a Handle (9) to a Cable Eye (37) with a
Cable Clip (10). Attach the other Handle to the
other Cable Eye in the same manner
.
4. Make sure that all parts have been properly
tightened. The use of the remaining parts will
be explained in ADJUSTMENT beginning on
the following page.
2
3
10
37
1
4
9
59
81
81
5
9
5
5
8
1
81
5
1
6
13
14
15
60
60
10
20
33
19
Welded Tubes
Weight Selector



 To Next Page