3
Item No.:FJ310
F-104S Starfighter
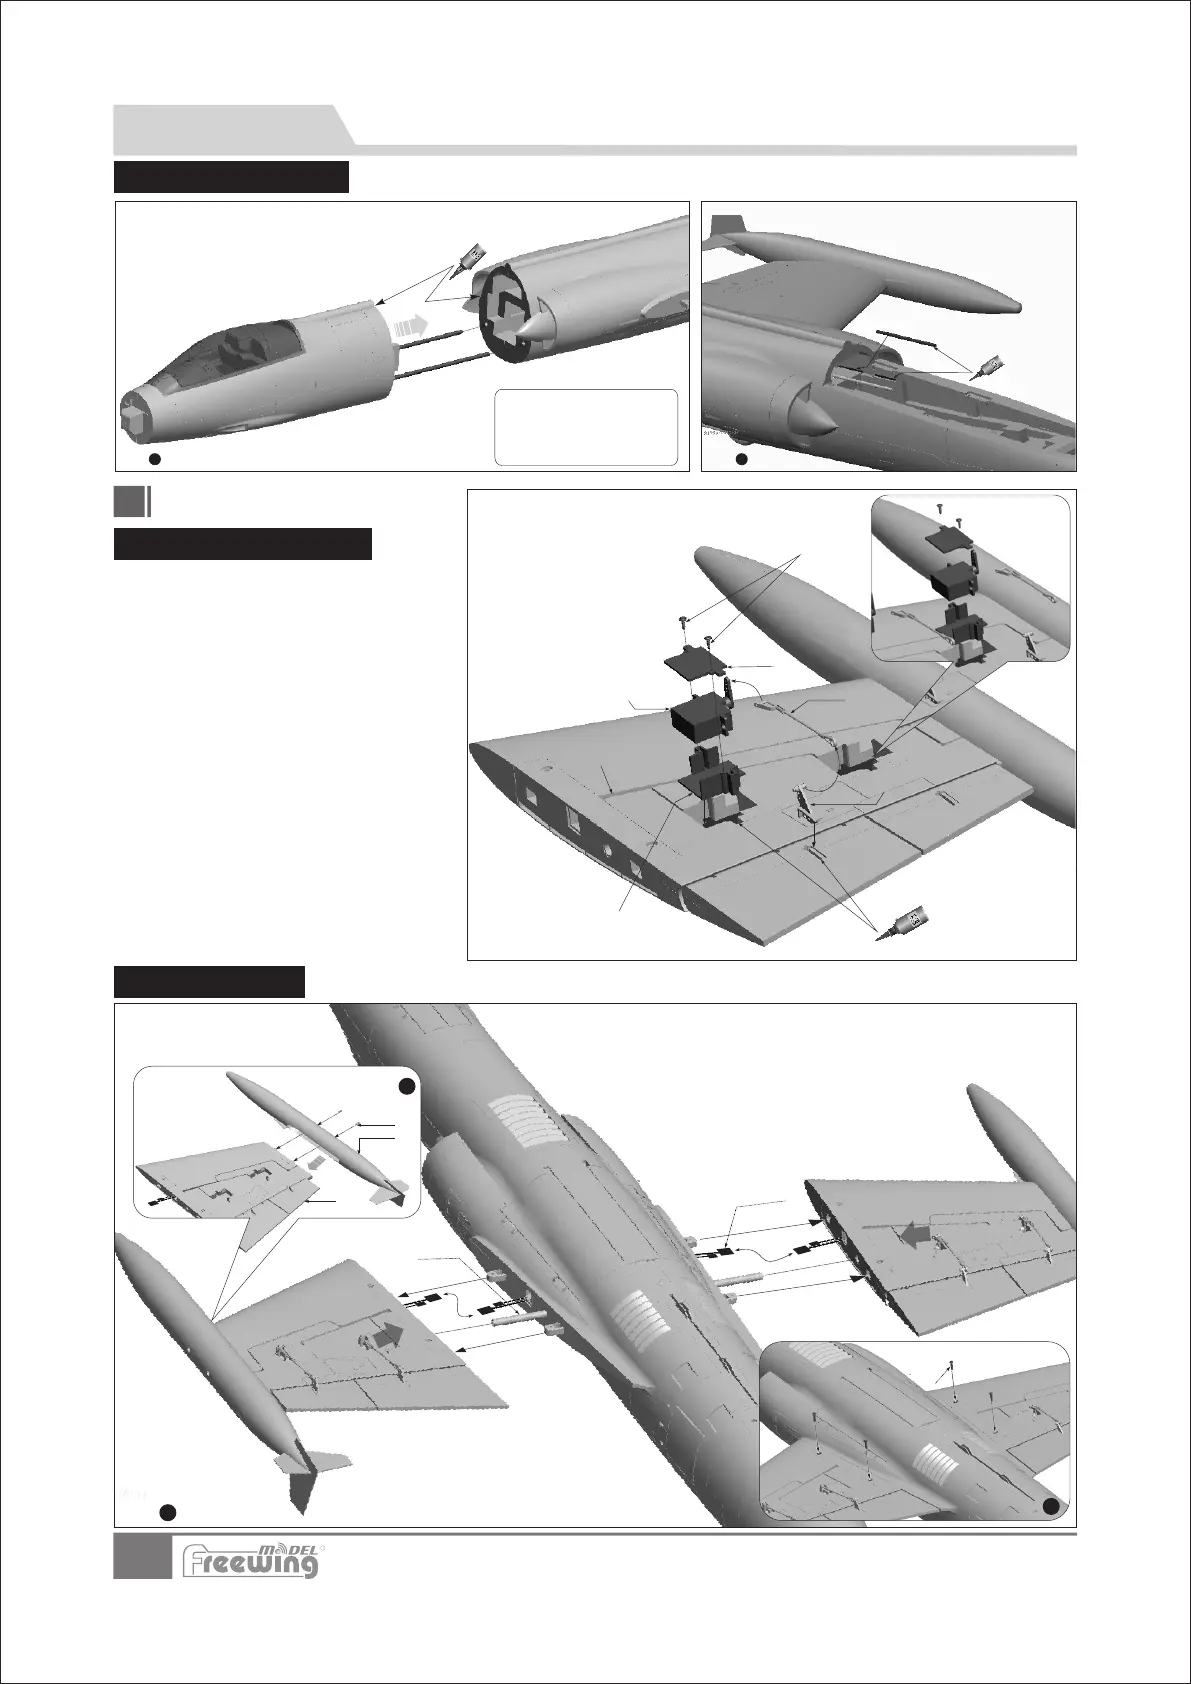
Use 4pcs screws to fix the main wing.
1. ;
2. ;
3.
Connect the servo cable with fuselage extension cable
Insert the main wing into fuselage
Use 4pcs screws to fix the main wing.
Connect the servo cable with fuselage extension cable
Insert the main wing into fuselage
Use 4pcs screws to fix the main wing.
A-
B-
C-
D-
E-
F-
(
( )
PA3x8mm 4pcs)
8x300 mm
Extension cable of servo,LED light
(PM3x14mm 4pcs)
Screw
Fuel tank
Main Wing
Carbon tube
Extension cable of servo,LED light
Screw
Screw
Fuel tank
Main Wing
Carbon tube
Extension cable of servo,LED light
Screw
(
(Ø )
(PM3x14mm 4pcs)
PA3x8mm 4pcs)
8x300 mm
3
Step
1
2
D
E
F
Installation
Main Wing
Install Main Wing Servo
1.Use servo tester or radio to center
the servo arm.
2.Use glue to attach the 17g servo
box (C) and horn(D)on the main
wing.
3.Install the servo on the 17g servo
box(C),and press the servo cable
on the servo cable trough (F),
cover the 17g servo cover(B),and
use 2pcs screws(A)to fix the servo.
4.Use pushrod (E) to conne c t th e
servo arm and rudder horn(D).
A-Screw
B-Servo cover
C-Servo box
D-Horn
E-Pushrod
F-Servo cable trough
(PWA2x8mm 4pcs)
Servo
Step
Step
Install Main Wing
EN
A
B
D
E
C
F
Note:There is a EPO glue on
package,please use it to glue.
Glue should be spread evenly,
and wait for 90 seconds.Then
install on,its best glue condition.
Use glue, Carbon tube to attach the nose and rear fuselage.
Carbon tube:Ø6x180mm 2pcs
1 2
Step Step
Carbon tube:Ø4x100mm 2pcs
Install carbon tubes in the trough,and
use glue to attach it.
R
Install nose fuselage




 To Next Page