8. Start the engine.
Horton DriveMaster
®
Fan Clutch
NOTE: If any part of the fan clutch needs to be
repaired or replaced after performing the checks
below, see Group 20 of the
Business Class
®
Trucks Service Manual
.
1. Disconnect the batteries at the negative termi-
nals. Drain all air from the air system. If
equipped with an air starter, drain the air starter
reservoir.
WARNING
Make sure the batteries are disconnected, and if
applicable, the air starter reservoir is drained be-
fore checking the fan clutch. If the engine starts
during this procedure, the fan could engage,
which could result in serious personal injury.
2. Inspect the electrical connections and wires to
the fan clutch solenoid. Secure the connection if
loose; replace wires and connectors if damaged.
3. Clean the fan clutch air solenoid valve filter, if
equipped.
3.1 Unscrew the fan clutch solenoid valve air
filter assembly and remove the filter ele-
ment.
3.2 Clean the filter element with cleaning sol-
vent.
3.3 Using a clean, lint free cloth, wipe off any
excess solvent.
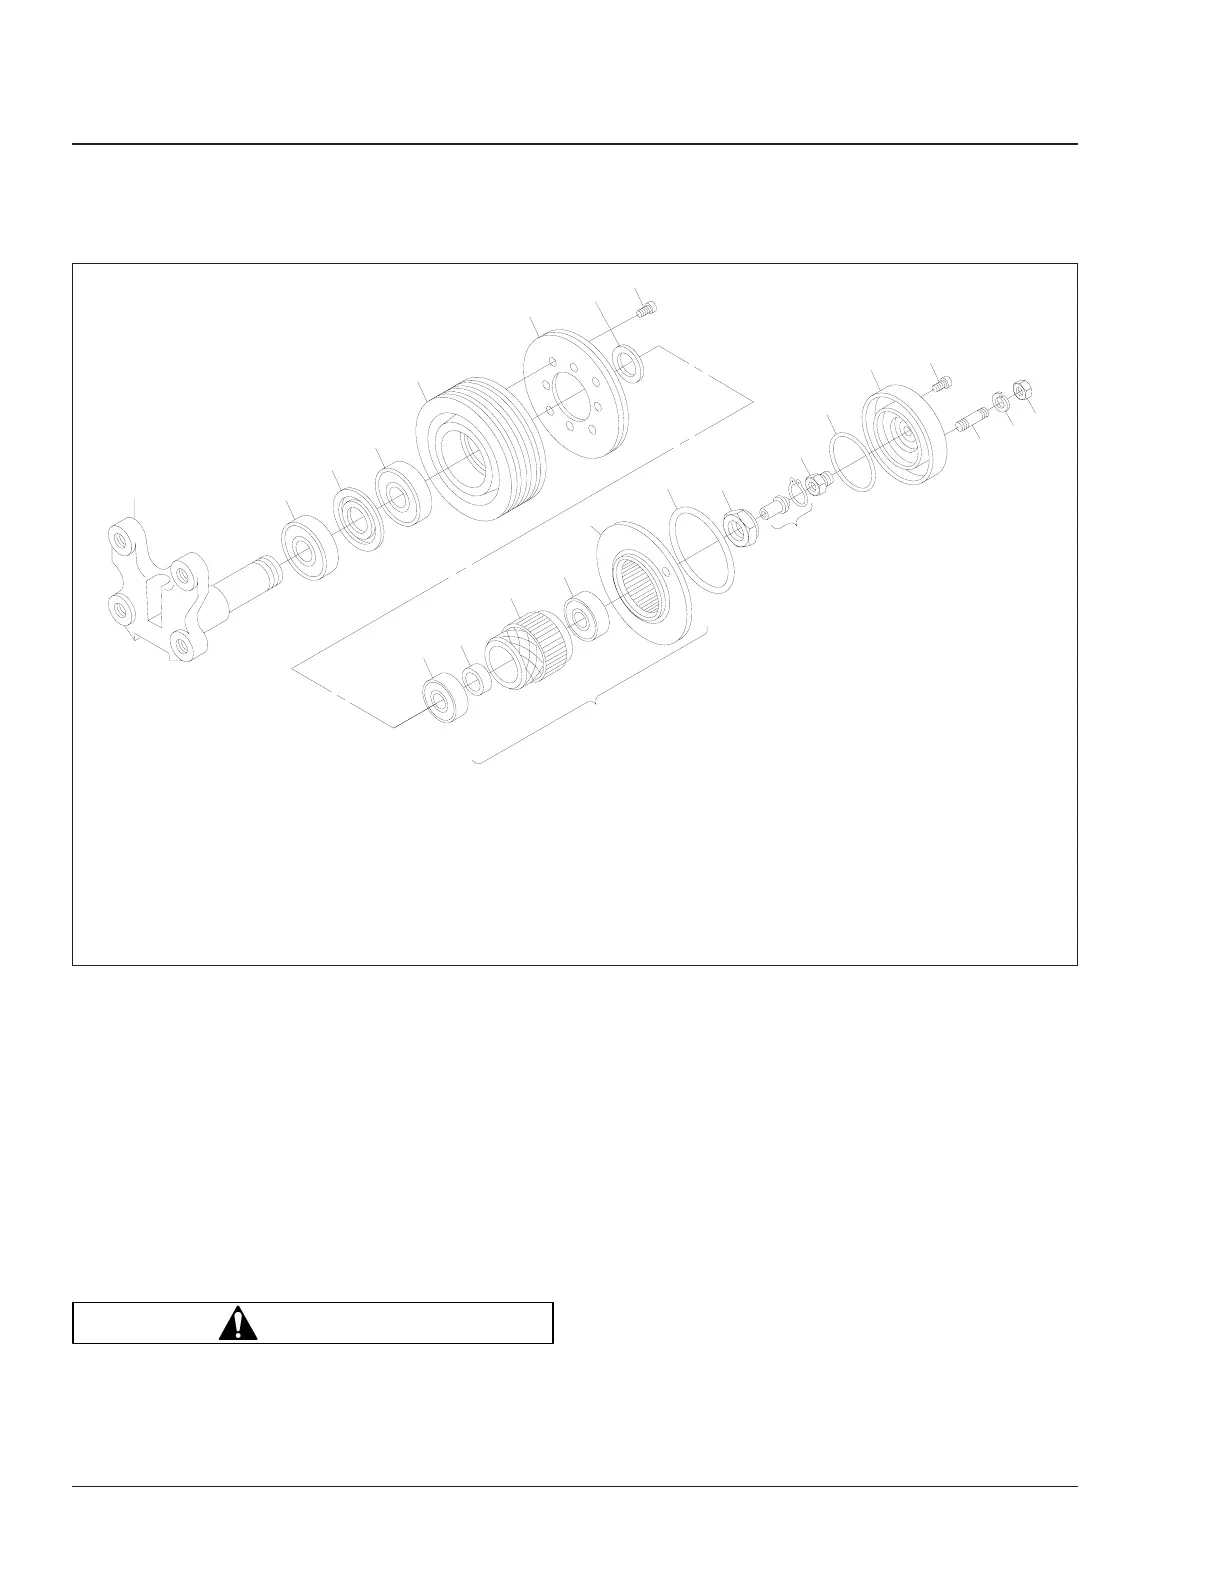
f200194a
1
2
3
4
5
6
7
8
9
10
11
12
13
14
15
16
17
18
19
20
21
23
22
24
03/30/95
1. Mounting Bracket
2. Rear Sheave Bearing
3. Inner and Outer Bearing
Spacers
4. Forward Sheave Bearing
5. Sheave
6. Friction Facing
7. Journal Spacer
8. Socket-Head Capscrew
9. Rear Hub Bearing
10. Bearing Spacer
11. Splined Hub
12. Forward Hub Bearing
13. Piston Friction Disc
14. Large O-Ring
15. Locknut
16. Cartridge Assembly
17. Face Seal
18. Small O-Ring
19. Air Chamber
20. Socket-Head Capscrew
21. Stud Bolt
22. Lockwasher
23. Hexnut
24. Piston Assembly
Fig. 6, Horton Advantage Fan Clutch Components
Engine Cooling/Radiator20
Business Class Trucks Maintenance Manual, August 200320/6