12 13
C. INSTALLATION OF THE UNIT
C.4 Window Installation
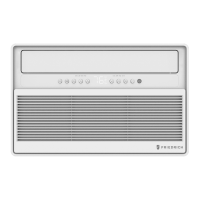
C.4.1 Remove the Packaging
CAUTION:
Heavy object. Team handling is required during the installation process.
When handling the unit, be careful to avoid cuts from the sharp metal edges and aluminum
fins on the front and rear coils.
1. Removing All the Packaging
Carefully remove all the packaging straps and wraps from the air conditioner and accessories.
12
ASSEMBLING YOUR AIR CONDITIONER
Getting Started
SUGGESTED TOOLS FOR INSTALLATION (Not included)
CAUTION:
Heavy object. Team handling is required during the installation process.
1. Removing All the Packaging
Carefully remove all the packaging straps and wraps from the air conditioner and accessories.
CAUTION:
When handling the unit, be careful to avoid cuts from the sharp metal edges and aluminum
fins on the front and rear coils.
NOTE:
To be easy installation, both the left and right curtains, curtain frames, top channel, and bottom
channel, are pre-assembled in factory.
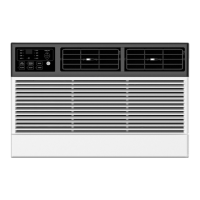
2.Applying the Adhesive Foam Seal
Measure the length of the upper window frame, trim the adhesive foam
seal to the appropriate length and apply as shown.
Phillips
screwdriver
Scissors
or knife
Pencil Level Ruler or
tape measure
Left curtain frame,
pre-assembled in factory.
Left curtain,
pre-assembled in factory.
Top channel,
pre-assembled in factory.
Right curtain frame,
pre-assembled in factory.
Right curtain,
pre-assembled in factory.
Bottom channel,
pre-assembled in factory.
Figure C.4.1
C.4.2 Applying the Adhesive Foam Seal
Measure the length of the upper window frame, trim the adhesive foam seal to the appropriate length and apply as shown.
12
ASSEMBLING YOUR AIR CONDITIONER
Getting Started
SUGGESTED TOOLS FOR INSTALLATION (Not included)
CAUTION:
Heavy object. Team handling is required during the installation process.
1. Removing All the Packaging
Carefully remove all the packaging straps and wraps from the air conditioner and accessories.
CAUTION:
When handling the unit, be careful to avoid cuts from the sharp metal edges and aluminum
fins on the front and rear coils.
NOTE:
To be easy installation, both the left and right curtains, curtain frames, top channel, and bottom
channel, are pre-assembled in factory.
2.Applying the Adhesive Foam Seal
Measure the length of the upper window frame, trim the adhesive foam
seal to the appropriate length and apply as shown.
Phillips
screwdriver
Scissors
or knife
Pencil Level Ruler or
tape measure
Left curtain frame,
pre-assembled in factory.
Left curtain,
pre-assembled in factory.
Top channel,
pre-assembled in factory.
Right curtain frame,
pre-assembled in factory.
Right curtain,
pre-assembled in factory.
Bottom channel,
pre-assembled in factory.
Figure C.4.2
C.4 Window Installation (Continued)
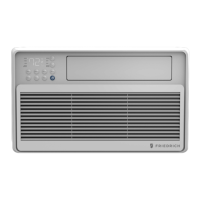
C.4.3 Placing Inside An Open Window
Carefully lift the air conditioner with a helper to the windowsill
and pull down the sash, making sure the air conditioner is
centered and its bottom rail is flush against the windowsill.
NOTE: The air conditioner should be tilted about 3˚ for better
drainage of condensate and rainwater. Use a level: about 1/3
bubble willshow correct slant.
Figure C.4.3
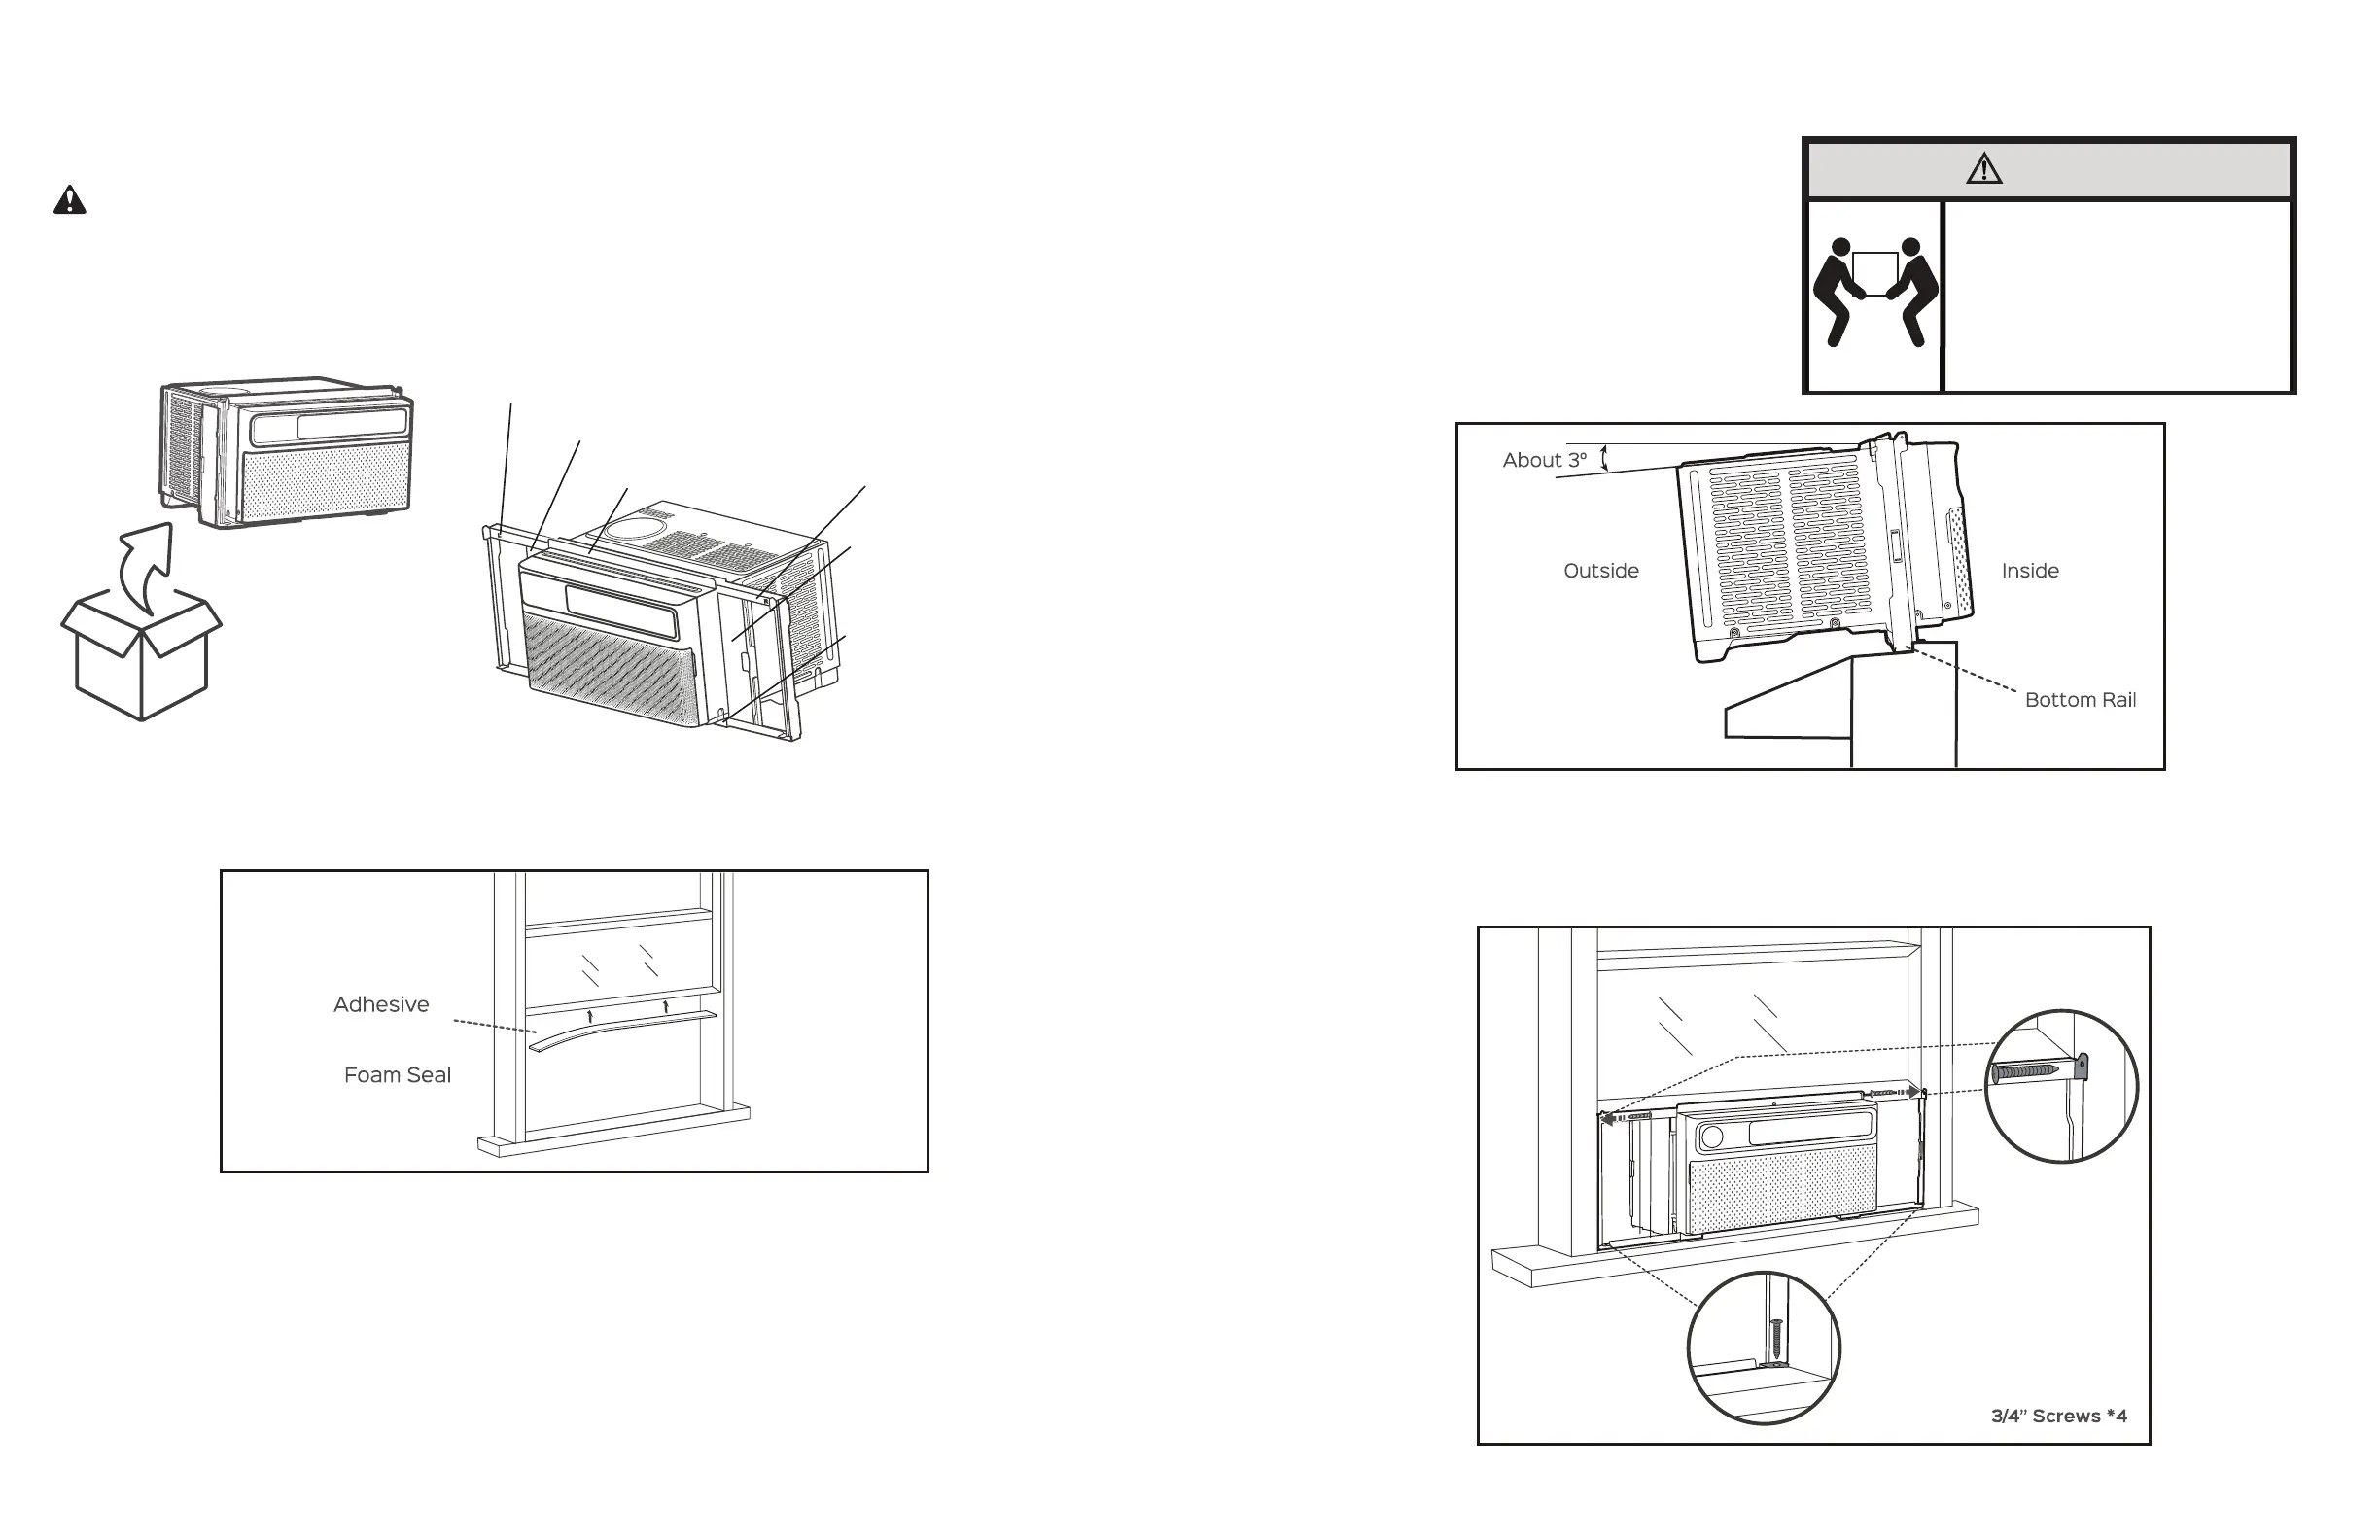
C.4.4 Securing the Side Brackets
Extend the side brackets from both sides of the air conditioner onto the left and right window frames and secure by installing four 3/4’’ screws
as shown.
NOTE: Install the upper screws first, then the lower screws.
Figure C.4.4
C. INSTALLATION OF THE UNIT
ASSEMBLING YOUR AIR CONDITIONER
13
3.Placing Inside an Open Window
Carefully lift the air conditioner with a helper to the windowsill and pull
down the sash, making sure the air conditioner is centered and its bottom
rail is flush against the windowsill.
NOTE:
o
The air conditioner should be tilted about 3 for better drainage of condensate and
rainwater. Use a level: about 1/3 bubble willshow correct slant.
4.Securing the Side Brackets
Extend the side brackets from both sides of the air conditioner onto the
left and right window frames and secure by installing four 3/4" screws as
shown.
NOTE:
Fix the upper screws first, then the lower screws.
CAUTION
Excessive Weight Hazard
Use two or more people when
installing your air conditioner.
Failure to do so can result in
back or other injury.
 Loading...