Do you have a question about the Friedrich CP12F10 and is the answer not in the manual?
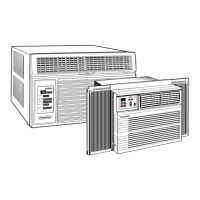
This document is a Service and Parts Manual for Friedrich Room Air Conditioners, specifically covering models CP10F10 and CP12F10, designed for 115-volt operation. It provides comprehensive information for servicing, maintaining, and understanding the operation of these units.
The manual begins with crucial safety precautions, emphasizing the importance of following instructions to prevent injury or property damage. It uses clear warning and caution symbols to highlight potential risks, such as death, serious injury, or property damage. Key safety instructions include proper installation of expansion panels, avoiding placing the power cord near heaters or flammable gases, and never disassembling or modifying the product. It also warns against operating or stopping the unit by plugging/unplugging the power cord, using damaged or unspecified power cords, and operating the unit with wet hands or in damp environments. Proper ventilation is stressed when gas is present, and users are advised not to use loose or damaged sockets. When water enters the unit, the power switch should be turned off, the power plug removed, and a service center contacted. Users are cautioned not to touch sharp metal parts when removing the filter and to avoid blocking the inlet or outlet, as this can impair performance. Maintaining the outer casing is also highlighted to prevent the unit from falling out of the window.
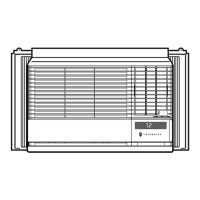
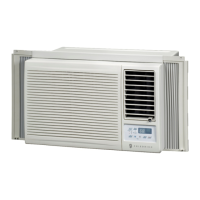
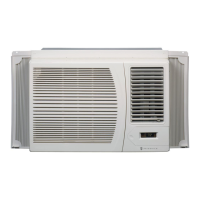
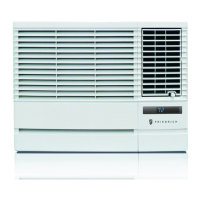
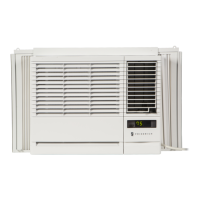
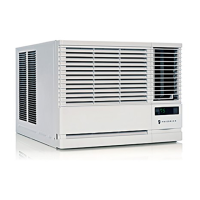
The manual then delves into the operational aspects of the Friedrich CP air conditioner. It describes the unit as being designed for cooling only, offering powerful and incredible cooling performance. A top-down chassis design facilitates simple installation and service. It features a built-in adjustable thermostat and a washable one-touch filter, contributing to ease of maintenance. The compact size of the unit is also noted as a usage feature.
Detailed instructions are provided on how to operate the air conditioner using its controls and remote control. The remote control features buttons for Power, Temperature Control, Operation Mode Selector (Cool, Money Saver®, Fan, Dry), Fan Speed Selector (High, Low, Med), ON/OFF Timer, and Auto Swing. The Power button initiates and stops operation. The Temperature Control allows users to set the desired room temperature between 60°F and 86°F (16°C and 30°C), with the unit typically taking about 30 minutes to adjust. The Operation Mode Selector enables users to choose between cooling, energy-saving (Money Saver®), basic ventilating fan, or dry modes. The Fan Speed Selector offers three speeds for increased cooling power. The ON/OFF Timer function allows scheduling the unit to start or shut off after a set number of hours (1 to 12 hours). For sleeping comfort, the temperature setting will rise 2°F after 30 minutes and again after another 30 minutes when the timer is set. The Auto Swing button controls the air flow direction automatically. Instructions for inserting remote control batteries emphasize using new AAA 1.5V batteries, paying attention to polarity, and removing batteries if the unit will not be used for an extended period to prevent discharge. Users are also advised to keep the remote control away from extreme heat or humidity and to ensure the remote sensor is not exposed to direct sunlight for optimal operation.
Maintenance features are extensively covered through disassembly and troubleshooting guides. The disassembly section provides step-by-step instructions for removing various components, starting with the front grille, cabinet, and control box. It details how to access and remove mechanical parts like the motor, and electrical parts such as the overload protector, compressor, capacitor, and power cord. For the refrigerating cycle, instructions are given for removing the condenser, evaporator, and capillary tube, with a strong caution to discharge the refrigerant system using a Freon™ Recovery System and to install a service valve if one is not present. The manual includes detailed diagrams for pulling vacuum and charging the system, outlining the necessary equipment like a vacuum pump, charging cylinder, manifold gauge, brazing equipment, pin-off tool, leak detector, tubing cutter, and hand tools. It also provides specific steps for evacuating and recharging the refrigeration system, including warnings about high vacuum equipment and preventing oil foaming.
The troubleshooting guide is divided into two main categories: "Starting Failure" (electrical defects) and "Ineffective Air Conditioning" (refrigeration circuit defects or improper application). For "Ineffective Cooling," the guide directs users to check cold air circulation, outdoor coil and fan operation, heat load increase, dirty indoor coil, gas leakage, fan malfunction, clogged air filter, and obstruction at the air outlet. Remedies include cleaning the condenser, repairing gas leaks, replacing the unit if beyond repair, checking inside gas pressure, adjusting refrigerant charge, and addressing compressor malfunctions. For "Fails to Start" issues, the guide suggests checking the power source, circuit breaker and fuse, control panel settings, and addressing problems with the compressor or fan motor. Specific checks include power voltage drop, improper thermistor setting, loose terminal connections, capacitor defects, and improper wiring. The guide also provides flowcharts for electrical parts troubleshooting, covering scenarios where the unit does not operate, the compressor does not operate, the compressor always operates, the fan does not operate, the remote controller does not operate, or the display shows abnormalities. These flowcharts guide technicians through a series of checks, such as Trans input/output voltage, IC voltages, reset circuit, connections between Main and Display P.W.B, and component exchanges. A table of Room Air Conditioner Voltage Limits (115V ± 10%, with minimum 103.5V and maximum 126.5V) is provided for diagnostic purposes. Further troubleshooting tables detail complaints like fan motor not running, fan motor noise, and compressor not running while the fan motor runs, offering causes and remedies such as checking wiring, capacitors, bearings, and realigning components. It also addresses issues like compressor cycles on overload (voltage, overload, fan motor, condenser air flow restriction, damaged condenser fins, capacitor, wiring, refrigeration system) and insufficient cooling (air filter, undersized unit). Excessive noise issues are addressed by checking the blower or fan and copper tubing.
Finally, the manual includes an exploded view diagram of the air conditioner, illustrating all major components and their relative positions, followed by a replacement parts list with corresponding part numbers for both CP10F10 and CP12F10 models. This comprehensive approach ensures that technicians have all the necessary information for effective service and maintenance.
| Cooling Capacity | 12, 000 BTU |
|---|---|
| Cooling Area | Up to 550 sq. ft. |
| Voltage | 115V |
| Fan Speeds | 3 |
| Noise Level | 52 dB |
| Power Supply | 115V/60Hz |
| Refrigerant | R-410A |