Air handling parts
2.2.1 Cover (at the top)
1. Remove the front grille. (Refer to section 1)
2. Remove the cabinet. (Refer to section 2)
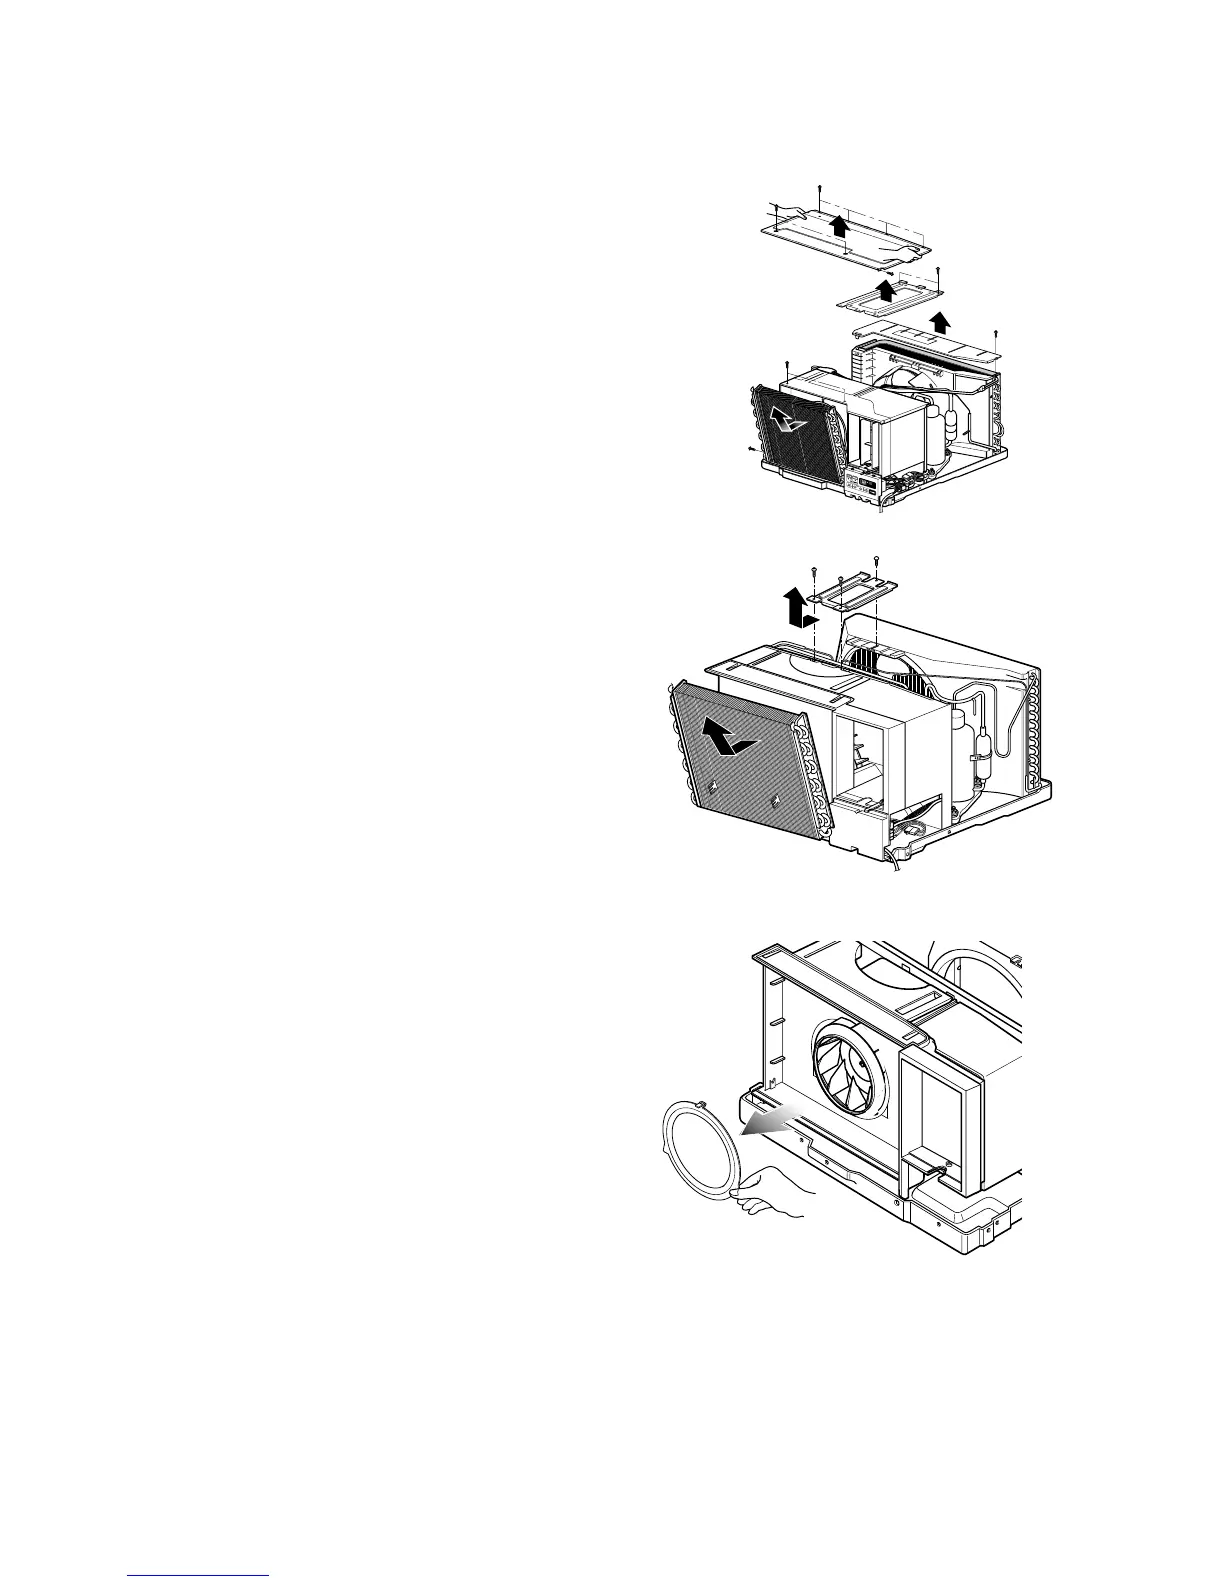
3. Remove 11 screws which fasten the brace and covers.
4. Remove the covers and the brace. (See Fig. 19)
5. Re-install the components by referring to the removal
procedure, above.
Figure 19
2.2 AIR HANDLING PARTS
—6—
2.2.2
.
AIR GUIDE AND BLOWER
1. Remove the front grille.
2. Remove the cabinet.
3. Remove the control box.
4. Remove the 3 screws which fasten the brace.
5. Remove the brace.
6. Remove the 2 screws which fasten the evaporator.
7. Move the evaporator forward and pulling it upward
slightly. (See Figure 20)
8. Move the evaporator to the left carefully.
9. Pull out the hook of orifice by pushing the tabs and
remove it. (See Figure 21)
10. Remove the clamp with a hand plier which
secures the blower.
11. Remove the blower.
12. Remove the 4 screws which fasten the air guide
from the barrier.
13. Move the air guide backward, pulling out from the
base pan.
14. Re-install the components by referring to the
removal procedure, above.
Figure 20
Figure 21
Figure 22
 Loading...