Do you have a question about the Frigidaire FAD704DWDE1 and is the answer not in the manual?
Covers fire, electric shock, proper grounding, flammable liquids, child safety, and general warnings.
Details the best placement for effective dehumidifier operation, including clearance and enclosure requirements.
Explains the dehumidification process, coil condensation, air flow, and the compressor's time delay.
Describes typical sounds like rushing air, gurgling, dripping, and high-pitched chatter during operation.
Covers upright requirement, plugging in, and turning the unit on to CONTINUOUS mode.
Explains how to set desired humidity levels and fan speeds (HIGH/LOW) for optimal performance.
Details the CLEAN FILTER light and how to reset it after cleaning the filter.
Describes setting a Delay Start or Delay Stop timer for the unit, with increments up to 24 hours.
Notes that power must be supplied and desired humidity set before entering timer settings.
Instructions on how to turn off the dehumidifier using the ON/OFF button.
Explains common fault codes like "AS", "ES", and "EC" and troubleshooting steps.
Step-by-step guide on how to safely remove and empty the water bucket when full.
Clarifies that the foam under the float is a functional part and should not be removed.
Instructions for setting up continuous drainage using a garden hose and nearby drain.
Describes how to remove, wash, dry, and re-install the air filter.
Instructions for cleaning the unit's exterior cabinet using appropriate cloths.
Guidance on cleaning the water bucket with warm water and detergent.
Advice on unplugging the unit and using the cord wrap for storage.
Addresses issues like disconnected plug, tripped breaker, full bucket, or unit not turned on.
Explains why the unit might run excessively, such as open windows or settings.
Covers reasons for insufficient drying, like high humidity setting, blocked airflow, or low room temperature.
Explains frost appearance due to recent operation or low room temperature.
Clarifies that fan noise is a normal operating sound.
Outlines the one-year limited warranty and 2-5 year warranty on the sealed system.
Lists items and conditions not covered by the warranty, like serial number issues or commercial use.
Provides instructions on how to obtain service and contact Electrolux for support in the USA and Canada.
This document serves as a comprehensive Use & Care Manual for your Frigidaire dehumidifier, providing specific operating instructions to ensure optimal performance and longevity of the appliance. It emphasizes the importance of adhering to these guidelines for safe and effective use.
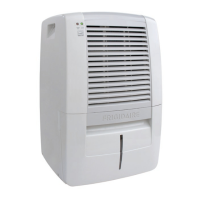
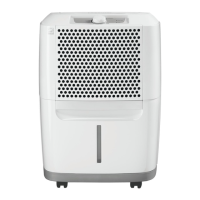
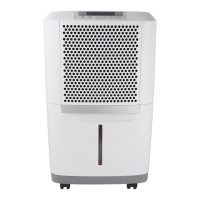
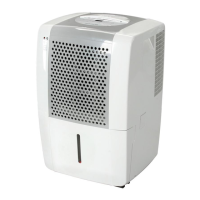
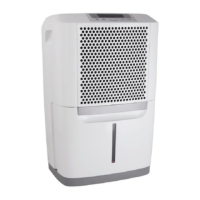
The Frigidaire dehumidifier is designed to remove excess moisture from the air in enclosed spaces, creating a more comfortable and healthier environment. It operates by drawing moisture-laden air over dehumidifying coils, which condense the moisture. The dry, warm air is then released back into the room, while the collected water is gathered in a front-mounted bucket. The unit is engineered to function effectively within a temperature range of 41°F (5°C) to 96°F (35°C). For optimal performance, it is recommended to operate the dehumidifier in an enclosed area with all doors, windows, and other outside openings closed to prevent new moisture-laden air from entering the room.
The dehumidifier incorporates a "Compressor" circuit with an automatic 3-minute time-delayed start. This feature is crucial for preventing overheating of the compressor and potential circuit breaker tripping, especially if the unit is turned off and on quickly. The unit will not operate if the water collection tank is not fitted correctly, ensuring safe and proper functioning.
Location Selection: To maximize effectiveness, the dehumidifier should be placed in a location that does not restrict airflow through the front of the unit or out of the louvers on the left side of the cabinet. A minimum of 12 inches of clearance around the unit is recommended. It's important to note that a dehumidifier operating in a basement may have limited effect on an adjacent enclosed storage area unless there is adequate air circulation. The unit must be placed on a level floor capable of supporting it when the water bucket is full.
Initial Setup and Operation: Before operating, allow the unit to reach room temperature and ensure it has been upright for at least one hour. Plug the power cord directly into a properly grounded 115-volt AC outlet. The power cord features a three-prong grounding plug for safety; never cut, remove, or bypass this prong. If the "BUCKET FULL" light is on, remove and re-install the bucket to reset the float switch.
To turn the unit on, press the ON/OFF button. The dehumidifier will initially run in the factory setting of CONTINUOUS mode with high fan speed. In this mode, the display will show "CO" instead of room humidity. It is advisable to run the unit in CONTINUOUS mode for the first three to four days to effectively eliminate sweating and dampness odors.
Humidity Control: After the initial period, once the relative humidity has declined, you can adjust the desired humidity level using the HUMIDITY ▲ or ▼ buttons. These buttons allow you to select a value between 35% and 85% in 5% increments, maintaining a comfortable humidity level in the room. The display will show the actual room humidity. To return to CONTINUOUS mode, press the HUMIDITY ▼ button until "CO" is displayed.
Fan Speed Adjustment: The FAN SPEED button allows you to switch between HIGH and LOW fan speeds. A higher fan speed facilitates quicker moisture removal, and an indicator light will confirm your selected setting.
Timer Function: The TIMER function offers flexibility for both Delay Start and Delay Stop operations, allowing you to set a delay from 0.5 hours up to 24 hours.
Fault Codes: The unit is equipped with a diagnostic system to alert you to potential issues:
Continuous Drainage: For continuous drainage, you will need a garden hose and a nearby drain. Unscrew the drain cap on the back of the unit, insert the female threaded end of the hose onto the drain connector, and screw it securely. Ensure the hose is free of kinks and elevations to allow water to flow freely into the drain. Select the desired humidity setting and fan speed to initiate continuous draining. It is recommended to use a dehumidifier drain hose of 1/2" (12.7 mm) or larger. If continuous drainage is not chosen, the drain cap must be securely screwed to prevent leakage.
Emptying the Water Bucket: When the water bucket is full, the unit will automatically shut down, and the "BUCKET FULL" indicator will illuminate. Do not move the unit at this time to avoid spilling water. Gently press the sides of the bucket to unclip it, then remove and empty the collected water. Replace the empty bucket back into the unit, ensuring it is correctly seated. You should hear a click when it is in the correct position, and the unit will resume operation. If the "BUCKET FULL" light does not extinguish, verify that the float is correctly snapped in place. The foam embedded under the float is a functional part and should not be removed. Discarded water from the bucket is not potable and should not be used for drinking.
Filter Cleaning: The CLEAN FILTER light will illuminate after 250 hours of operation, signaling that the air filter needs cleaning. To clean the filter:
Cabinet Cleaning: To clean the exterior cabinet, use an oil-free cloth or a damp cloth to dust the surfaces. For the grill, use a vacuum cleaner with a brush attachment to remove dust and debris.
Water Bucket Cleaning: The water bucket should be cleaned periodically with warm water and detergent to prevent mold or mildew buildup.
Storage: When the dehumidifier is not in use for an extended period, unplug it from the power source. Utilize the cord wrap feature, designed for your specific model type, to neatly store the power cord. This helps prevent damage to the cord and keeps the unit tidy.
By following these operating and maintenance instructions, you can ensure your Frigidaire dehumidifier provides efficient and reliable moisture removal for years to come.
| Type | Dehumidifier |
|---|---|
| Energy Star Rated | Yes |
| Water Tank Capacity | 16.9 Pints |
| Weight | 45 lbs |
| Dimensions | 24.5 x 15 x 11.6 inches |
| Noise Level | 51 dB |
| Filter Type | Washable filter |
| Water Removal | 70 pints per day |
| Tank Capacity | 16.9 pints |
| Warranty | 1 year limited |
| Capacity | 70 pints |
| Features | Auto restart |
| Coverage Area | 1400 sq ft |