This document is a Use & Care Manual for a Frigidaire dishwasher, providing comprehensive instructions for its operation, maintenance, and troubleshooting. The dishwasher is designed to clean dishes by spraying a mixture of hot water and detergent through spray arms against soiled surfaces. Water first fills the filter area, then is pumped through the spray arms, with soil particles filtered and drained out. This process repeats as needed, and the number of water fills varies with the selected cycle.
Function Description
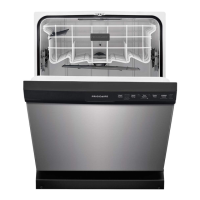
The Frigidaire dishwasher offers various wash cycles and options to accommodate different soil levels and user preferences. It features a Precision Direct Wash System designed to reduce sound levels during operation, making it quieter than many other dishwashers.
Wash Cycle Selections:
- Heavy Wash: Recommended for pots, pans, casseroles, and dinnerware with light to heavily soiled loads.
- Normal Wash: Recommended for lightly to heavily soiled loads.
- Top Rack: Designed for small loads in the upper rack only that are lightly to heavily soiled.
- Rinse Only: For rinsing dishware that will be washed later, preventing food soils from drying on dishes if the dishwasher isn't run immediately.
Option Selections:
- Hi-Temp Wash Option: Heats water in the main wash to approximately 140°F (60°C), helping detergent remove grease and soil more effectively and aiding in drying. This option is available with all cycles except RINSE ONLY and is automatically provided with the HEAVY WASH cycle.
- Sanitize Option: Raises the water temperature in the final rinse to 155°F (68°C) and maintains it for 9 minutes, designed to meet NSF requirements for sanitization. This option is available in Heavy and Normal Cycles.
- Delay Start: Allows users to delay the start of a wash cycle by 2, 4, or 6 hours.
- Air Dry: Deactivates the heater during the drying phase, slightly lowering energy use but potentially increasing the likelihood of dishes not drying completely. If not selected, the heater activates during drying.
DishSense™ Technology: This feature checks the soil level on dishes in the HEAVY WASH, NORMAL WASH, and TOP RACK cycles. Based on soil levels, the sensor determines if additional water fills are needed or can be deleted, adjusting cycle time and water usage accordingly.
Usage Features
The dishwasher is designed for ease of use with several practical features:
Getting Started:
- Load dishes according to the provided guidelines.
- Add detergent to the dispenser.
- Add rinse aid if needed.
- Select the desired wash cycle and options.
- Run the hot water faucet nearest the dishwasher until water reaches optimal temperature (around 120°F) before turning it off.
- Press the START/CANCEL pad and close the door to begin.
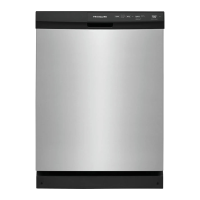
Controls and Indicators:
- The dishwasher remembers the last selected cycle and options, allowing for quick starts by simply pressing START/CANCEL.
- Indicator lights above the pads illuminate when a cycle or option is selected.
- Status Indicator Lights:
- WASHING: Illuminates at the start of the cycle and remains on until the end of the main wash.
- DRYING: Illuminates during the drying portion of the cycle.
- SANITIZED: Glows when the SANITIZE cycle is finished (if dishes were properly sanitized).
- CLEAN: Illuminates at the end of the cycle.
- Child Lock Controls: Prevents accidental changes or starts by locking the controls. Activated by pressing and releasing the AIR DRY pad for 3 seconds while the door is open.
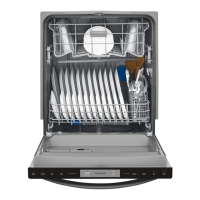
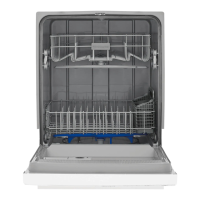
Loading Flexibility:
- Top Rack: Designed for cups, glasses, stemware, small plates, and bowls. Plastic items should be placed in the top rack only. Some models include fold-down cup shelves or stemware holders for loading two levels of items or tall glasses.
- Bottom Rack: Best for plates, saucers, bowls, and cookware. Large items should be placed along the edge to avoid blocking spray arm rotation. Bowls, casseroles, and saucepans should face down or toward the center for best drainage.
- Silverware Basket: Can be loaded while in the bottom rack or removed for loading on a counter. Sharp items (knives, skewers) should be loaded pointing down to prevent injury. Items should be mixed (some pointing up, some down) to avoid nesting and ensure thorough cleaning.
Detergent Dispenser: Features two cups: a smaller one for pre-wash and a larger one for the main wash. Users should use fresh automatic dishwashing detergent and adjust the amount based on water hardness. For tablets or packets, one should be placed in the main wash cup.
Rinse Aid Dispenser: Automatically releases a measured amount of rinse aid during the last rinse to improve drying and reduce water spots. The amount dispensed can be adjusted by rotating a dial under the cap. The indicator shows when it's time to refill.
Adding/Removing Items During Cycle:
- Unlatch the door and wait a few seconds for wash action to stop.
- Add the item and wait a few seconds for cold air to expand.
- Close the door firmly and press START/CANCEL to resume.
Maintenance Features
Regular maintenance helps ensure optimal performance and longevity of the dishwasher.
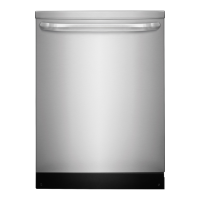
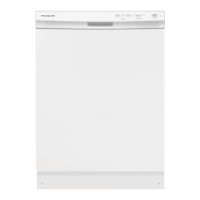
Cleaning the Exterior:
- Outer Door: Clean with warm soapy water and a dishcloth or sponge, then rinse with clean water and dry with a soft cloth. Avoid harsh cleaners.
Cleaning the Interior:
- The inside of the dishwasher and filter are generally self-cleaning with normal use.
- Tub Gasket Area: Clean occasionally with a damp cloth.
- Glass Trap: Located in the center of the filter, it collects broken glass, straws, bones, and pits. To empty, grasp the handle, rotate 90° clockwise while pressing down on the wash arm, then lift the assembly out. Tip it over a container to empty, or separate the glass trap by pulling its handle toward you, then up. Ensure the glass trap and spray arm are fully snapped back into place to prevent damage.
- Overfill Protector: Located in the left front corner of the tub, it prevents overfilling. Clean occasionally with household cleaner containing vinegar or bleach. Ensure it moves freely up and down about one inch.
Addressing Hard Water Issues:
- Hard water can cause lime deposit buildup, spots, or film on dishes and the dishwasher interior.
- To remove buildup and film: Load clean dishes (no metal utensils), do not add detergent, select NORMAL WASH, allow the cycle to run for about 8 minutes (second water fill), open the door, pour 2 cups of white vinegar into the bottom, close the door, and let the cycle finish.
- Using a rinse aid agent and selecting NORMAL WASH with HI-TEMP WASH can improve drying performance and reduce spotting.
Care of Drain Air Gap:
- If a drain air gap is installed (usually on the countertop), check it to ensure it's clean for proper drainage. This is not part of the dishwasher and is not covered by warranty.
Winterizing:
- For dishwashers in unheated places, protection from freezing is necessary. A qualified person should disconnect service by turning off electrical power and water supply, disconnecting water and drain lines, and draining water. To restore service, reconnect lines, turn on power and water, fill detergent cups, and run a HEAVY WASH cycle, checking for leaks.
Troubleshooting Tips (Before Calling for Service):
- Food Soils Left on Dishes: Check rack loading, water pressure (should be 20-120 psi), water temperature (around 120°F), water hardness, detergent freshness, and ensure spray arms are not blocked.
- Dishes Not Dry: Ensure rinse aid dispenser is filled and set correctly, check water temperature, and proper loading.
- Glassware/Flatware Spotted or Cloudy: Check water hardness, water temperature, loading, detergent freshness, and rinse aid levels.
- Dishware Chipped: Load with care, place delicate items in the top rack, ensure items are secure and clear the tub top.
- Vapor at Vent: Wipe up any spilled rinse aid to prevent foam and overflow.
- Dishware Stained or Discolored: For tea/coffee stains, use a bleach/warm water solution. For iron deposits, a special filter may be needed. Aluminum utensils can leave gray/black marks if they rub against other items. High-acid foods can discolor stainless steel and plastics; use Rinse Only cycle if not running immediately. Avoid mixing stainless steel and silver.
- Etching: Caused by too much detergent in soft water. Adjust detergent amount based on water hardness and lower water temperature if needed.
- Detergent Left in Cups: Use fresh detergent, ensure dish load doesn't block spray, and check if the cycle completed.
- Dishwasher Leaks: Check door gasket, wipe up spilled rinse aid, ensure dishwasher is level, and use correct detergent amount.
- Cycle Takes a Long Time: May be due to cool water supply, large loads, Delay Start option, or soil-sensing adjustments.
- Dishwasher Won't Run: Check circuit breaker/fuse, water supply, cycle setting, Delay Start option, and ensure door is closed and latched, and START/CANCEL pad is pressed.
- Dishwasher Won't Fill: Check water supply and ensure overfill protector moves freely.
- Dishwasher Does Not Drain Properly: Ensure food disposer is empty (if connected), knockout plug is removed from disposer inlet, drain hose isn't kinked, cycle is complete (not paused), and glass trap is clean.
- Dishwasher Has an Odor: Run Rinse Only cycle for soiled dishes. A "new" smell is normal after installation. Check drainage.
- Stains on Tub Interior: Tomato-based soils can cause pink/orange stains; pre-rinsing or using Rinse Only cycle can reduce this. No heat dry option will lessen staining.
- Opening Door During Cycle: If the door is opened, START/CANCEL must be pressed and the door shut immediately (within 10 minutes) for the cycle to resume.