EasyManua.ls Logo

Frigidaire FFTR2045VS - User Manual

Frigidaire FFTR2045VS
8 pages
Print Icon
To Next Page IconTo Next Page
Loading...
AUTOMATIC ICE MAKER
INSTALLATION INSTRUCTIONS
P/N: A13109106
WARNING
To avoid electric shock, which can cause death or severe personal injury, disconnect the refrigerator
from electrical power before connecting a water supply line to the refrigerator.
Connect the ice maker to a potable water supply only.
An authorized service technician is recommended to install the ice maker kit.
Ice Maker (IM117000) Kit Components
5304520536
Ice Maker
QTY: 1
5304525288
Shoulder Screw
QTY: 5
5304520538/5304520539
Cover with Door
QTY: 1
5304520535
Ice Bin
QTY: 1
5304520537
Bracket (30" only)
QTY: 1
Parts needed for install inside the unit
Tools Needed:
Flat head screw driver Phillips or Quadrex driver
¼" Hex driver Gloves
Drill Needle nose pliers
Parts needed for install on back side of the unit
NOTE
Check with your local building authority for recommendations on water lines and associated materials prior to
installing your new refrigerator. For household water line hookup from the home water supply system to the unit,
Frigidaire recommends for homes with existing valves its Smart Choice
®
water line kit 5304437642 (with a 6�
Stainless Steel Water Line) and for homes without an existing valve, Frigidaire recommends its Smart Choice
®
water line kit 5304493869 (with a 6� Polyline Waterline). Please refer to Frigidaire.com for more information.
5304520540
Water Valve
QTY: 1
218976923
Tube
QTY: 1
241500304
#8 screw
QTY: 2
218515401
Hose and
Harness Clip
(30" only)
QTY: 3
5304455846
Clamp ¼"
QTY: 1
5303001193
Clamp ½"
QTY: 1
Question and Answer IconNeed help?

Do you have a question about the Frigidaire FFTR2045VS and is the answer not in the manual?

Summary

Ice Maker Kit Components

Inside Unit Parts List

Lists parts required for installation inside the refrigerator unit, such as screws and the ice maker itself.

Back Unit Parts List

Lists parts required for installation on the back of the refrigerator unit, including clips and screws.

General Ice Maker Installation

Initial Installation Steps

Covers initial procedures like unplugging the refrigerator, removing the freezer shelf, and preparing the freezer liner.

Ice Maker Installation (with access cover)

Access Cover Handling

Details removing the refrigerator's access cover and its reinstallation after the ice maker is mounted.

Water Valve Wiring

Explains connecting the water valve wire harness and routing it securely to the unit.

Ice Maker Installation (without access cover)

Connector Box and Valve Mounting

Covers removing the connector box and installing the water valve into its designated mounting location.

Water Tube and Bracket Setup

Details connecting the water tube to the valve and attaching the water valve bracket to the unit.

Connecting Water Supply to Ice Maker

Water Supply Line Requirements

Specifies necessary tools, water pressure, and recommended tubing types for a safe water supply connection.

Connecting Water Line to Valve

Provides step-by-step guidance for securely connecting the household water supply line to the ice maker's water valve.

Ice Maker Operation and Service

Initial Ice Production and Quality

Explains initial ice production, potential flavor issues, and recommendations for the first 24 hours.

Ice Maker On;Off Control

Guides on using the ice maker's power switch and how it automatically stops and resumes production.

Ice Maker Maintenance Tips

Offers advice on water quality, cleaning the ice bin, and proper shut-off procedures for storage or vacation.

Overview

This document provides comprehensive instructions for the installation and maintenance of an automatic ice maker kit, designed to be integrated into compatible refrigerators. The primary function of this device is to automatically produce ice cubes, ensuring a continuous supply for household use.

Function Description

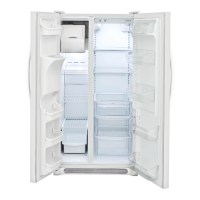
The automatic ice maker is designed to be installed within the freezer compartment of a refrigerator, connecting to the household's potable water supply. Once installed and activated, it automatically fills with water, freezes it into ice cubes, and then dispenses the cubes into an ice bin. The ice maker is equipped with a mechanism that detects the ice level in the bin, pausing production when the bin is full and resuming when the level drops. This ensures an efficient and consistent supply of ice without manual intervention. The kit includes all necessary components for both the internal freezer installation and the external water valve connection to the refrigerator's back panel.
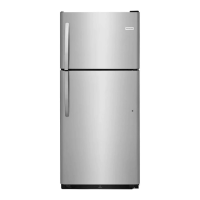
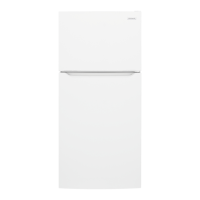
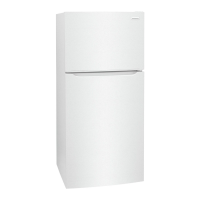
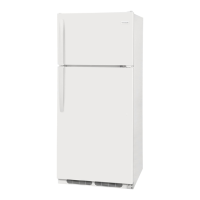
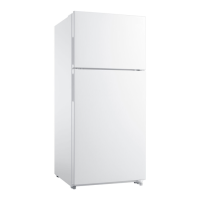
Usage Features

  • Automatic Ice Production: The core feature is its ability to automatically produce ice cubes, eliminating the need for ice trays or manual refilling.
  • On/Off Control: The ice maker includes an On/Off button, allowing users to easily start or stop ice production as needed. A green LED illuminates when the ice maker is active.
  • Ice Bin Integration: The ice maker works in conjunction with a dedicated ice bin, which collects and stores the produced ice cubes. The bin is designed to slide into the lowest position of the freezer shelf for optimal placement.
  • Compatibility: The installation instructions differentiate between 30" wide and 28" wide refrigerators, indicating specific components (like a bracket for 30" models) and procedures tailored to each size, ensuring broad compatibility.
  • Water Supply Connection: The device connects to a household cold water line with a recommended pressure range of 30 to 100 psi. The manual provides detailed steps for connecting either copper tubing or braided flexible stainless steel/polyline tubing, offering flexibility based on user preference and existing plumbing.
  • First-Time Use Guidance: The instructions advise users on what to expect during the initial 24-48 hours of operation, including potential discoloration or odd flavor of the first ice cubes due to new plumbing lines, and the gradual filling of the ice bin.
  • Adjustable Production Rate: While not explicitly a user-adjustable setting on the ice maker itself, the manual notes that users can increase ice production by setting the freezer to a colder temperature.

Maintenance Features

  • Easy Ice Bin Cleaning: The ice bin is designed for easy removal and cleaning. Users are instructed to wash it with warm water and mild detergent, then rinse and dry thoroughly. A crucial caution is provided: Do Not place the ice container in your dishwasher.
  • Water Quality Importance: The manual emphasizes that water quality directly affects ice quality. For homes with water softeners, it is critical to ensure the softener is properly maintained and functioning, as chemicals from a malfunctioning softener can damage the ice maker.
  • Temporary Shutdown for Cleaning/Vacations: Users are advised to stop the ice maker when cleaning the freezer or during short vacations to conserve energy and prevent unnecessary ice production.
  • Long-Term Shutdown Procedure: For extended periods when the ice maker will be off, the instructions recommend turning off the water supply valve to the closed position. This prevents potential issues related to stagnant water or leaks.
  • Water Line Maintenance: For copper lines, the manual suggests replacing the compression fitting ferrule (sleeve) and nut each time the fitting is reused to ensure a secure, leak-free connection.
  • Troubleshooting (Chattering Noise): A specific note addresses a "chattering noise" that may occur if the ice maker is on but not connected to the water supply, guiding users to either connect the water supply or turn off the ice maker.
  • Access Cover Management: For units with an access cover, the instructions detail the removal and reinstallation of the cover for water valve access, including screw management and proper alignment to ensure the power cord and water line are correctly routed.
  • Component Replacement: While not explicitly a maintenance feature, the detailed list of kit components and their part numbers facilitates easy identification and potential replacement of parts should they wear out or become damaged, supporting the long-term serviceability of the ice maker.
  • Professional Installation Recommendation: The document begins by recommending an authorized service technician for installation, which, while not a maintenance feature, implies that complex repairs or adjustments might also benefit from professional attention, ensuring proper functioning and longevity.
  • Local Code Compliance: The instructions stress the importance of ensuring water supply line connections comply with all local plumbing codes, which is a preventative measure to avoid future issues and ensure safe operation.
  • Water Line Length: Recommendations for water line length (typically 6 feet for braided stainless or poly kits) are provided to allow the refrigerator to be rolled forward for cleaning or service without kinking the line, contributing to easier maintenance and access.

Frigidaire FFTR2045VS Specifications

General IconGeneral
Typefreestanding
Styleone door; top freezer
Colorstainless steel; black
Total Capacity20 cu. ft.
Refrigerator Capacity14.6 cu. ft.
Freezer Capacityyes; 5.4 cu. ft.
Humidity Controlled Crispers2
Defrost Systemautomatic; frost-free
Cooling Systemeventemp cooling
Number of Refrigerator Shelves2
Number of Refrigerator Door Bins3 fixed full-width
Number of Refrigerator Adjustable Shelves2
Number of Refrigerator Drawers2 humidity-controlled crisper, full-width deli drawer
Number of Freezer Shelves1 adjustable full-width glass shelf
Number of Freezer Door Bins2 fixed full-width
Temperature Controlno
Wine Rackno
Interior Lightled
Dispenserno
Ice Makeroptional
Control Typeelectronic touch/rotary knobs
Smart Homeno
Remote Controlno
Wi-Fino
Voltage115 volts
Current15
Weight and Dimensions IconWeight and Dimensions
Depth32 inch
Height66 3/8 inch
Width30 inch
Net Weight220 lbs.

Related product manuals