EasyManua.ls Logo

Frizzlife PD600-TAM3 - User Manual

Frizzlife PD600-TAM3
22 pages
Print Icon
To Next Page IconTo Next Page
Loading...
Question and Answer IconNeed help?

Do you have a question about the Frizzlife PD600-TAM3 and is the answer not in the manual?

Summary

INSTALLATION INSTRUCTION

Before Installation

Inspect the box and components to ensure nothing is missing or damaged during shipping.

Product Introduction

Front View and Components

Diagram illustrating the front view of the PD600-TAM3 system and its components.

Back View and Ports

Diagram showing the back view of the PD600-TAM3 system with power and connection ports.

Included Accessories

List of included accessories for the PD600-TAM3 system.

Installation Tips

Tubing Connection and Cutting

Instructions on how to cut and connect/disconnect tubing, including safety notes for drilling.

Installation Steps

Filter Installation

Steps for unpacking and inserting the CP and RO filters into the system.

Tubing Softening

Guide on cutting and softening the 3/8" tubing for proper connection.

Feed Water Valve Connection

Instructions for connecting the three-way feed water valve to the water supply.

Water Supply Connection

Steps to shut off water and connect the cold water pipe to the feed water valve.

SUPPLY Tubing Connection

Guide on connecting the SUPPLY water tubing to the system's SUPPLY port.

Drain Saddle Installation

Instructions for installing the drain saddle on the drain pipe and connecting tubing.

WASTE Tubing Connection

Steps to connect the WASTE water tubing to the system's WASTE port.

FILTERED Tubing Connection

Connecting the 1/4" tubing to the FILTERED port and the TAM3 filter.

TAM3 Filter Connection

Steps for connecting the TAM3 filter to the system's SUPPLY and FILTERED ports.

Drinking Faucet Installation

Guide for mounting the drinking faucet onto the sink top, including drilling notes.

Power Cord Connection

Instructions for turning on the water supply and connecting the power adapter to the system.

First Time Usage and Initial Flush

System Automatic Flush

The system automatically flushes for 30 seconds after power connection.

Filter System Flush

Flush the filter system by turning on the faucet for 20 minutes before first use.

Important Usage Notes

Notes on TDS display, protection status, and proper faucet operation.

User Interface and Operation

System Status Indicators

Explains power-on, water production, and TDS display indicators.

Filter Life and Flushing Indicators

Details on filter life indicators (colors) and automatic flushing modes.

Manual Flushing and Reset Function

How to perform manual flushing and reset filter lifetimes using buttons.

Filter Cartridge Replacement

Replacement Schedule

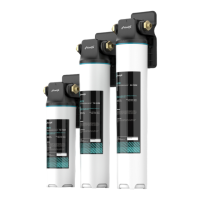
Recommended replacement periods for PP+CB, RO membrane, and Alkaline remineralization filters.

Filter Replacement Procedure

Steps to cut power, remove front cover, unscrew old cartridges, and screw in new ones.

TAM3 Filter Specifics

Notes on replacing the TAM3 filter, including auto shut-off and housing removal.

Filter Lifetime Reset and Post-Flush

Resetting filter lifetime and flushing the filter after replacement, with usage notes.

Refrigerator;Ice Maker Connection

Mini Tank Availability

System Maintenance

Long-Term Storage Procedures

Guidelines for maintaining the system when not in use for extended periods.

Troubleshooting Common Issues

No Water & Low Water Flow

Diagnosing and resolving issues related to no water output or low water flow from the faucet.

Poor Quality Water & Leakage

Addressing problems with filtered water quality and identifying sources of water leakage.

System Unstoppable & Indicator Issues

Troubleshooting system behavior like being unstoppable or indicator malfunctions.

Frequently Asked Questions

Water Bubbles & TDS Readings

Explanations for white bubbles in water and initial high TDS readings.

TDS Display & Disconnection

Understanding the TDS display, disconnecting the TAM3 filter, and faucet fitment.

Limited Product Warranty

Warranty Terms and Conditions

Details on warranty coverage, exclusions, and owner responsibilities.

Overview

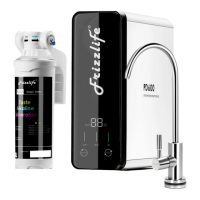
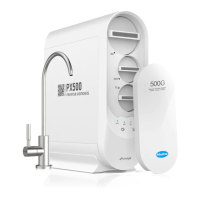
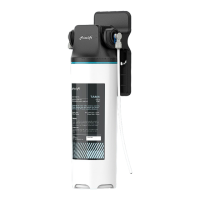
The Frizzlife PD600-TAM3 is a reverse osmosis undersink filter system designed to provide purified drinking water. It features a 600G RO membrane for efficient filtration and includes a TAM3 alkaline remineralization filter to enhance water quality by adding beneficial minerals and raising the pH level.

Function Description:

The system operates by filtering tap water through multiple stages. The first stage uses a PP+CB 2-in-1 filter (ASR211) to remove sediment, chlorine, and other impurities. The second stage utilizes a 600G RO membrane (ASR212) to significantly reduce TDS (Total Dissolved Solids) and other contaminants. The final stage, the TAM3 alkaline remineralization filter, adds essential minerals back into the water and adjusts the pH to an alkaline level, improving taste and health benefits. The system is tankless, providing instant fresh pure water directly from the faucet. It includes a dedicated faucet for dispensing filtered water and a drain saddle for waste water disposal. The system is designed for cold water use only.

Important Technical Specifications:

  • Model: PD600-TAM3
  • Rated Frequency: 50-60HZ
  • Rated Power: 85W
  • Rated Voltage: 110-240VAC
  • Flow Rate: 0.41 gallons/minute
  • Operating Temperature: Min. 39°F, Max. 100°F
  • Working Pressure: Min. 20psi, Max. 80psi
  • Daily Production Rate: 600 gallons
  • Applicable Water Source: Municipal water
  • Filter Cartridges:
    • 1st stage: PP+CB 2-in-1 filter (ASR211)
    • 2nd stage: RO membrane (ASR212)
    • 3rd stage: Alkaline remineralization filter (TAM3)

Usage Features:

  • Installation: The system is designed for undersink installation. An installation video is available via QR code or by searching "Frizzlife PD600-TAM3 installation" on YouTube. The manual provides detailed steps for connecting the feed water valve, drain saddle, and dedicated faucet. It emphasizes proper tubing connection and cutting techniques to prevent leaks.
  • First Time Usage: After installation and plugging in the power supply, the system automatically flushes for 30 seconds. Before first use or after filter replacement, it is recommended to flush the filter system by turning on the faucet for 20 minutes. For the first minute of water production, the TDS result may not be displayed.
  • User Interface: The system features a user interface with indicators for CP (PP+CB filter), RO (RO membrane), and Flush. It displays OUT TDS (Total Dissolved Solids) in PPM.
  • Power-on: Upon power-on, a beep sounds, all indicators light up for 3 seconds, and the system automatically flushes for 30 seconds. If no water is produced after flushing, it enters standby.
  • Water Production: When producing water, the power indicator flashes blue.
  • TDS Display: After 1 minute of continuous water production, the system automatically tests and displays the TDS of the RO water. The displayed TDS remains unchanged in standby or during flushing. The TAM3 filter typically increases TDS by 10-30 ppm due to mineral addition, and a PH level of more than 9 can be achieved.
  • Filter Life Indicator:
    • Constant blue light: Filter is working normally.
    • Flashing red light: Filter lifetime is about to expire (remaining lifespan <5%).
    • Constant red light: Filter is expired.
    • An audible beep will sound when a filter is expired, reminding users to replace it.
  • Long-time Operation Reminder: If the system produces water continuously for 30 minutes, it enters a protection status, and all components stop working. Indicators will flash red. To reset, unplug the power for 10 seconds and then power on again.
  • Automatic Flushing:
    • Upon power-on: 30 seconds of automatic flushing.
    • After 10 minutes of cumulative water production: 10 seconds of automatic flushing when returning to standby.
    • After 10 minutes of constant water production: 15 seconds of automatic flushing.
  • Manual Flushing: In standby mode, pressing the "Flush" button initiates flushing. Pressing it again stops flushing. During flushing, the indicator flashes blue.
  • Reset Button:
    • Select Filter: Long press "Reset" for 3 seconds to enter filter selection mode. Press "Reset" to cycle through filters; the selected filter's lifetime indicator will flash.
    • Reset Filter: After selecting a filter, long press "Reset" for 3 seconds. A beep confirms successful reset, and the indicator turns blue. If no operation occurs within 10 seconds, the system exits this mode.
    • Revocation of Reset: To revoke a reset (within 5 minutes of resetting, and if the system has not been powered off), select the wrongly operated filter, then long press "Reset" and "Flush" buttons for 3 seconds. Three beeps will sound, and the filter indicator will revert to its pre-reset color status.
  • Refrigerator/Ice Maker Hook-up: The PD600 can be connected to a refrigerator/ice maker using an optional IMC-1 ice maker connection kit (not included).
  • Mini Tank Option: For users who prefer no time lag for water outflow or experience unstable water pressure, the Frizzlife MWT3 mini water tank is available as an accessory.

Maintenance Features:

  • Filter Replacement:
    • Frequency:
      • PP+CB 2-in-1 filter (ASR211): One year or 60 hours of cumulative water production (approx. 900-1000 gallons).
      • RO membrane (ASR212): Two years or 120 hours of cumulative water production (approx. 1800-2000 gallons).
      • Alkaline remineralization filter (TAM3): Approx. 900-1000 gallons.
    • Procedure:
      1. Cut off power and turn on the water faucet to release pressure.
      2. Cut off water supply and power.
      3. Remove the front cover.
      4. Unscrew the old cartridge counter-clockwise and screw in the new one clockwise.
      5. For TAM3 filter replacement, water supply does not need to be cut off due to auto shut-off design. Twist the housing counter-clockwise, use a wrench to unscrew the housing body, replace the cartridge, and reassemble.
    • Post-Replacement: After replacing filters, reset the filter lifetime using the reset button. Flush the system by turning on the faucet. If replacing the RO membrane, do not use the water for the first 20 minutes. If replacing other cartridges, do not use the water for the first 10 minutes.
  • General Maintenance:
    • Do not use with microbiologically unsafe or unknown quality water without adequate disinfection.
    • Clean the system with clear water; do not spray water directly or use steel wool, abrasive cleaners, or corrosive liquids.
    • Keep the waste water pipe unobstructed.
    • Regularly check the system and water pipe fittings for leaks.
    • Regularly check power supply and wires for damage or looseness.
  • Long-term Storage:
    • If unused for more than 2 days, discharge filtered water for at least 5 minutes before use.
    • If unused for more than 1 week, seal filter cartridges and store them in the refrigerator (do not freeze). Discharge filtered water for at least 10 minutes before use.
    • If unused for a long time, cut off water supply and power, then turn on the faucet to release internal pressure to prevent system damage.

Warranty:

The Frizzlife PD600-TAM3 comes with a ONE YEAR LIMITED FRIZZLIFE WARRANTY, covering defects in material and workmanship. Frizzlife will replace or repair defective components without charge. The customer is responsible for shipping costs for inspection and replacement. The warranty is void if defects result from misuse, improper installation, freezing, hot water, fire, or other acts of God outside Frizzlife's control. Filter cartridges are disposable and not covered by warranty. An optional 150% Extended Warranty can be registered by emailing order ID and full name to support@frizzlife.com or scanning a QR code.

Frizzlife PD600-TAM3 Specifications

General IconGeneral
BrandFrizzlife
ModelPD600-TAM3
CategoryWater Filtration Systems
LanguageEnglish

Related product manuals