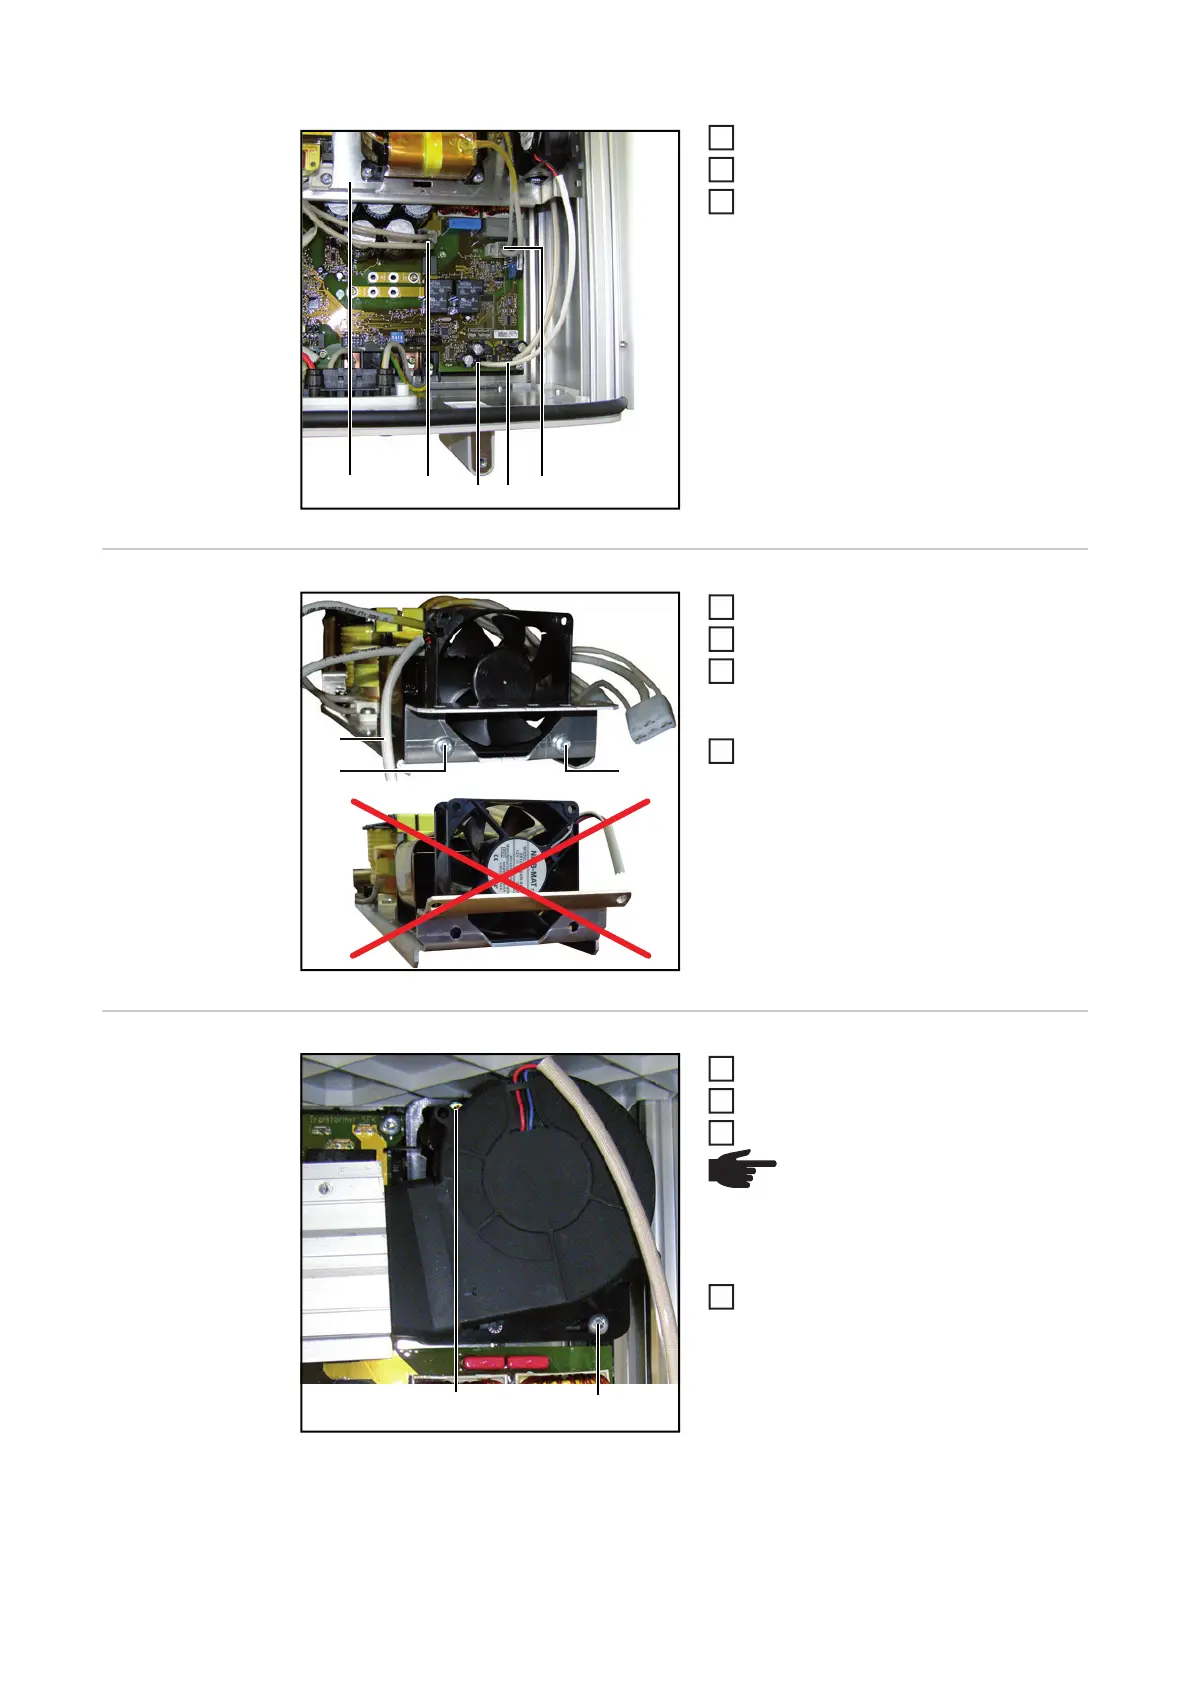
12
Disconnect 2 plugs (6, 9)
Disconnect the fan cable (7, 8)
Remove inductance bridge (5)
Replacing the Ax-
ial Fan
Remove 2 TX 25 screws (1)
Remove fan
Insert the new fan so that the connec-
tion cable (2) is positioned on the side
shown.
Secure fan with 2 TX 25 screws (1)
tightening torque: 0.8 Nm / 0.6 ft lb.
Replacing the Ra-
dial Fan
Remove 2 screws (1)
Remove fan
Insert new fan
Secure fan with 2 screws (1)
tightening torque: 3 Nm / 2.2 ft lb.
(5) (6)
(7) (8)
(9)
2
3
4
(1)(1)
(2)
1
2
3
4
(1)(1)
NOTE! When securing the fan,
make sure that the rubber gasket
is up against the heat sink.
IMPORTANT! Do not pinch the fan cable
between the fan and the housing.
1
3