2S Li-Battery
without protective circuit
PH2.54-XH-3Y
Please use the following type of battery if you do not
want to use the battery slot.
Battery compartment size:76*36.5*18.6mm(L*W*H)
B+
BM
B-
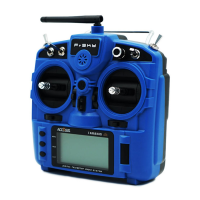
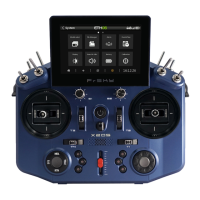
FrSky 2.4GHz ACCESS Horus X10 Express/Horus X10S Express Manual
FrSky Electronic Co., Ltd. www.frsky-rc.com Contact us: frsky@frsky-rc.com
Add: F-4,Building C, Zhongxiu Technology Park, No.3 Yuanxi Road, Wuxi, 214125, Jiangsu, China Technical Support: sales4tech@gmail.com
FrSky 2.4GHz ACCESS Horus X10 Express/Horus X10S Express Manual
FrSky Electronic Co., Ltd. www.frsky-rc.com Contact us: frsky@frsky-rc.com
Add: F-4,Building C, Zhongxiu Technology Park, No.3 Yuanxi Road, Wuxi, 214125, Jiangsu, China Technical Support: sales4tech@gmail.com
FrSky 2.4GHz ACCESS Horus X10 Express/Horus X10S Express Manual
FrSky Electronic Co., Ltd. www.frsky-rc.com Contact us: frsky@frsky-rc.com
Add: F-4,Building C, Zhongxiu Technology Park, No.3 Yuanxi Road, Wuxi, 214125, Jiangsu, China Technical Support: sales4tech@gmail.com
FrSky 2.4GHz ACCESS Horus X10 Express/Horus X10S Express Manual
FrSky Electronic Co., Ltd. www.frsky-rc.com Contact us: frsky@frsky-rc.com
Add: F-4,Building C, Zhongxiu Technology Park, No.3 Yuanxi Road, Wuxi, 214125, Jiangsu, China Technical Support: sales4tech@gmail.com
Cautions on handling External antenna.
Do not touch the antenna during operation. Doing so could interfere with transmission, causing a crash.
Do not carry the transmitter by the antenna. The antenna wire could break and prevent transmission.
Do not pull the antenna forcefully. The antenna wire could break and prevent transmission.
Specifications
●
Dimension: 213*225*112 mm (L*W*H)
●
Weight: Horus X10 Express: 900g (without battery)
Horus X10S Express: 950g (without battery)
●
Operating system: FrOS / OpenTX
●
Internal RF module: ISRM-S-X10
●
Number of Channels: 24 channels
●
Operating Voltage Range: 6.5 ~ 8.4V (2S Li-battery)
●
Operating Temperature: -10℃~60℃ (14℉~140℉)
●
Operating Current: 240mA@7.4V (typ)
●
Charging Current: ≤1A ±200mA
●
USB Adaptor Voltage: 5V+0.2V
●
USB Adaptor Current: >2.0A
●
Backlit LCD resolution: 480*272
●
Compatibility: ACCST D16 and ACCESS receivers
Warnings for Battery
Do not remove the battery from the Horus X10 Express/Horus X10S Express transmitter while the voltage
warning is blinking as this could cause internal settings and memories to be destroyed.
Do not use the transmitter if a “Backup Error” warning occurs.
Notes and Warnings for Battery & Charger
About USB 2S Li-battery balance charging :
The Green Power indicator LED state:
Led on: charging
Led off: charge end
Led flash: charge fault
Note:
1. Charge the battery with the USB adapter (Voltage:5V+0.2V Current:>2.0A) when you use the USB
charging function.
2. The lower the initial charging voltage, the better the charging effect is when the voltage difference
between the two cells exceed 50 mV.
Caution:
Only 2S Li-battery without protective circuit can be applied to balance charging system, and please do
not charge any other types of battery.
Model Setup for Horus X10 Express/Horus X10S Express Internal RF Module
The internal RF module of FrSky Horus X10 Express/Horus X10S Express is newly developed by FrSky under the
name of ISRM-S-X10.
Enter the RF SYSTEM menu (for details, download it from FrSky website).
Step 2:Set the Channel Range
The internal RF module of Horus X10 Express/X10S Express support 24 channnels. the channel range is configu-
rable, and it needs to be double checked before use.
Step 3: Set the Receiver Number
When you create a new model, the system will assign you a receiver number automatically, but this can be easily
changed. The range of the receiver number is 01-64, with the default number being 01. Once the receiver is set to
the desired number and is bound to the Horus X10 Express/Horus X10S Express, the bind procedure will not need
to be repeated unless the receiver number is changed, In this case, set the receiver number to the previous one,
repeat the bind procedure.
● No Pulse: on loss of signal the receiver produces no pulses on any channel. To use this type, select it in the menu
and wait 9 seconds for the failsafe to take effect.
● Hold: the receiver continues to output the last positions before signal was lost. To use this type, select it in the
menu and wait 9 seconds for the failsafe to take effect.
● Custom: pre-set to required positions on lost signal. Move the cursor to the failsafe mode of channel and press
Encoder, then choose the Custom mode. Move the cursor to the channel you want to set failsafe on, and press
Encoder.
Then rotate the Encoder to set your failsafe for each channel and short press Encoder to finish the setting. Wait 9
seconds before the failsafe takes effect.
Notice:
● When failsafe is disabled on Horus X10 Express/Horus X10S Express side, the failsafe set on receiver side will
be used.
● SBUS port always outputs, does not support the No Pulse failsafe mode. Set “Hold” or “Custom” for SBUS port.
Model Setup for Horus X10 Express/Horus X10S Express External RF Module
The external RF module can be powered on or off by software. The setup process is the same as that for the internal
RF.
Step 4 :
Registration
In ACCESS, select the STATE [Register] into Registration status. Then Press the F/S button and power on your
receiver, and select the “RX Name XX” and [REGISTER] to complete the Registration process then power down the
receiver.
Step 5: Automatic binding (Smart Match )
Move the cursor to Rx1[BIND],and select it, power your receiver, select the RX, and complete the process, the
system will confirm "Bind successed". (You do not need to press the "F/S" button in ACCESS to Bind. Refer to the
receivers manual for details)
Step 6: Set Failsafe mode
There are 3 failsafe modes when enable: No Pulse, Hold, Custom.
Step 7: Range
Range refers to Horus X10/Horus X10S EXPRESS range check mode. A pre-flight range check should be done
before each flying session. Move the cursor to “STATE”, scroll the Encoder to select “RANGE” mode and press
Encoder. In range check mode, the effective distance will be decreased to 1/30. Press the Encoder again, turn to
normal state.
Overview
Micro SD Card slot
External RF Module slot
Features
●
High-speed module digital interface with installed ACCESS protocol
●
Supports spectrum analyzer function
●
Supports wired training function
●
New PARA wireless training system
- High-speed training system with a lower latency
- Compatible with FrSky Free Link App and AirLink S via mobile devices
●
Dual internal antennas and a single detachable external antenna work in unison to create a robust link
●
Antenna detection and SWR warning
●
Industrial LCD: 480*272 readable outdoor color screen
●
Supports 2S Li-battery balancing charge with mini USB interface
●
Easily accessible battery compartment (*Batteries not included)
●
M10 hall sensor gimbals and extendable stick ends (Horus X10 Express)
●
MC12P all CNC digital higher accuracy ten bearings hall sensor gimbals and extendable stick ends (Horus X10S
Express)
Introduction
With the demand for further extending the legacy of the Horus Series Transmitters, the Horus X10/S Express version
was born. With many new updates like applying the ACCESS protocol and hardware tweaks.
Horus X10/S Express use the ACCESS communication protocol, it boasts 24 channels with a faster baud rate and
lower latency equipped with a high-speed module digital interface. Along with the new spectrum analysis function and
added FrOS/OpenTX firmware, it is now possible to check the airwaves for RF noise.
Both X10 and X10S Express support balancing charge for 2S Li-ion battery via a collateral USB cable. The accessible
battery compartment design is another change worth mentioning, with two 18650 Li-ion batteries you can expect to be
able to fly all day. The Express carries forward all of their predecessor’ features like the industrial LCD color screen,
and the highly-accuracy M10/MC12P hall sensor gimbals which offer the most precise control. Additionally, it features
a remarkable PARA wireless trainer function which also makes them compatible with the FrSky Free Link App and
AirLink S. All that makes the Express version an ideal transmitter for, gliders, helis, multirotor and every type of
fixed-wing imaginable.
Mini USB Port
1. Micro SD card is not provided with shipment.
2. USB port is for upgrading, reading/writing
Micro SD cards and internal memory of radio
contents and charging (Includes USB cable in
packge but without the adapter).
3. Smart Port is for firmware upgrade for all
FrSky S.Port devices.
● SA: 3 positions; Short Lever
● SB: 3 positions; Long Lever
● SC: 3 positions; Long Lever
● SD: 3 positions; Short Lever
● SE: 3 positions; Short Lever
● SF: 2 positions; Long Lever
● SG: 3 positions; Short Lever
● SH: 2 positions; Momentary, Long lever
Step 1: Set the Mode for Horus X10 Express/Horus X10S Express internal RF corresponding to your receiver
(ACCESS,ACCST D16)
-- Press the MODEL button, Choose the INT MODULE.Then turn ON INTERNAL RF ,select the OUTSIDE or
INSIDE ANTENNA( Dual internal antennas and external antenna work simultaneously while selecting the OUTSIDE
ANTENNA.)