24 25
Maintenance
WARNING: IMPORTANT!
Before lighting, inspect the gas supply piping or hose prior to
turning the gas “on”. If there is evidence of cuts, wear or abrasion,
it must be replaced prior to use.
Grill Burner:
Remove grill lid, diffuser panel, grate, and burner. Remove screw
holding burner to grill body by unscrewing counter-clockwise.
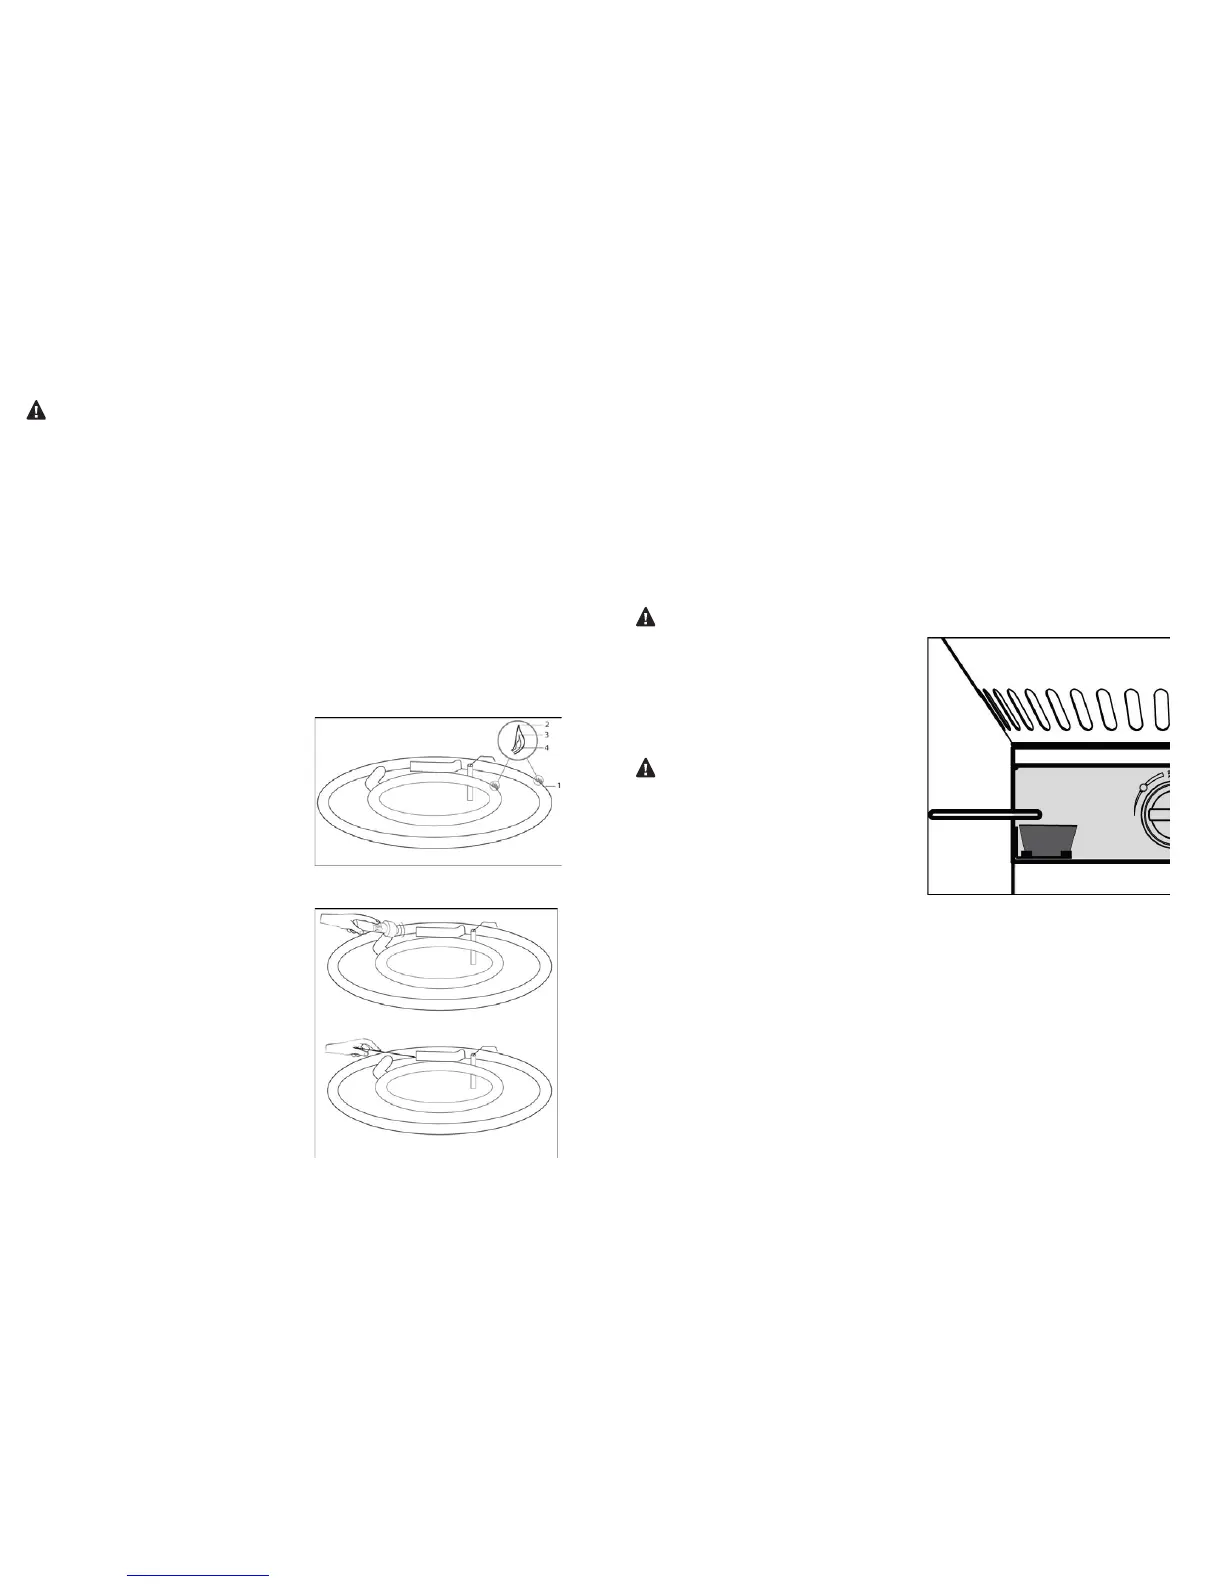
Grill Burner Flame Height:
The factory burners have been set for the correct air and gas mix-
ture. The correct fl ame pattern is shown in (FIG. 04).
1: Burner tube
2: Tips occasionally fl icker yellow
3: Light blue
4: Dark blue
If fl ames do not appear to be
uniform throughout the burner
tube, check if the ventilation
openings of the burner tube
are blocked by dirt, debris,
spider webs, etc. In order for
burner to work properly there
must be no obstructing the fl ow
of combustion or ventilation air.
Proceed with cleaning instruc-
tions below.
Grill Burner Exterior Cleaning:
Clean the exterior of the burner
with a wire brush. Clean stub-
born scale with a metal scraper.
Clear any clogged ports with
a straightened paper clip (FIG.
05B). Never use a wooden
toothpick as it may break off
and clog the port. Shake out any debris. Use a fl ashlight to
inspect the burner inlet to ensure it is not blocked (FIG. 05A). If
obstructions can be seen, use a metal wire coat hanger that has
been straightened out.
Orifi ce Cleaning:
With burner removed remove the orifi ce and shine a fl ashlight
through the opening to ensure there is no blockage. Use a
needle to clear any debris. Be extremely careful not to enlarge
the hole or break off the needle.
WARNING:
IT IS EXTREMELY IMPORTANT
TO CENTER THE BURNER ON
THE ORIFICE PROPERLY TO
PREVENT A FIRE HAZARD OR
EXPLOSION.
WARNING:
DO NOT REMOVE BURNER OR
PERFORM CLEANING WHILE
GRILL IS STILL HOT
Cleaning
Residue Cup Replacement:
Check residue cup before each
use for debris build-up.
Standard 4 oz. aluminum cup replacements can be purchased at
most general or grocery stores. (FIG. 06)
Cast Iron Grate And Frame Cleaning:
Clean the cast iron grate with a wire brush.
FIG. 06
FIG. 04
FIG. 05
A
B
 Loading...