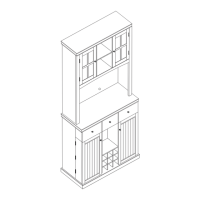
Do you have a question about the FUFU & GAGA Shoe Storage Cabinet and is the answer not in the manual?
| Brand | FUFU & GAGA |
|---|---|
| Model | Shoe Storage Cabinet |
| Category | Indoor Furnishing |
| Language | English |
Read the entire manual before assembling or using the product for reference.
Assemble furniture on a soft layer like a rug to avoid scratching.
Collaborate with a partner to speed up installation and reduce time.
Secure furniture to the wall using provided or suitable attachments to prevent serious injury.
Re-tighten screws after 2 weeks and every 3 months for stability. Clean with neutral detergent.
Gather necessary tools like screwdrivers, measuring tape, and a drill before starting assembly.
Distinguish screws by size and shape to ensure correct usage during installation.
Identify all numbered parts and quantities before beginning the assembly process.
Extend the slide mechanism by following the illustrated steps.
Push the lever upwards to release or adjust the slide component.
Remove the runner from the slide assembly as depicted.
Attach parts P, O, and slide rail J1 to plates 1 and 2 using screws A and H.
Screw quickfit screw A into plate 4, attach plate 5, and fix slide rail J1 with screw H.
Slide plate 8, insert dowel C, connect plates 1, 2, 4, 8, 9, 10 with cam locks B.
Screw quickfit screw A into plate 3, cover with dowel C, and secure with cam locks B.
Reinforce the back plate with part I and screw H, then attach part R to plates 1 and 2 with screw T.
Fix plates 16 and 17 to plate 19 using screw F, then slide plate 18.
Screw quickfit screw A into plates 14 and 15 as shown.
Attach plates 14, 15 to component, use cam locks B, and fix handles G1 with screws G2.
Fix drawer runners J2 to the drawer sides using screws H.
Fix plastic hinges L and M to plate 13 with screw U, and handle G1 with screw G2.
Fix plate 11 to plastic hinges L and M using screw H.
Fix plate 12 to plastic hinges L and M using screw H.
Assemble drawers to plates 1 and 2, knock part N into hinges, and fix with screw K.
Insert assembled drawers into the main cabinet structure as shown.
Fix plate 12 to plastic hinges L and M using screw H.
Install the anti-tipping device to secure the cabinet to the wall for safety.
Details on how to make a warranty claim, including required information and response times.
Explains what invalidates the warranty and what types of damage are covered.
Defines the manufacturer's and user's responsibilities regarding product damage.
Specifies the duration of warranty for sheet parts and electrical parts.
Instructions for returning an item if the customer has simply changed their mind.
Procedure for reporting and resolving issues with defective products.
Guidance on handling items received with shipping damage, including refusal and claim procedures.