Printing and Deleting Stored Jobs
415
Job Status
11
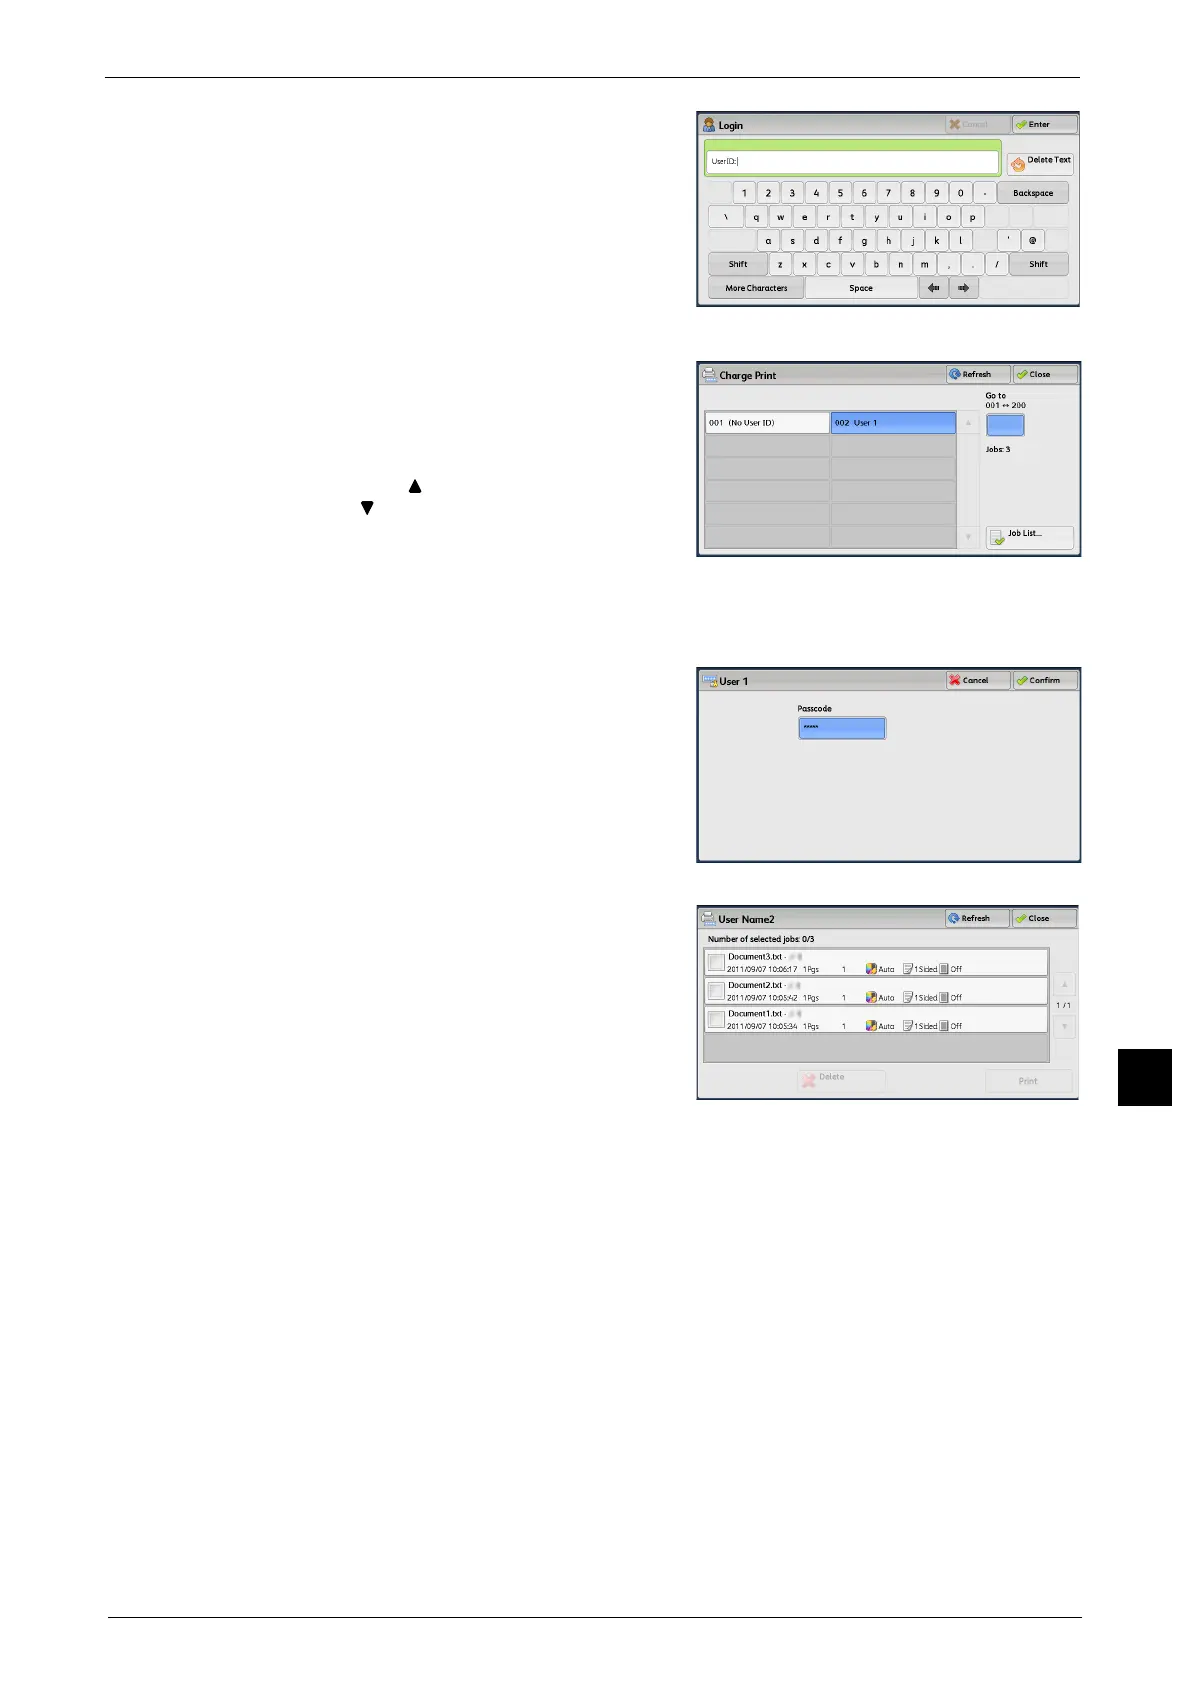
2 Enter the user ID, and select [Enter].
Note • When the passcode is set, enter the user ID
and select [Next]. Then, enter the passcode
and select [Enter].
• While a user is authenticated, the <Log In/
Out> button lights up on the control panel.
• To log out of the machine, press the <Log In/
Out> button on the control panel.
3 Select [Charge Print].
4 Select the user to be checked, and select [Job
List].
Note • Select [Refresh] to display the updated
information.
• Select [ ] to return to the previous screen or
[ ] to move to the next screen.
• Drag or flick to scroll the list to switch the
screen to be displayed. For information on
how to drag or flick, refer to "Touch Screen"
(P.81).
• You can enter a user ID in [Go to] using the numeric keypad to display the user ID at the top of the
list.
5 Enter the passcode, and select [Confirm].
Note • If the passcode is not set, the passcode entry
screen does not appear.
6 Select the job to be printed or deleted.
Select All
Selects all jobs. To deselect all the jobs, select
this button again.
Note • You can select up to 100 files simultaneously
to print or delete the files. If you select
multiple files, they are printed in the selected
order.
• The files in a folder can be displayed in a list
or thumbnailed view. You can also preview the files.
7 Select any option.
8 When printing, specify the number of print sets using the numeric keypad.
Delete
Deletes the Charge Print job.
Refer to "When [Delete] is Selected" (P.416).
Preview
Displays the previewed image on the first page of the selected job.
Note • If you select multiple documents, the [Preview] button cannot be pressed.
Refer to "When [Preview] is Selected" (P.416).
 Loading...


