Do you have a question about the FujiFilm FinePix S2 Pro and is the answer not in the manual?
Precautions against fire and electric shock hazards, and general warnings.
Document confirming conformity with EU directives and standards.
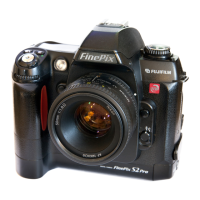
Details the camera's advanced features and lists included accessories.
Instructions on how to attach the camera strap.
Guide on attaching and using lenses with the camera body.
Instructions for inserting SmartMedia or Microdrive cards.
Guide on how to insert lithium or AA-size batteries.
Procedures for powering the camera on/off and setting the date/time.
How to check the remaining battery charge on the camera display.
Explains the information displayed on the camera's top LCD panel.
Describes the information shown on the camera's rear LCD screen.
Explains the information and indicators visible within the camera's viewfinder.
List and descriptions of available setup menu items.
General procedure for changing setup settings.
Table outlining lens compatibility and features.
Lists incompatible lenses/accessories to prevent camera damage.
Information on compatible SmartMedia cards and their usage.
Details on using Microdrive media, including handling precautions.
Lists the types of batteries supported by the camera.
General precautions and information about battery usage.
Advice for using AA-size batteries when lithium batteries are unavailable.
Explains the function and usage of the main and sub-command dials.
How to navigate and use playback, menu, and setup functions.
Displays the number of photos that can be saved on the media.
Table showing expected shots based on media capacity and image quality.
Navigating through recorded images.
Magnifying images during playback.
Moving around a zoomed image.
Adjusting the viewfinder to match eyesight for clear viewing.
Illuminating the display panels for use in low light.
Checks the depth of field by stopping down the aperture.
Shows the position of the CCD plane for precise distance measurement.
Choosing between AF-S, AF-C, or Manual focus.
Configuring the camera's focus area selection.
Manually choosing the specific focus point within the frame.
Explains the function and operation of the AF-assist illuminator.
Using focus aid to assist with manual focusing.
Details the 3D 10-segment matrix metering system.
Explains center-weighted metering for exposure.
Describes spot metering for precise exposure measurement.
How to adjust the camera's ISO sensitivity settings.
Using the Program Auto mode for automatic exposure.
Using the Flexible Program option within Auto-Multi Program.
Setting shutter speed priority for capturing motion.
Setting aperture priority for controlling depth of field.
Setting shutter speed and aperture manually.
Understanding the exposure indicator in the viewfinder.
Table detailing bracketing options.
Direct settings for flash synchronization and compensation.
Information on the camera's integrated flash unit.
Determining the correct flash control mode.
Standard flash synchronization for normal photography.
Slow sync for capturing ambient light with flash.
Rear-curtain sync for motion blur effects.
Reduces red-eye effect in portraits.
Combines red-eye reduction with slow sync.
Table showing flash range based on ISO and aperture.
Examples of flash compensation settings.
Important considerations for using Nikon external flashes.
Information about the camera's accessory shoe.
Details on the synchro terminal for external flashes.
Setting the camera's white balance for different lighting conditions.
Explains white balance settings and their effects.
Configuring autofocus modes and area selection.
Selecting image quality settings (Normal, Fine, High).
Choosing the resolution (pixel dimensions) for saved images.
Adjusting color density and saturation.
Adjusting image contrast.
Adjusting image sharpness.
Preventing accidental changes to function menu settings.
Displaying and interpreting image histograms for exposure analysis.
Explains histogram icons and their meaning.
Viewing which frames are currently protected.
Options for erasing images (single, all).
Initializing memory cards.
Erasing all unprotected frames.
Steps for recording and adding voice memos.
List and descriptions of available setup menu items.
General procedure for changing setup settings.
Setting how images are displayed after shooting.
Manually setting white balance for specific lighting.
Detailed list and explanation of custom settings.
Steps to reset custom settings.
How to connect the camera to a television for viewing images.
Using the AC adapter for continuous power.
Compatibility of Windows OS with camera connection types.
Compatibility of Mac OS with camera connection types.
Information about the Hyper-Utility software.
Hardware and software requirements for the software.
Locations and conditions to avoid when using the camera.
Precautions regarding water and sand exposure.
Handling condensation that may form on the camera.
Instructions for cleaning the camera body and components.
How to inspect the CCD surface for dust or dirt.
Initial steps and precautions before cleaning the CCD.
| Camera Type | Digital SLR |
|---|---|
| Image Ratio | 3:2 |
| Effective Pixels | 6.17 million |
| Sensor Size | 23.0 x 15.5 mm |
| Sensor Type | CCD |
| ISO Range | 100 - 1600 |
| Lens Mount | Nikon F mount |
| Focal Length Mult. | 1.5x |
| LCD Screen Size | 2.0 inches |
| Max Shutter Speed | 1/4000 sec |
| Min Shutter Speed | 30 sec |
| Shutter Speed | 30 - 1/4000 sec |
| Metering Modes | Multi, Center-weighted, Spot |
| White Balance Presets | 6 |
| Image Formats | JPEG, RAW |
| Battery Type | AA |
| Storage Types | CompactFlash (Type I or II) |
| Viewfinder Type | Optical |
| Effective Megapixels | 6.1 MP |
| ISO | Auto, 100, 200, 400, 800, 1600 |
| Screen Size | 2.0 inches |
| Battery | 4 x AA NiMH batteries |
| Dimensions | 142 x 131 x 80 mm (5.6 x 5.2 x 3.1 in) |