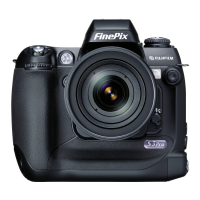
S3 Pro
FGS-406109-FG
BL00432-200
(
1
)
E
A. Mounting the camera lens
Position lens in the camera’s
bayonet mount so that the
mounting indexes on lens and
camera body are aligned, then
twist lens counterclockwise
until it locks into place.
2. Load the AA-size Ni-MH
rechargeable batteries in the
direction indicated by the
≠
and – labels on the holder.
C. Setting up the camera
AF-assist illuminator
Self-timer lamp
Red-eye reduction lamp
Accessory shoe
Accessory shoe cover
Power switch
Sub-command
dial
Depth of field
check button
Shutter button for
vertical shooting
Strap mount
Flash exposure
compensation button
Exposure compensation
button
Top display panel
LCD illuminator
button
Shutter button
Release mode switch
unlock button
Exposure mode dial
Release mode switch
Synchronizing
terminal cap
Synchronizing terminal
Lock lever for vertical shooting
Tripod mount
Slot cover unlock button
Main-command dial
Access lamp
4-direction button
lock switch
MENU/OK button
BACK button
xD-Picture Card slot
CF / Microdrive eject button
CF / Microdrive slot
Slot cover
4-direction button
AE-L/AF-L button
Metering system
selector dial
PLAY button
FUNC button
F1 button
F2 button
F3 button
F4 button
LCD monitor
Rear display
panel
Synchro mode button
Auto Exposure
Bracketing button
Diopter adjustment knob
Rubber eyecup
Viewfinder
Flash pop-up button
Battery
holder release
catch
Battery holder
Lens release button
Strap mount
Flash
USB socket
(mini-B)
IEEE 1394 socket
VIDEO OUT
(Video output) socket
DC IN 5V
(power input) socket
Terminal cover
Digital terminal
cover
Remote release
socket
(10-pin terminal)
Remote release
socket cap
Focus mode
selector switch
Camera Controls
Picture Taking
Refer to Owner’s Manual for more detailed instructions
Still images that can be viewed on the FinePix S3 Pro
You can use this camera to view still images recorded on the FinePix
S3 Pro or still images (excluding some uncompressed images)
recorded on a FUJIFILM digital camera that supports xD-Picture
Card or CF/Microdrive.
4
4. Unlock the 4-direction button.
Press “d” or “c” to select
Year, Month, Day, Hour or
Minute and then press “a” or
“b ” to adjust the selected
setting.
Press the “MENU/OK” button
after you complete the setting.
✽ Refer to owner’s manual for
date/time setup.
B. Loading the batteries
DATE/TIMEDATE/TIME
2004 . 1 . 12004 . 1 . 1
12 : 00 AM12 : 00 AM
YYYY.MM.DDYYYY.MM.DD
SETSET
CANCELCANCEL
1. Set the Power switch to “OFF”
to turn the camera off.
Turn the battery holder release
catch counterclockwise to
unlock the battery holder.
Pull the battery holder out.
1
3. Push the battery holder in
and hold it in place as you
turn the battery holder release
catch clockwise to securely
lock the battery holder.
3
2
2. Close the slot cover.
2
3. Set the Power switch to
“ON”.
3
01
01
02
03
02
03
1. Align the gold marking on the
xD-Picture Card slot with the
gold contact area on the xD-
Picture Card™ and push the
card firmly all the way into
the slot.
Push the CF/Microdrive
firmly all the way into the
CF/Microdrive slot.
✽ Compatibility is listed on
Fujifilm website:
http://home.fujifilm.com/
products/digital/
1
xD-Picture Card
CF/Microdrive
✽
D. Taking pictures
1. Set the Exposure mode dial to “P”
(Auto-Multi Program).
2. Press the shutter button down halfway
to adjust the focus.
3. Press the shutter button down fully to
take a picture.
E. Viewing pictures
1. Press the “PLAY” button.
2. Press the “d” or “c” to move
through your images.
1
2 3
1 2


 Loading...