En-3
(2)
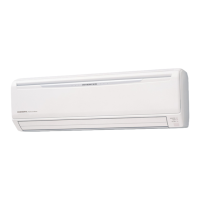
Intake grille
Mounting shaft
Bearing
Knob
(2)
(2)
Intake grille
Mounting
shaft
Knob
Air cleaning & deodorizing fi lter installation
(1) Open the intake grille and remove the air fi lters.
(2) Set the Air cleaning & deodorizing fi lter into the Air cleaning & de-
odorizing fi lter frame.
(3) Engage the 6 latches of the Air cleaning & deodorizing fi lter frame
with the 6 hooks at the rear of the air fi lters.
(4) Install the 2 air fi lters and close the intake grille.
Air cleaning & deodorizing fi lter
Air cleaning & deodorizing
fi lter frame
Hook (6 places at the rear)
Latch (6 places)
Cleaning body
Wash the body with warm water, and then dry with a clean and soft cloth.
When not using for an extended period
Leave the breaker on for at least 12 hours before starting operation when
it is to be used again.
TROUBLESHOOTING
The following conditions are not breakdowns or op-
eration failures.
Doesn’t operate immediately:
● If the unit is stopped and then immediately started again, the com-
pressor will not operate for about 3 minutes, in order to prevent fuse
blowouts.
● Whenever the electrical breaker is turned off then on again, the protec-
tion circuit will operate for about 3 minutes, preventing unit operation
during that period.
Airfl ow is weak or stops:
● When Heating operation is started, indoor unit’s fan may temporarily
stop, to allow internal parts to warm up.
● During Heating operation, if the room temperature rises above the
thermostat setting, the outdoor unit will stop, and the indoor unit’s fan
will stop. If you wish to warm the room further, set the thermostat for a
higher setting.
● During oil recovery operation, the airfl ow may stop for approximately
10 minutes. (See page 2)
● During Heating operation, the unit will temporarily stop operation (be-
tween 4 and 15 minutes) as the Automatic Defrosting mode operates.
(See page 2)
● The fan may operate at low speed during Dry operation or when the
unit is monitoring the room’s temperature.
● In the monitor AUTO operation, the fan will operate at low speed.
● If the unit is used for long periods under high-humidity conditions,
condensation may form on the surface of the indoor unit, and drip onto
the fl oor or other objects underneath.
● Do not use this unit for any purposes other than the Cooling, Heating,
Dehumidifying, and air-circulation of rooms in ordinary dwellings.
CLEANING AND CARE
CAUTION
● Before cleaning the unit, be sure to stop the unit and disconnect the
power supply.
● Do not stand on an unstable platform when cleaning.
● When removing and replacing the air fi lters, be sure not to touch the
heat exchanger, as personal injury may result.
● Be sure the intake grille is installed securely.
● Do not clean the inside of the unit by yourself. To clean the inside,
always consult authorized service personnel.
● When cleaning the unit’s body, do not use water hotter than 40 °C,
harsh abrasive cleansers, or volatile agents like benzene or thinner.
● If dirt is allowed to accumulate on the air fi lter, airfl ow will be reduced,
lowering operating effi ciency and increasing noise.
During periods of normal use, the air fi lters should be cleaned every 2
weeks.
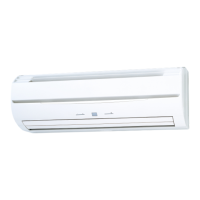
Cleaning the intake grille and the air fi lter
1. Remove the intake grille and the air fi lter.
(1) Place your fi ngers at both lower ends of the grille panel, and lift
forward.
(2) Pull down the knob.
(3) Open the intake grille, and lift the intake grille upward, until the axle
at the top of the intake grille is removed.
(4) Lift up the air fi lter‘s handle, disconnect the 2 lower tabs, and pull out
the air fi lter.
(2)
(1)
(1)
(3)
(3)
(2)
Intake grille
Mounting
shaft
Knob
Air fi lter handle
Hooks
(2 places)
2. Cleaning
(1) Cleaning the intake grill
Remove dust with a vacuum cleaner, wash the grille with warm water,
and then dry with a clean and soft cloth.
(2) Cleaning the air fi lter
Remove dust with a vacuum cleaner or by washing. After washing, be
sure to allow it to dry thoroughly in a shady place before reinstalling.
3. Replace the intake grille and the air fi lter.
(1) Align the sides of the air fi lter with the panel, and push in fully, making
sure the 2 lower tabs are returned properly to their holes in the panel.
(2) The fi xing axle of the intake grille is installed on the front panel.
(3) Lay down the intake grille.
(1)
(1)
Hooks (2 places)
9377772138-03_OM.indb 39377772138-03_OM.indb 3 2015/2/5 10:35:252015/2/5 10:35:25
 Loading...