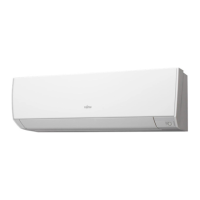
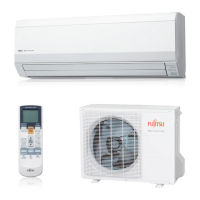
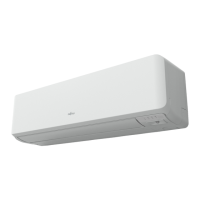
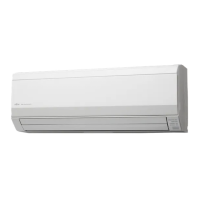
This document describes the Fujitsu ASTG09KMCA and ASTG12KMCA wall-mounted air conditioners, covering their operation, maintenance, and safety precautions.
Safety Precautions
The manual emphasizes safety, categorizing warnings into "WARNING" (death or serious injury) and "CAUTION" (injury or property damage). It highlights that the appliance uses a flammable R32 refrigerant and must only be installed or serviced by qualified personnel. Users are warned against damaging the power supply cable, operating with wet hands, or inserting objects into the unit. In case of malfunction, such as a burning smell, the unit should be immediately stopped, and power disconnected. During thunderstorms, the air conditioner should be turned off via the remote controller, and the unit or power plug should not be touched. The appliance should be stored in a well-ventilated room, away from continuous ignition sources, and disposed of properly according to regulations. Children must be supervised to ensure they do not play with the appliance.
Further precautions include avoiding installation in areas with mineral oil or excessive oil/steam, not using inflammable gases near the unit, and not exposing oneself directly to the cooling airflow for extended periods. Users are advised to provide occasional ventilation, always operate with air filters installed, and keep electronic equipment at least 1 meter away. The power supply cable should be unplugged during extended non-use. Regular checks of the installation stand are recommended to prevent the unit from falling. The airflow direction and room temperature should be carefully considered when infants, children, elderly, or sick persons are present. The airflow should not be directed at fireplaces or heating apparatus, and the intake grille and outlet port should not be blocked. Heavy pressure should not be applied to radiator fins, and climbing, placing objects on, or hanging objects from the unit is prohibited. Vases or water containers should not be placed on the unit, nor should other electrical products or household belongings be placed under it, as dripping condensation could cause damage. The unit should not be exposed directly to water. It is not intended for preserving food, plants, animals, precision equipment, or artwork, as this may cause quality deterioration. Animals or plants should not be exposed to direct airflow, and the drainage from the air conditioner should not be consumed. The power supply cable should not be pulled to disconnect the plug. Touching the aluminum fins of the heat exchanger is warned against to prevent personal injury during installation or maintenance.
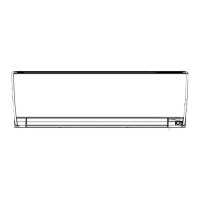
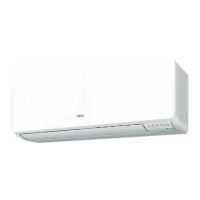
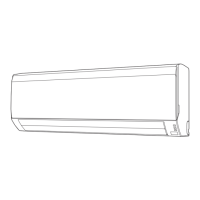
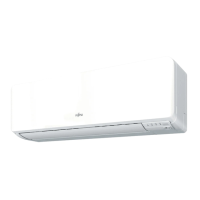
Indoor Unit Overview and Operations
The indoor unit features an intake grille, which must be completely shut for proper function. A "MANUAL AUTO" button allows operation if the remote controller is lost or malfunctioning, offering modes like Stop, AUTO, and Forced Cooling. A "Front panel" and "Human Sensor" are present, with the latter used for an Energy Saving Program that detects people in the room.
The "Vertical airflow direction louver" can be adjusted using the SET button on the remote controller, with different positions for COOL/DRY and HEAT modes. The manual advises against adjusting it by hand and notes that it may stay in position 1 for adjustment at the beginning of AUTO or HEAT mode. Prolonged use of positions 4-7 in COOL or DRY mode may cause condensation. The "Power diffuser" moves in conjunction with the vertical airflow direction louver, but not during SWING operation. A "Drain hose" is also part of the unit.
The "Remote controller signal receiver" is crucial for signal transmission, and users are advised to keep it away from direct sunlight, strong lights, and flat-panel television screens. Instantaneous fluorescent lights may interfere with signal transmission.
Indicators include the "OPERATION indicator" (green) for normal operation, slow blinking during Automatic defrosting, and blinking during Demand Response operation. The "ECONOMY indicator" (green) lights up during ECONOMY and 10 °C HEAT operations. The "TIMER indicator" (orange) lights during TIMER operation and blinks for timer setting errors.
Remote Controller Overview and Operations
The remote controller should be placed away from direct sunlight or excessive heat. Leaking battery fluid should be handled with care, and exhausted batteries must be removed and disposed of properly. Obstacles between the remote controller and the indoor unit can affect signal transmission. Strong shocks and water exposure to the remote controller should be avoided.
The remote controller features a "START/STOP button" to turn the unit on/off. The "MODE button" cycles through AUTO, COOL, DRY, FAN, and HEAT modes. "TEMP. (temperature) buttons" adjust the desired temperature within specified ranges (18-30 °C for AUTO/COOL/DRY, 16-30 °C for HEAT). Temperature control is not available in FAN mode. The "Remote controller display" shows all possible indicators.
The "POWERFUL button" activates a POWERFUL operation for quick cooling or warming, operating at maximum power and strong airflow. It emits 3 short beeps when activated and 2 short beeps when turned off. This mode automatically turns off after 20 minutes or when the set temperature is reached. It overrides OUTDOOR UNIT LOW NOISE and ENERGY SAVING functions.
The "10 °C HEAT button" starts an operation to maintain the room temperature at 10 °C, preventing it from dropping too low. It emits 2 short beeps and turns on the ECONOMY indicator. Only vertical airflow direction can be adjusted in this mode.
The "Signal transmitter" on the remote controller sends signals to the indoor unit, with an operating range of approximately 7 m. A beep confirms successful signal transmission. The "FAN button" controls fan speed (AUTO, HIGH, MED, LOW, QUIET), with AUTO adjusting speed automatically. The "SWING button" starts or stops automatic vertical airflow direction louver swing, with the range varying by mode. The "SET button" adjusts the vertical airflow direction.
The "WEEKLY timer button" activates a weekly timer for up to 4 on/off programs per day. The "SLEEP timer button" activates a sleep timer for gradual temperature control. The "ON/OFF timer button" activates the ON/OFF timer. "NEXT" and "BACK" buttons are used for timer setting adjustments. The "RESET button" resets the remote controller settings. "CLOCK ADJUST button" adjusts the clock. The "SEND button" sends timer/clock settings to the indoor unit. The "TIMER SETTING button" enters the timer setting mode.
The "OUTDOOR UNIT LOW NOISE button" lowers noise from the outdoor unit by reducing compressor rotation and fan speed. This setting is preserved until the button is pressed again. It cannot be performed simultaneously with FAN, DRY, and POWERFUL modes. The "ECONOMY button" saves electricity by adjusting the set temperature to a moderate setting (a few degrees higher in COOL/DRY, lower in HEAT). Its maximum output is approximately 70% of usual air conditioning operation and cannot be performed during temperature monitoring by AUTO mode. The "SENSOR button" activates or deactivates the energy saving program (Human Sensor).
Timer Operation
The manual details how to set ON, OFF, WEEKLY, and SLEEP timers. Any power interruption will reset the internal clock, causing the TIMER indicator to blink, requiring readjustment.
For ON/OFF timers, users press the TIMER SETTING button, select the desired mode (WEEKLY, ON/OFF, SLEEP), press NEXT, adjust the time using SELECT, and then SEND. The time can be adjusted in 5 or 10-minute increments.
The WEEKLY timer allows up to 4 ON/OFF programs per day, for a total of 28 per week. The week and time must be set first. Users select the program number and day, then the operation mode (ON, OFF, or no timer), and then the ON/OFF times and temperatures. The system allows specifying a temperature for ON settings in WEEKLY timer mode. If ON and OFF timers are set at the same time, the ON timer runs. If multiple ON timers are set at the same time, they run in program number order. Power interruptions will cause the internal timer to be incorrect, and the main timer lamp will flash, requiring time and date matching. The WEEKLY timer cannot be used with other timers.
The SLEEP timer automatically controls temperature to prevent excessive warming or cooling during sleep, gradually adjusting the temperature over a set period (e.g., 1-4 °C in HEAT mode, 1-2 °C in COOL/DRY mode) before turning off.
Human Sensor (Energy Saving)
The Human Sensor prevents electricity waste by controlling temperature settings when no one is in the room. It activates when the SENSOR button is pressed, causing the ENERGY SAVING indicator to flash. If no one is detected for approximately 20 minutes, the set temperature is automatically adjusted (increased by up to 2°C in COOL/DRY, decreased by up to 4°C in HEAT). When someone returns, it reverts to original settings. The SLEEP timer takes priority if used concurrently. The sensor may not work if the room temperature is significantly different from the set temperature. The sensor detects movement using infrared light, but detection can be inaccurate in certain situations, such as high ambient temperatures, prolonged stillness, obstructions, or interference from other moving objects like pets, curtains, or oscillating fans.
Demand Response and Indoor Unit Operation
This product is compatible with Air Conditioning Demand Response programs, requiring an arrangement with the electricity supplier. When a DR mode is activated, the OPERATION indicator blinks.
- DR mode 1: Compressor off.
- DR mode 2: Cooling/heating continues, but electrical energy consumption is limited to 50% of rated capacity in a half-hour period.
- DR mode 3: Cooling/heating continues, but electrical energy consumption is limited to 75% of rated capacity in a half-hour period.
In DR mode, the unit operates moderately, reducing cooling/heating effect. This function cannot be overridden by changing temperature settings or other actions until the function finishes. Remote controller or OFF timer operations are valid in DR mode. Power interruptions during DR mode will prevent DR mode indication. Powerful operation is performed within the operable range of DR mode. After DR mode, the unit reverts to its previous operation. Users with operational issues should contact their electricity supplier first.
The unit includes an "Automatic defrosting operation" to prevent frost formation on the outdoor unit during heating in cold, humid conditions. When frost forms, the unit temporarily stops, and the defrost circuit operates for up to 15 minutes, with the OPERATION indicator blinking.
The "Heating performance" section explains that the air conditioner operates on the heat-pump principle, transferring heat from outdoors to indoors. Performance may be reduced as outdoor air temperature drops, and supplementary heating may be needed.
An "Auto-restart function" ensures that after a power interruption, the air conditioner automatically restarts and resumes its previous operation. If a timer was set, it will be reset, and the TIMER indicator will blink, requiring the timer to be reset.
Malfunctions can be caused by other electrical devices like electric shavers or wireless radio transmitters. If this occurs, turning off and on the circuit breaker, then resuming operation with the remote controller, is recommended.
The permissible "Temperature and Humidity Range" for operation is 18-32 °C indoor temperature and below 80% indoor humidity for COOL/DRY mode, and 16-30 °C indoor temperature for HEAT mode. Operating outside these ranges may trigger protection circuits, cause freezing, or water leakage. The air conditioner should not be used for purposes other than room cooling/dry, heating, or fan.
Care and Cleaning
Before cleaning, the indoor unit must be turned off, and all power supply disconnected. The intake grille must be completely shut after cleaning. Users are warned not to touch the aluminum fins of the heat exchanger, expose the unit to liquid insecticides or hair sprays, or stand on unstable surfaces during maintenance.
Daily care involves cleaning the indoor unit body with a soft cloth, avoiding water hotter than 40 °C, scouring cleansers, or volatile solvents.
Cleaning the intake grille:
- Open the intake grille by gently pressing the left and right mounting shafts outward and removing it.
- Wash the grille gently with water or a soft cloth moistened with warm water, then wipe it dry.
- Reinstall the grille by setting the shafts into the pillow blocks and snapping them in place, then closing the grille.
Cleaning the air filters:
Air filters should be cleaned every 2 weeks under normal use to prevent reduced performance and increased operating noise.
- Open the intake grille.
- Pull up the filter handle and release the claws, then slide the filter downward to remove it.
- Remove the filter holder and air cleaning filter from the air filter by unlatching corners.
- Remove dust with a vacuum cleaner or by washing with neutral household detergent and warm water. Rinse well and dry in a shaded place.
- Attach the air cleaning filter and filter holder to each air filter.
- Align the air filter with the front panel and push it in fully, ensuring claws snap into guide holes.
- Close the intake grille.
Replacing the air cleaning filter:
The product uses two types of air cleaning filters: Apple-catechin filter (UTR-FA16) and Ion deodorization filter (UTR-FA16-2). These are purchased separately.
- Remove the air filter.
- Release the latches of the filter holder, turn it over, and remove the soiled air cleaning filter.
- Attach a new or maintained air cleaning filter to the filter holder.
- Latch the corners of the filter holder to the air filter firmly.
- Reinstall the air filter.
- Close the intake grille.
The Apple-catechin filter uses static electricity to clean fine particles like tobacco smoke and pollen. It is disposable, not washable, and should be used as soon as the package is opened. It should be replaced every 3 months under normal use, and higher fan speeds increase its cleaning effect.
The Ion deodorization filter deodorizes by decomposing absorbed odors using ions. To maintain its effect, it should be cleaned every 3 months by flushing with high-pressure hot water, washing gently with diluted neutral detergent, rinsing well, and drying in a shaded place. It should be replaced every 3 years under normal use.
After extended non-use of the unit: If the unit has been shut down for a month or more, perform FAN operation for half a day to dry internal parts.
Additional inspection: After long periods of use, accumulated dust may reduce performance. A product inspection by authorized service personnel is recommended in such cases.
Troubleshooting
The manual provides a troubleshooting guide for common issues. Users are advised to stop operation and disconnect power immediately if they detect burning smells, smoke, or water leaks, and consult authorized service personnel.
Normal functions/characteristics that are not malfunctions:
- Delayed operation after restart: Compressor protection circuit delays operation for about 3 minutes after power supply changes.
- Noise: Refrigerant flowing sound, slight squeaking from front panel expansion/contraction, and sizzling sound during automatic defrosting in heating mode are normal.
- Smell: Various absorbed smells from interior textiles, furniture, or cigarette smoke may be emitted.
- Mist/steam: Thin mist from condensation in COOL/DRY mode, or rising steam from automatic defrosting in heating mode are normal.
- Weak/stopped airflow: Fan speed may be very low at the start of heating, or if room temperature exceeds set temperature. Indoor unit temporarily stops for automatic defrosting. In DRY mode, fan speed is low to adjust humidity. In QUIET mode, fan speed is very low. In COOL mode, indoor unit fan may stop if outdoor unit is stopped. In AUTO mode, fan rotates very slowly during monitoring.
- Outdoor unit emits water: Water from automatic defrosting is normal during heating operation.
Troubleshooting checks before calling for service:
- Unit not operating: Check if the circuit breaker is off, if there was a power outage, or if a fuse has blown. Check if the timer is operating.
- Poor cooling/heating performance: Check if air filters are dirty, if the intake grille or outlet port is blocked, if room temperature is adjusted appropriately, if windows/doors are open, if direct sunlight is shining (cooling), if other heating apparatus/computers are operating, or if too many people are in the room. Check if fan speed is set to "QUIET" or if OUTDOOR UNIT LOW NOISE mode is set.
- Unit operates differently from remote controller settings: Check if remote controller batteries are exhausted or loaded improperly.
If problems persist after these checks, or if the OPERATION and TIMER indicators blink while the ECONOMY indicator blinks fast, users should stop operation, turn off the electrical breaker, and consult authorized service personnel.