En-5
4.3.3. Pipe connection
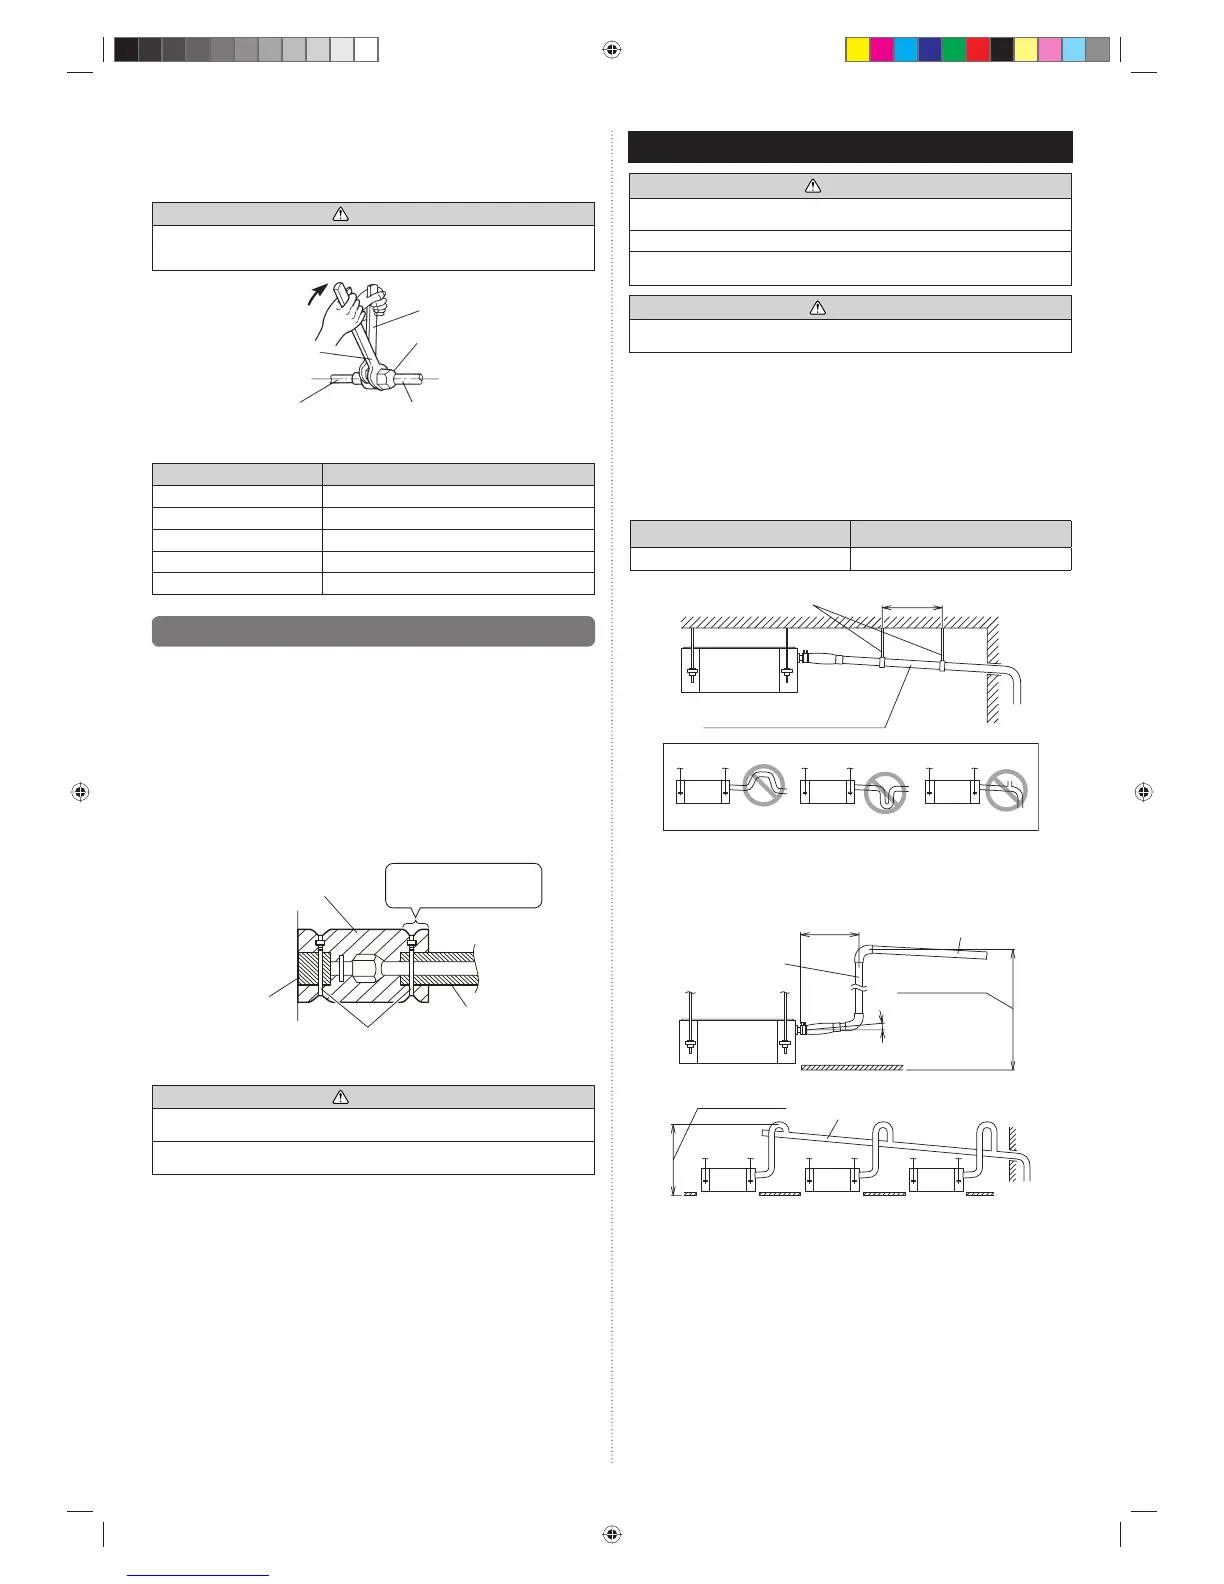
When the fl are nut is tightened properly by your hand, hold the body side coupling with
a separate spanner, then tighten with a torque wrench. (See the table below for the fl are
nut tightening torques.)
CAUTION
Hold the torque wrench at its grip, keeping it at a right angle with the pipe, in order to
tighten the fl are nut correctly.
Connection pipe
Flare nut
Tighten with 2 wrenches.
Torque wrench
Indoor unit pipe
(Body side)
Holding wrench
Flare nut [mm (in.)]
Tightening torque [N·m (kgf·cm)]
6.35 (1/4) dia. 16 to 18 (160 to 180)
9.52 (3/8) dia. 32 to 42 (320 to 420)
12.70 (1/2) dia. 49 to 61 (490 to 610)
15.88 (5/8) dia. 63 to 75 (630 to 750)
19.05 (3/4) dia. 90 to 110 (900 to 1,100)
4.4. Installing heat insulation
Install the heat insulation material after performing a refrigerant leak check (see the In-
stallation Manual for the outdoor unit for details).
COUPLER HEAT INSULATION
• Insulate by the coupler heat insulation (Accessories) around the gas pipe and liquid
pipe of indoor side.
• After installing the coupler heat insulation, wrap both end with vinyl tape so that there
is no gap.
• After affi xing the coupler heat insulation, secure it with 2 cable ties (large), one on
each end of the insulation.
• Make sure that the cable ties overlap the heat insulation pipe.
Coupler heat insulation
(Accessories)
Cable tie (Large)
(Accessories)
Heat insulation
Heat insulation
Cover this portion with
heat insulation.
CAUTION
After checking for gas leaks (refer to the Installation Manual of the outdoor unit), perform
this section.
Install heat insulation around both the large (gas) and small (liquid) pipes. Failure to do
so may cause water leaks.
5. INSTALLING DRAIN PIPES
WARNING
Do not insert the drain piping into the sewer where sulfurous gas occurs. (Heat
exchange erosion may occur)
Insulate the parts properly so that water will not drip from the connection parts.
Check for proper drainage after the construction by using the visible portion of
transparent drain port and the drain piping fi nal outlet on the body.
CAUTION
Do not apply adhesive agent on the drain port of the body. (Use the attached drain hose
and connect the drain piping)
• Install the drain pipe with downward gradient (1/100 to 1/50) and so there are no rises
or traps in the pipe. Unsmooth draining caused by accumulated water fl ow in the pipe
may cause clogged drain.
• Use general hard polyvinyl chloride pipe (VP25) [outside diameter 32 mm].
• When the pipe is long, install supporters.
• Do not perform air bleeding. Drainage may be blown out.
• Always heat insulate the indoor side of the drain pipe.
• If it is impossible to have suffi cient gradient of pipe, perform drain lift-up.
Pipe size
Drain pipe VP25 (O.D. 32 mm)
Hanging fi ttings
VP25 (O.D. 32 mm)
Downward gradient 1/100 to 1/50
1.5 to 2 m
Rise
PROHIBITED:
Trap Air bleeding
When lifting up drain:
• Height of inclined pipe should be less than 700 mm from the ceiling. A rise dimension
over this range will cause leakage.
• Lift up the pipe vertically at the position of 300 mm or less from the unit.
VP25 (O.D. 32 mm)
local arrangement
VP30 (O.D. 38 mm) or more
Downward gradient 1/100 to 1/50
Downward gradient
1/100 to 1/50
300 mm or less
700 mm or less
700 mm or less
Horizontal or
upward gradient
9371022253-01_IM.indb Sec1:59371022253-01_IM.indb Sec1:5 2012-7-12 14:34:422012-7-12 14:34:42
 Loading...