8
Installation Guide
Press MENU button to display the MAIN OSD MENU
MENU you want; Press ENTER button to enter th
the value in the sub menu; You can press MENU button to
go back to the upper menu or EXIT button to close the OSD.
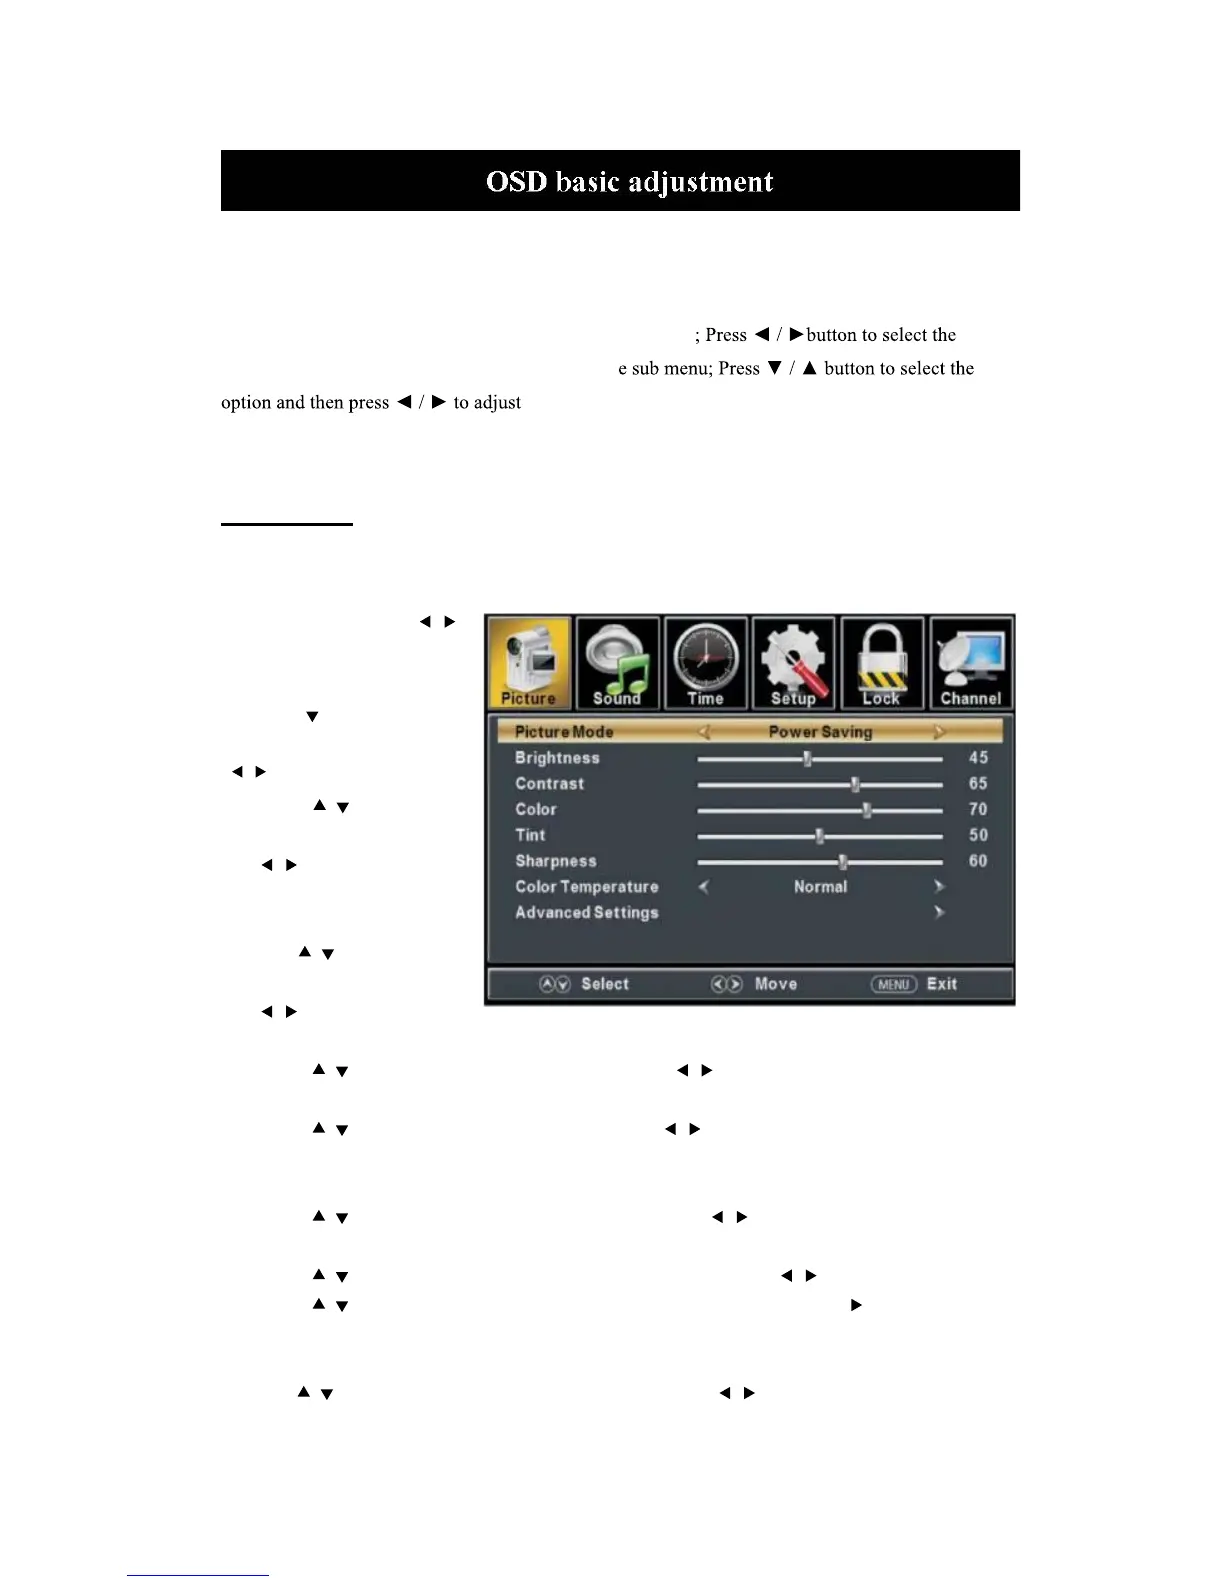
PICTURE
You can select the type of picture, which best corresponds to your viewing. Press the “MENU”
button to enter the OSD
menu .Then press “
/ ”
button to select the
“PICTURE” menu.
1. Press “
” button to select
“Picture Mode”, press
“
/ ” button to select.
2. Press “
/ ” button to
select “Brightness” and press
the “
/ ” button to enter
brightness adjustment menu
to adjust brightness.
3. Press “
/ ” button to
select “Contrast” and press
the “
/ ” button to enter
contrast adjustment menu to adjust contrast.
4. Press “
/ ” button to select “Color” and press the “ / ” button to enter color adjustment
menu to adjust color.
5. Press “
/ ” button to select “Tint” and press the “ / ” button to enter hue adjustment menu
to adjust tint.
Note:
The 'Tint' item is used in NTSC mode only.
6. Press “ / ” button to select “Sharpness” and press the “ / ” button to enter sharpness
adjustment menu to adjust sharpness.
7. Press “
/ ” button to select “Color Temperature” and press the “ / ” button to select.
8. Press “
/ ” button to select “Advanced Settings” and press the “ENTER/ ” button to enter
sub-menu.
a. Press “
/ ” button to select “Aspect Ratio” and press the “ / ” button to select.
 Loading...