16 17
• Wipe base with a soft damp cloth or sponge. Do not submerge base
in water. Do not spray the base with water or any other liquid. Base is
not dishwasher safe. Important: Do not use abrasive sponges, cloths, or
cleansers as these can damage the nish.
• Clean all other parts in warm, soapy water. A mild detergent is
recommended. Rinse well and dry thoroughly.
• To clean the lter and blade, hold them under warm running water. Use a
bristled dish washing brush to gently clean pulp from lter. Rinse the
lter from the outside under running water. If your sink has a spray hose
attachment, this is especially effective for loosening ber from the lter and
the blade before placing them in the dishwasher.
• Dry components thoroughly then assemble the machine and turn the power
on to spin out any excess water.
• Make sure unit and parts are completely dry, then store in a cool, dry place.
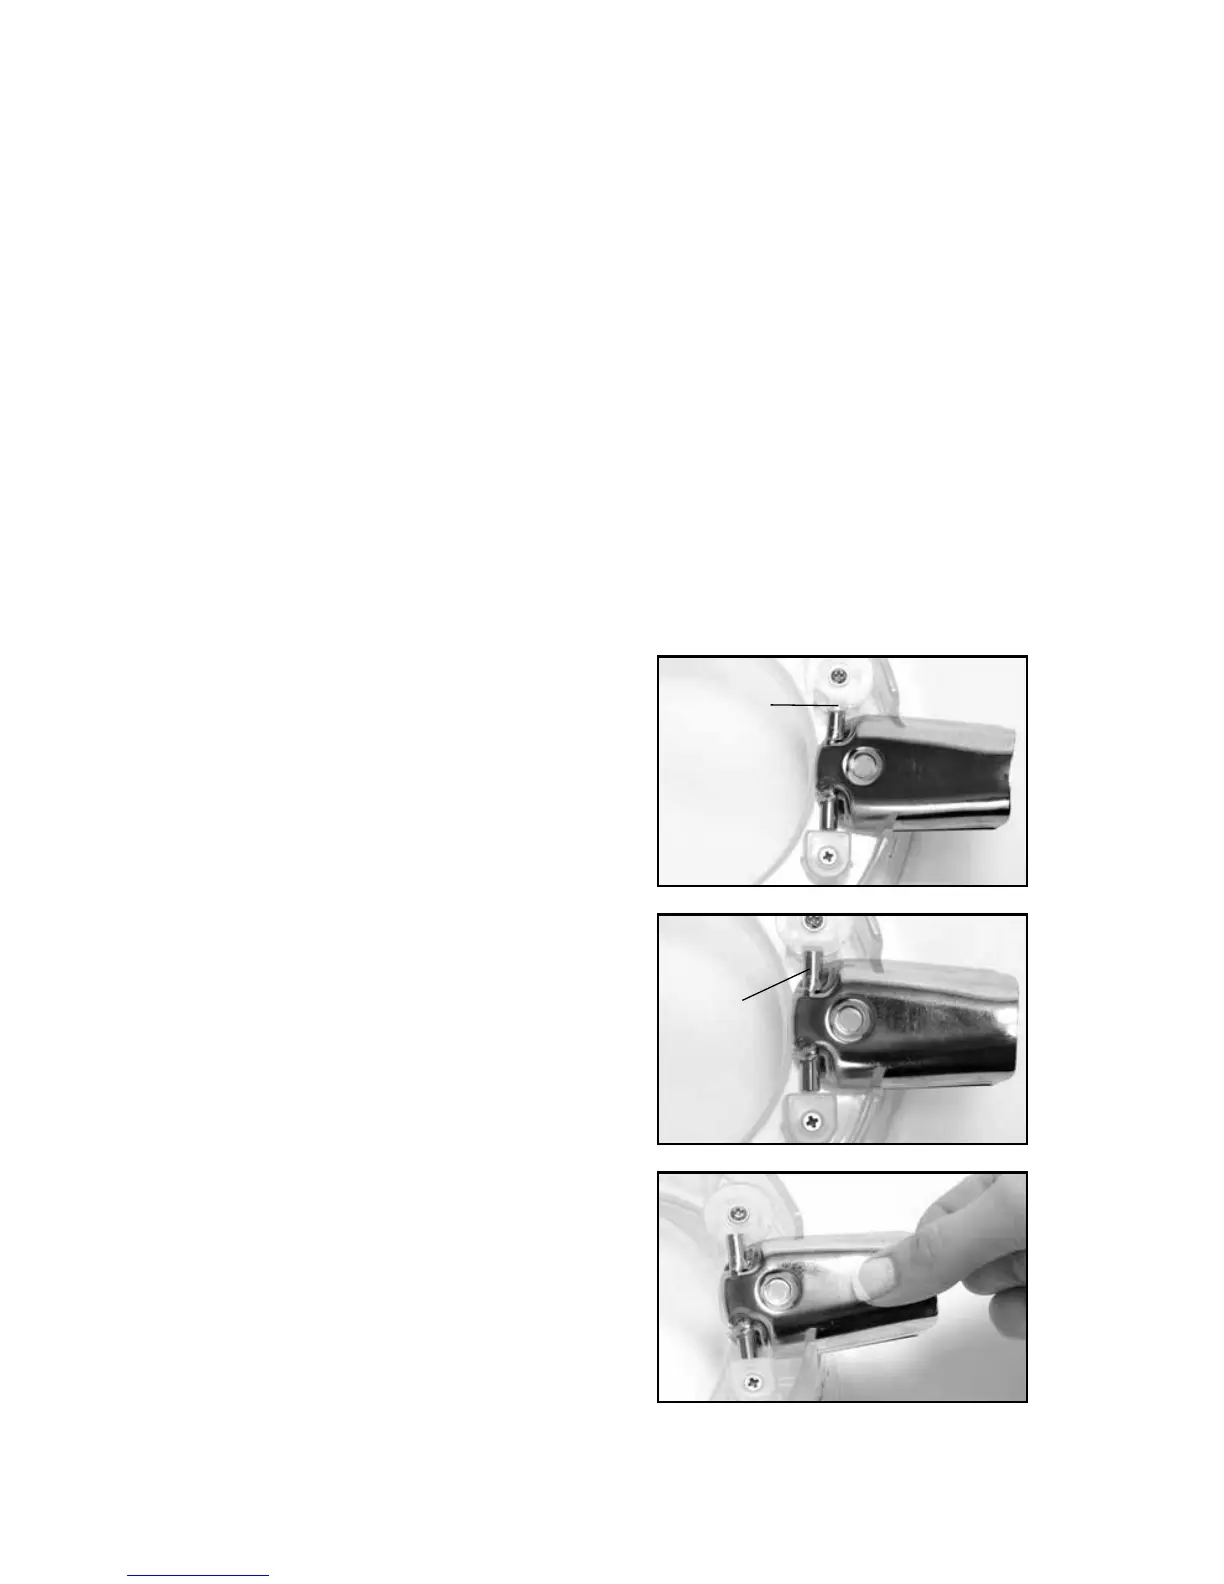
To Clean Juice Spout:
STEP 1
Locate removable juice spout locking
mechanism on the bottom side of
receptacle. Note: Juice spout will be in
the locked position.
STEP 3
Lift up juice spout carefully from
receptacle and remove to clean. To
Reattach: insert juice spout back into
original position and turn the locking
mechanism clockwise to lock into place.
STEP 2
To unlock, turn locking mechanism
counter-clockwise, lining up notch
with juicer spout hinge pivot arm.
IMPORTANT: When reattaching juice spout back into original position make
sure juice spout is in the locked position and tightly secured before use.
UNLOCKED
POSITION
Hinge
Pivot Arm
LOCKED
POSITION
Locking
Mechanism