8 9
5
7
4
6
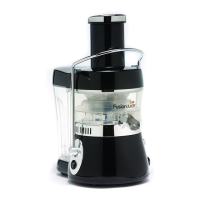
Top Rim
ASSEMBLY (Cont.)
STEP 4
Place lter/blade inside receptacle. Rotate the lter/
blade allowing it to settle into alignment. Press down
on rim of lter/blade rmly to secure.
IMPORTANT: The unit will not start until lter/blade
is secure and rmly in place. The motor will not start
until the unit is properly assembled.
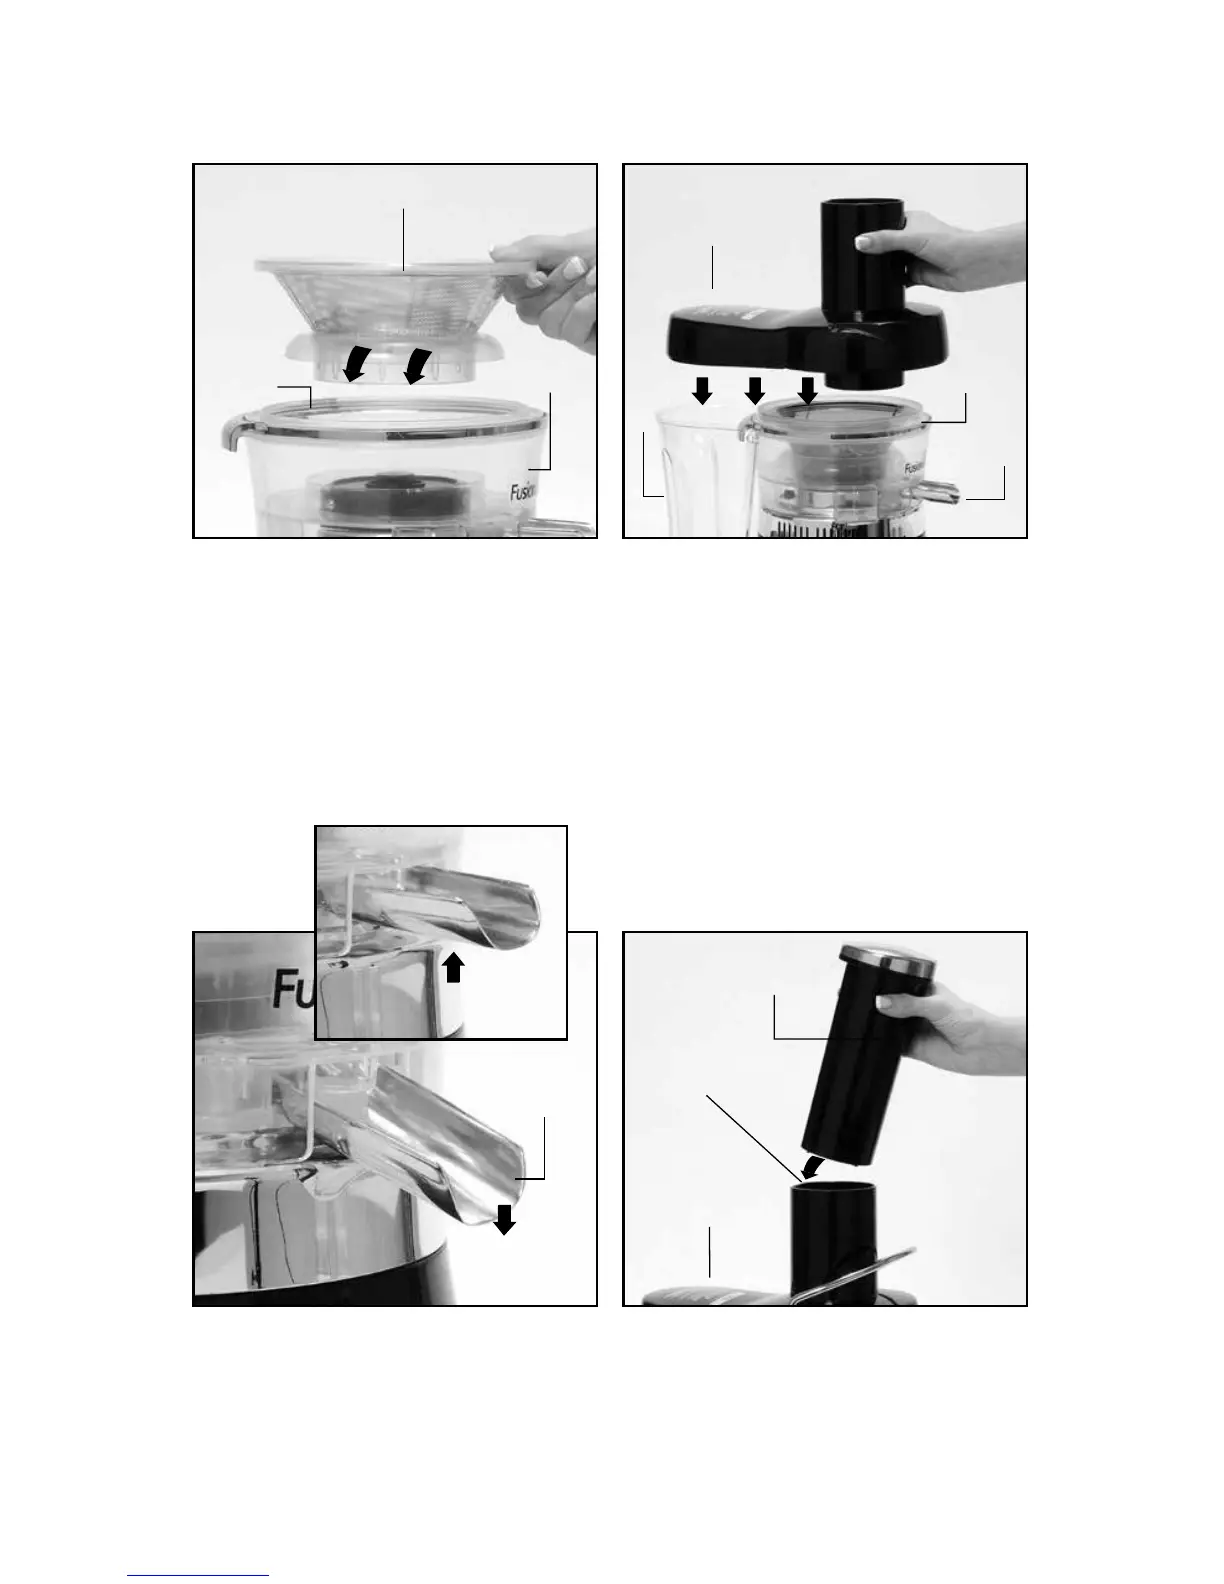
STEP 6
Make sure juice spout is in the downward position. If
the juice spout is left in the upright position the juice
will not ow. It will stay in the receptacle and may
overow from the sides.
STEP 7
Insert pusher into chute. Always use pusher to feed
fruits and vegetables into unit. Push gently, never
force. The blade will do the work.
STEP 5
Place lid with built-in pulp guard on top of receptacle,
making certain it is securely aligned with the pulp
guard facing in the opposite direction of juice spout.
Lock lid into place by lifting locking bar up until it
clicks into grooves located on both sides of the lid.
Make sure locking bar is in the full upright, locked
position.
IMPORTANT: The unit will not start until this bar
is properly locked in place and the pulp collector is
properly assembled.
UPWARD POSITION
DOWNWARD
POSITION
Juice Spout
Lid with Built-In
Pulp Guard
Receptacle
Receptacle
Juice
Spout
Pulp
Collector
Lid with Built-In
Pulp Guard
Pusher
Chute
Filter/Blade