33
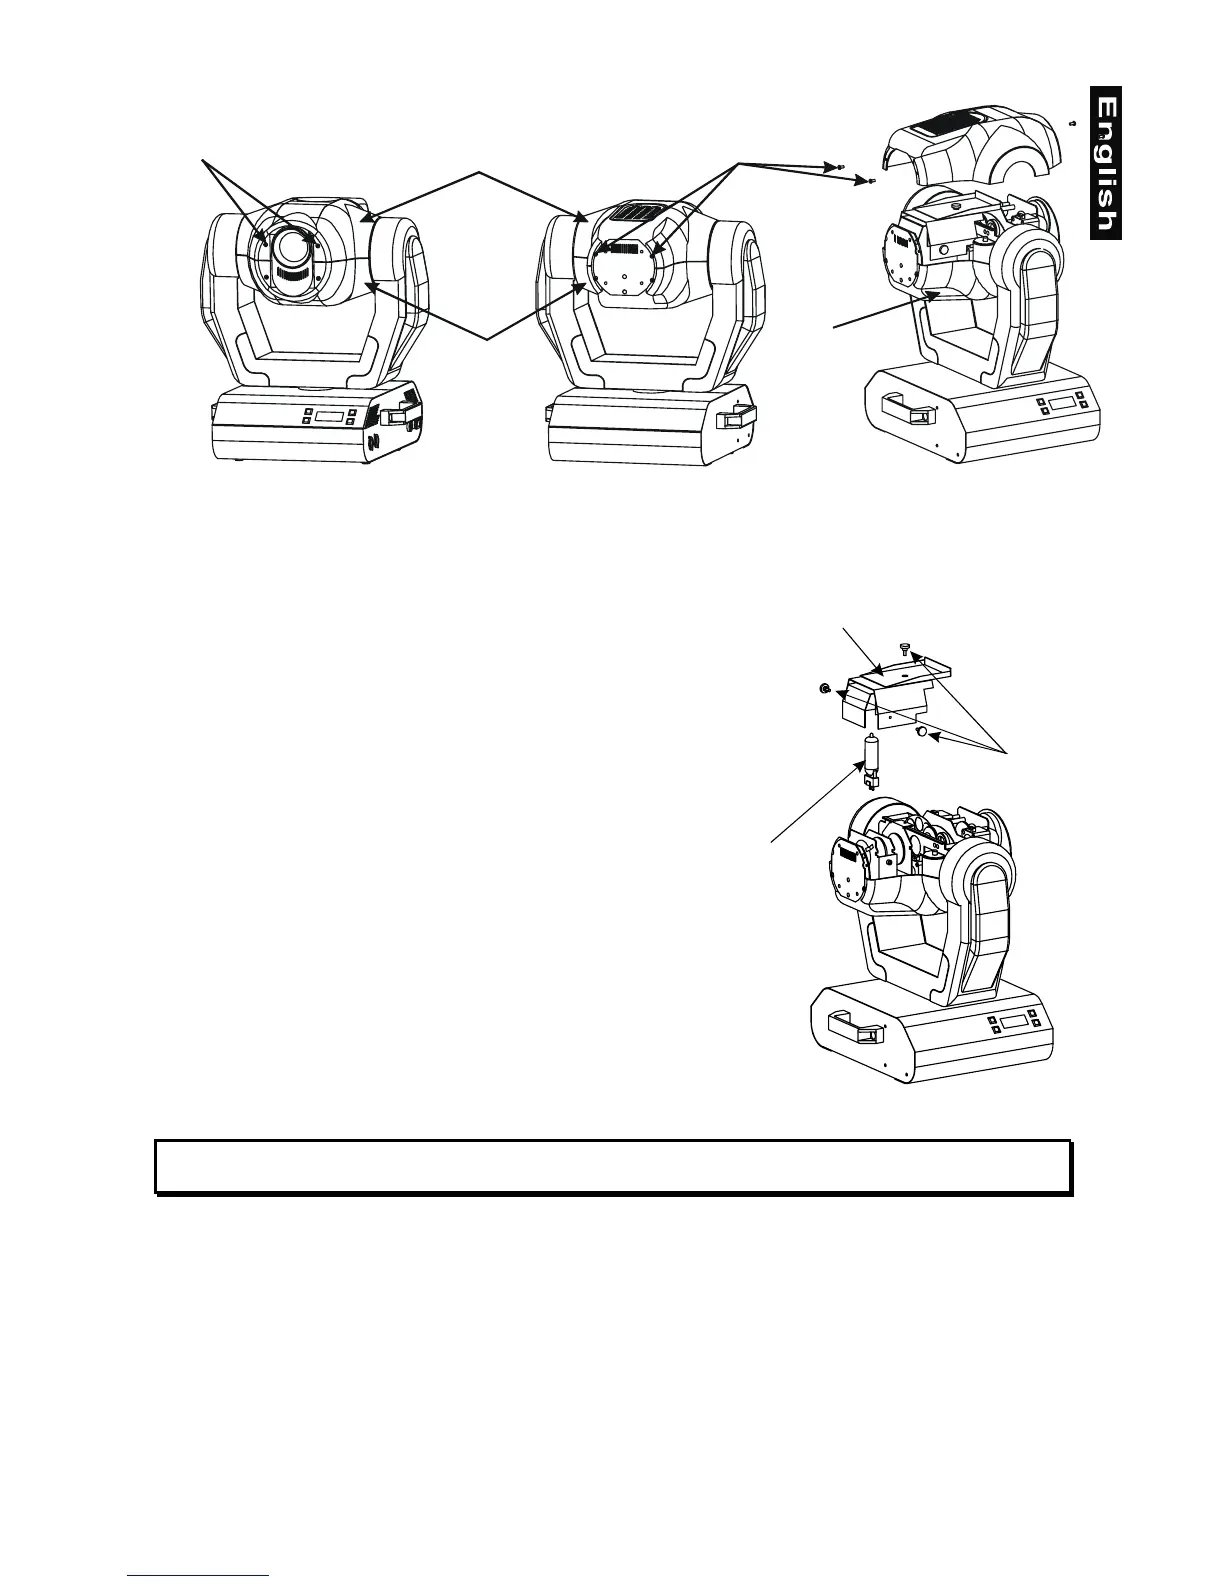
To insert the lamp MSD 230 V/250 W or MSD 230 V/200 W open the top cover of the head (see the
drawings to identify which cover is top) by loosening the 4 Phillips screws on the front and rear sides of the
top cover.
Then open the small lamp cover by loosening the 3 fastening screws (see the drawing).
If changing the lamp, remove the old lamp from the socket. Insert
the lamp to the socket.
Do not install a lamp with a higher wattage! A lamp like this
generates temperatures the device is not designed for.
Damages caused by non-observance are not subject to warranty.
Please follow the lamp manufacturer‘s notes!
Do not touch the glass-bulb bare-handed during the installation!
Make sure that the lamp is installed tightly into the lampholder
system.
Adjust the optimal distance 1-1.5 mm from the lens by turning the
screw
"A"
(see the drawings "Lamp adjustment" below).
Then close the small lamp cover by tighten 3 fastening screws
again.
Reclose the top cover of the head and tighten the 4 Phillips screws.
Before striking the lamp, reset the "LAti" counter in the main menu
of the Control Board, by pressing the "Up" and "Down" buttons in
one time and then confirming with the Enter-button.
Do not operate the fixture with opened housing-cover!
Bottom cover
Bottom cover
Top cover
2 Phillips screws2 Phillips screws
3 fastening screws
Lamp
Lamp cover