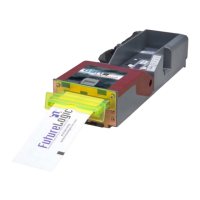
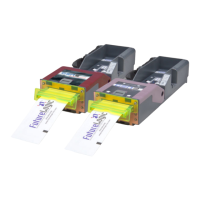
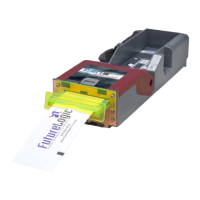
The FutureLogic GEN2 PSA-66-ST2 Printer is a device designed for use in gaming applications, offering a secure and simple means to reload printer firmware. This manual details the process of re-flashing the printer firmware using the FutureLogic, Inc. Download Utility, which can be used to change firmware on one or multiple printers connected via different communication ports.
Function Description:
The primary function of the GEN2 PSA-66-ST2 Printer is to print tickets, likely for gaming or similar applications. It is designed to be integrated into machines, and its firmware can be updated or changed to support different gaming applications or to implement enhancements. The firmware download utility facilitates this process, ensuring secure and controlled updates. The printer supports both RS232 and Netplex interfaces, catering to different communication requirements. The RS232 interface is used with FutureLogic's Evaluation Cable (Part Number 150-00044) or other approved cabling, while the Netplex interface requires a Convert Box and Power Supply.
Important Technical Specifications:
The self-test ticket provides a snapshot of the printer's configuration and firmware details. Key specifications include:
- Model: PSA-66-xxxx (where xxxx likely denotes specific variations)
- Firmware: STPV2.1.1 TKT-2.3 (example version)
- Communication Interface: Serial (RS232)
- Baud Rate: 19,200
- Data Bits: 8
- Parity: NONE
- Handshaking: XON/OFF+HARDWARE
- Print Control:
- Darkness Control: +00%
- Black Bar Index: Enabled
- Print On Demand: Disabled
- Auto Sleep Timer: Off
- System Resources:
- Templates: 1,2,3,4,5,6,7,8,9,A,B (example)
- Print Regions: 1,2,3,4,5,6,7,8,h,9,A,B, C,D,E,F,G,I,J,K,L,N,O,P, Q,R,S,T,U,Z,X,a,b,c,d,e, f,g,i,j,k,l,m,n,o,p,q (example)
- Graphics: (not specified in detail, but implied support)
- Fonts: 3(0), 1(0), 2(0), 4(0), 7(0), 8(0), 5(0) (example)
The printer is compliant with all applied CE standards, as indicated by the CE mark.
Usage Features:
The primary usage feature described is the firmware download process.
- Accessing the Printer: If the printer is installed in a machine, it needs to be accessed by disconnecting power, detaching the coil cable connector (with caution due to tension), and pulling the printer out until it locks.
- Download Utility: The FutureLogic Download Utility software is essential for firmware updates. It can be obtained from the FutureLogic website or a CD-ROM.
- Interface Detection: The utility's main window features an "Auto Download" tab and additional tabs for each communication port. It detects connected printers, displaying "Printer Found" for active ports and "??No Printer??" for inactive ones.
- Firmware Update Process:
- Ensure no download process is active by checking the "Abort Load" or "Stop Download" buttons.
- Select the "GEN2 Printers Only!" checkbox.
- Connect the printer via RS232 (using the evaluation cable) or Netplex (using a Convert Box and Power Supply).
- Power up the printer.
- Preferences Setup (Optional for first-time use):
- Click the "Preferences" toolbar button.
- In the "Auto Download Preferences" dialog, select the communication port to which the printer is connected.
- Click "Apply."
- Click "Select Firmware" to choose the firmware file (.VFX), which must be in the same folder as the utility.
- Click "Open" to load the firmware file.
- Click the "Save Preferences" toolbar button to save settings for future use.
- Click "Back to Prior" to return to the main window, which will display the download file name, firmware version, and ticket template(s).
- Once the printer is detected (indicated by screen image changes), click "Start Download."
- The download process proceeds automatically, with status updates displayed in the "State Area" of the main window.
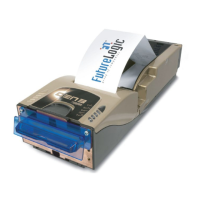
- Verification: After the download, the printer prints a ticket showing the new firmware version and ticket package. This should be compared with the version displayed on the screen to confirm a successful download.
- Printer Status Dialog: Clicking anywhere in the "State Area" of the main window opens the "Printer Status Dialog," providing detailed information about the printer's current state (e.g., Printer is Idle, Head is OK, Voltage is OK, Paper Loaded, etc.).
Maintenance Features:
- Self-Test Ticket: To double-check the results of a firmware update or to verify the printer's configuration, a self-test ticket can be printed. This is done by pressing and holding the "FEED" button while powering up the printer, and releasing it once printing begins. The self-test ticket displays the loaded firmware version, library inventory (Templates, Print Regions, System Resources), and other technical specifications.
- Troubleshooting Failed Downloads: If a download fails, the printer may become unusable, with its memory flushed or unable to boot. In such cases, the user is instructed to repeat the download steps. If repeated attempts are unsuccessful, the user should follow their RMA (Return Merchandise Authorization) procedure for the printer.
- Version Control and Verification: The firmware version number is printed on the ticket after a successful download, allowing for direct comparison with the version displayed on the screen to ensure correct installation.
- Caution during Download: It is crucial NOT to power down the printer or disconnect the RS232 cable during the download process, as this can render the printer unusable.
The GEN2 PSA-66-ST2 Printer is designed for robust operation in its intended environment, with clear instructions for firmware management and basic troubleshooting.