instrument interface or poor contact; to avoid the error caused by the user
to replace or lengthen the test line, the line resistance check function is
specially designed to measure the low-value resistance more accurately.
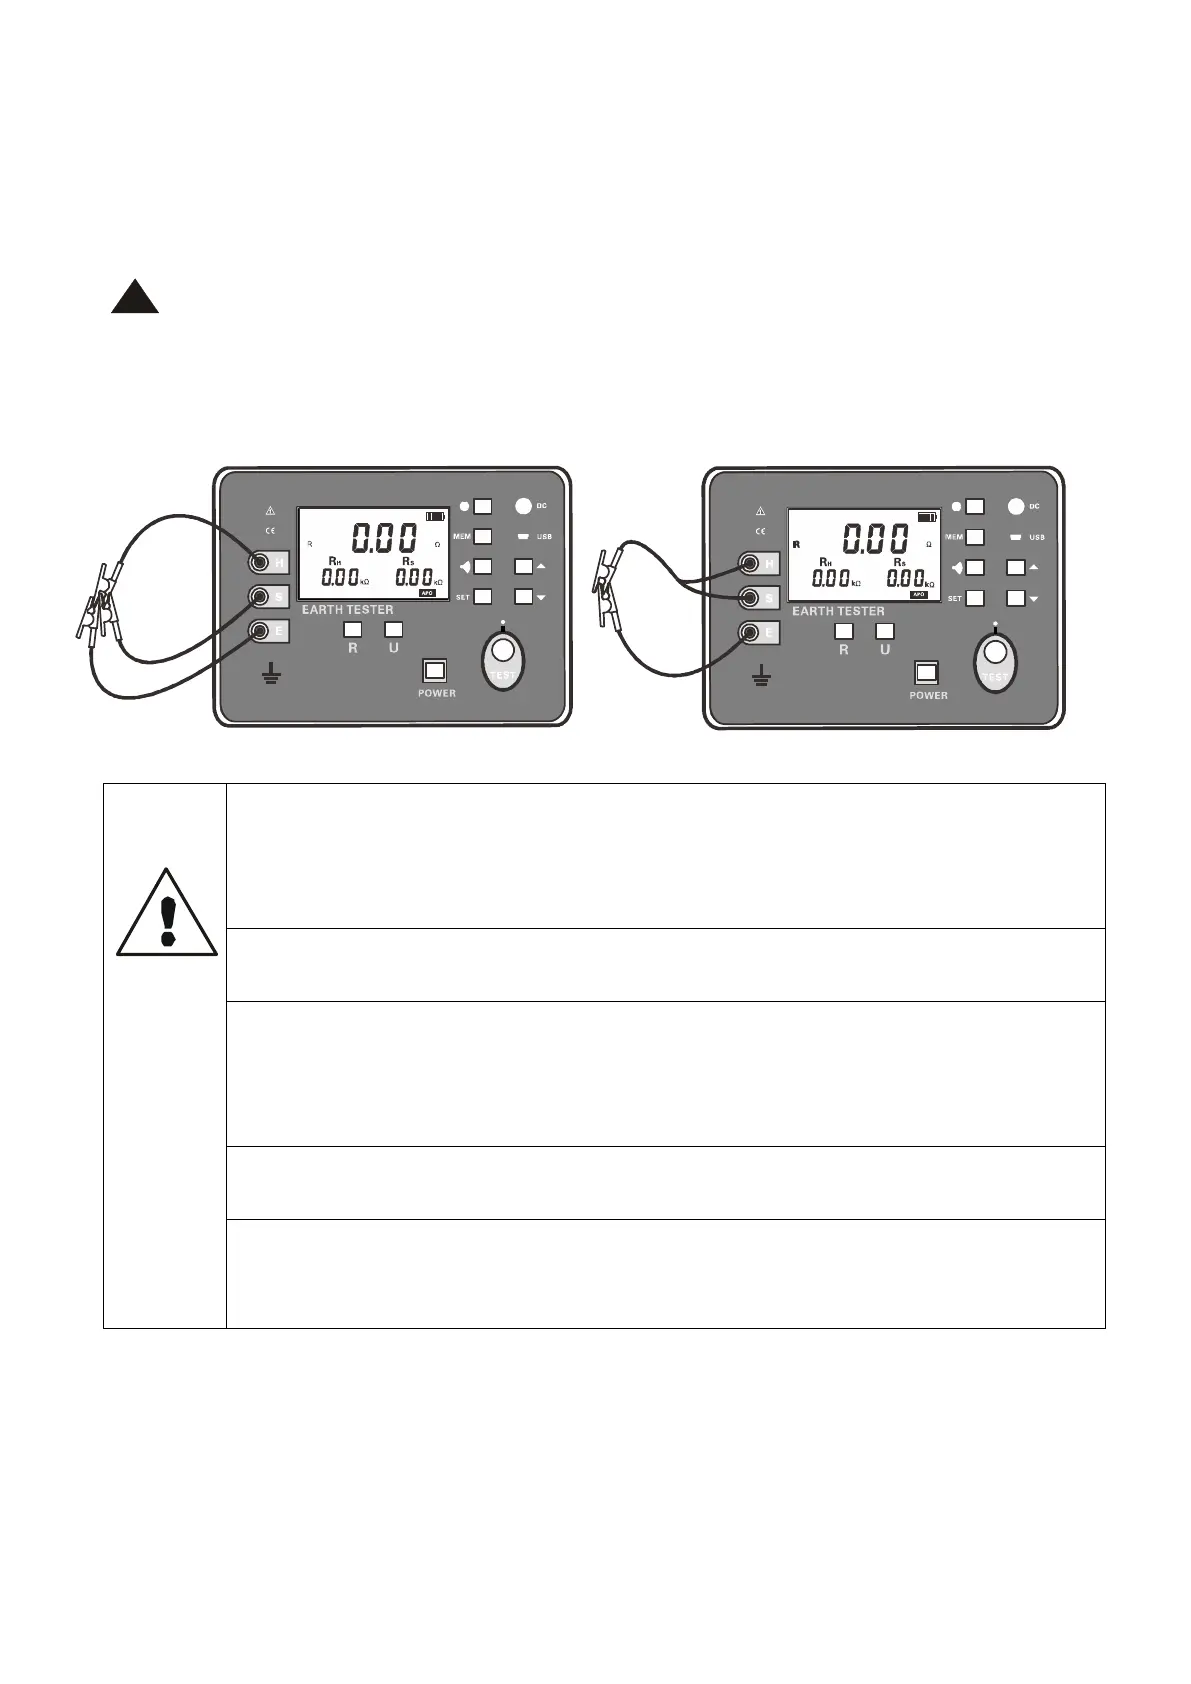
After connecting the test line and the meter, short the other end of all
the test lines. As shown in the figure below, press the function button R
to switch to the corresponding ground resistance measurement position. Press
“ ” key to start calibration, LED indicator flashes during calibration,
LCD countdown display, LCD display after calibration.
Shutdown does not save the verification line resistance. The next time
it is turned on, it needs to be recalibrated.
5.Grounding Resistance Precision Measurement
Before measuring, please make sure that the plug of the test line
is fully inserted into the corresponding interface of the meter.
If the plug is not fully inserted or contacted, the measurement
value may be incorrect.
For low-value ground resistance measurement, the measurement is
more accurate after line resistance check
When the grounding resistance is measured, the maximum voltage
of about 50V will be generated between the E and H interfaces!
Do not apply voltage between the measurement interfaces. Please
be careful to avoid electric shocks.
When measure ground resistance , the test line can not be mixed,
the test line should be measured separately
The auxiliary grounding rods H, S can be buried in places where
there is a large amount of water, so as to reduce the auxiliary
grounding resistance value and can reduce the indication error.
After the precision measurement grounding resistance adopts three-wire
connection, the auxiliary grounding rod and the test line are all connected,
switch the function to measure the resistance R mode, and press the “TEST”
key to start measure.LED flashes during measurement, LCD countdown display,
light off after measurement is complete, LCD shows measured value.From the
measured object, every 5 to 10 meters, insert the auxiliary grounding rod
into the earth in a straight line.Connect the grounding test lines (red,