11
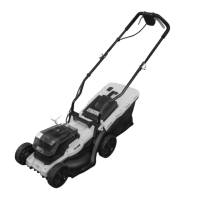
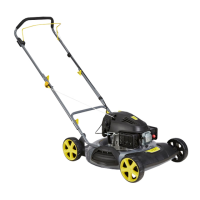
COMPONENTS & CONTROLS (FIG.1)
PACKING CONTENTS
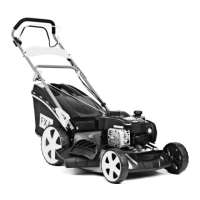
• Lawn mower
• Upper handle assembly
• Lower handle assembly
• Grass catcher
• Upper handle locking knob and bolts (2)
• Lower handle locking knob and bolts (2)
• Cable holder
• Key
• Operator’s Manual
WARNING! If any parts are damaged or missing do
not operate this product until the parts are replaced.
Failure to heed this warning could result in serious
personal injury.
Do not attempt to modify this product or create
accessories not recommended for use with this
product. Any such alteration or modification is misuse
and could result in a hazardous condition leading to
possible serious personal injury.
UNPACKING
Caution! This packaging contains sharp objects. Take
care when unpacking. Remove the machine, together
with the accessories supplied, from the packaging.
Check carefully to ensure that the machine is in good
condition and account for all the accessories listed in
this manual.
Also make sure that all the accessories are complete.
If any parts are found to be missing, the machine and
its accessories should be returned together in their
original packaging to the retailer.
Do not throw the packaging away, keep it safe
throughout the guarantee period, then recycle if
possible, otherwise dispose of it by the proper means.
Do not let children play with empty plastic bags due
to the risk of suffocation.
CHARGING THE BATTERY PACK
Warning! Only charge in compatible 18V chargers.
Use of other chargers may result in fire, damage or
serious personal injury.
The battery pack for this tool has been shipped in a
low charge condition to prevent possible problems.
Therefore, you should charge it until the green LED on
the front right hand side of the charger comes on.
Note: Batteries will not reach full charge the first time
they are charged. Allow several cycles (operation
followed by recharging) for them to become fully
charged.
First read the safety instructions then follow the
charging instructions.
Plug the charger into a standard 230V~50Hz mains
socket outlet, the green LED on the front left hand
side of the charger will illuminate.
Do not allow the cable to become knotted or kinked.
Place the battery pack into the charger base.
(Note the battery has raised ribs which allows it to fit
into the charger only one way). Time the charge for 60
minutes only.
The red LED on the front right hand side of the
charger will illuminate to indicate charging is in
progress. A green LED will illuminate when the battery
is fully charged.
Unplug the charger when not in use and store it in a
suitable storage cabinet.
Avoid charging your battery in freezing conditions as
charging power will not be sufficient.
When charging more than one battery pack in
succession allow at least 30 minutes for the charger
to cool down before charging an additional battery.
Always remove the battery pack and store it safely
when the tool is not in use.
Caution: If at any point during the charging process
none of the LEDs are lit, remove the battery pack from
the charger to avoid damaging the product. DO NOT
insert another battery.
1. Upper handle hand grip
2. Blade control lever
3. Upper handle
4. Lower handle
5. Locking knob and bolt
6. Impact protector
7. Square neck bolt
8. Battery compartment cover
9. Side discharge chute
10. Wheels x 4
11. Height adjustment lever
12. Collection box
13. Safety control box
14. Collection box handle
15. Battery cover release catch
16. Battery 1 (not included)
17. Battery 2 (not included)
18. Key
19. Safety button
 Loading...