3 IMPORTANT! Basic Assembly - Safety instructions
Beforeproceedingtooneofthethreecongurationoptionsinsections4,5,or6,dothebasic
assemblyofthetestxtureaccordingtostep1-4:
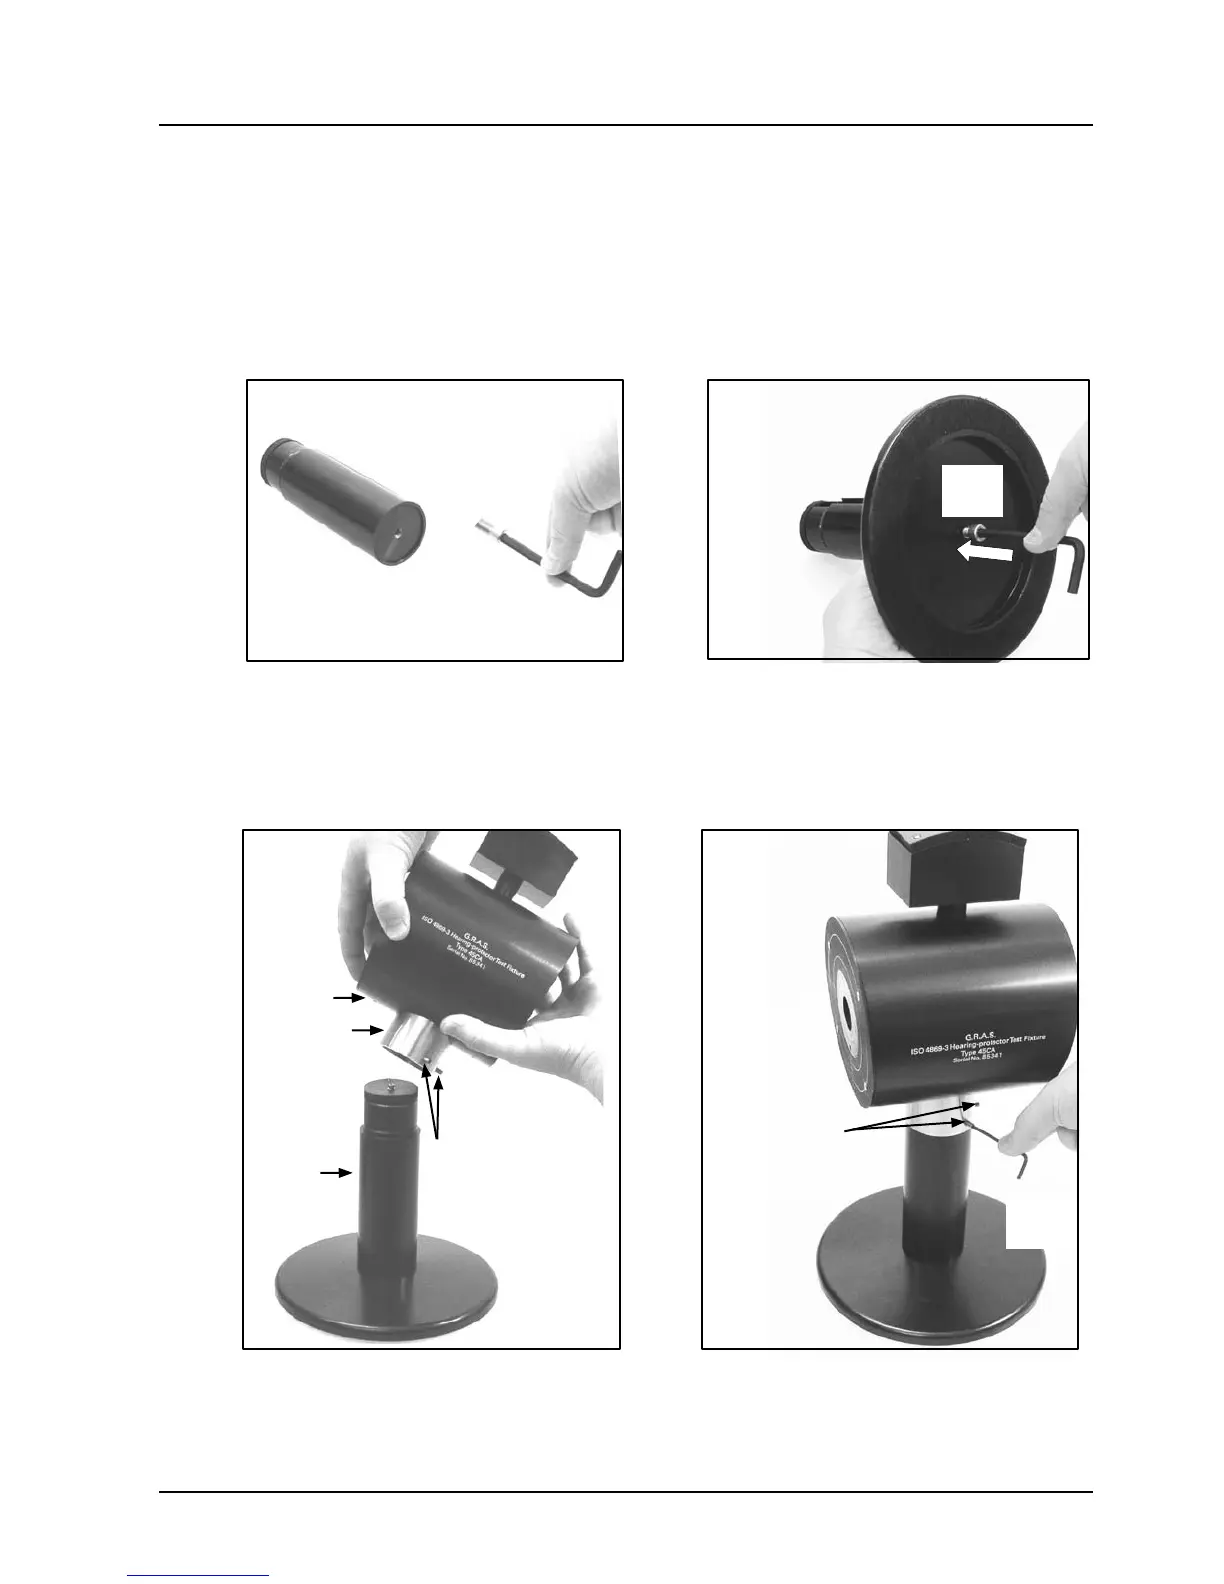
1. Placethetestxtureneckontoasolidtable,andndthesuppliedscrewand6mmAllenkey
(Fig. 3.1).
2. Place the screw into the bottom of the resilient base, and screw the base onto the neck with
the Allen key (Fig. 3.2).
Fig. 3.1 Fig. 3.2
Testxture
neck
Resilient base
3. After making sure both of the 1.5 mm Allen grub screws in the head’s steel tube are
loosened to their extreme positions, place the head onto the pedestal and carefully slide the
steel tube onto the top of the pedestal’s neck (Fig. 3.3).
4. Tighten both of the 1.5 mm Allen grub screws on the steel tube (Fig. 3.4).
IMPORTANT!
Tighten both of
these 1.5-mm
Allen grub screws
Fig. 3.3 Fig. 3.4
Testxture
head
Pedestal
Steel tube
1.5 mm Allen grub
screws loosened to their
extreme positions
Testxtureneck
Screw
6 mm
SK1544
Allen key
6 mm
YY0019
Allen key
1.5 mm
YY0012
ATTENTION!
When assembling head and pedestal, always make sure to tighten both of the 1.5 mm Allen
grub screws in the steel tube as indicated in Fig. 1.1.
Screw
6 mm
SK1544
 Loading...