T
T
F
F
-
-
D
D
G
G
C
C
A
A
L
L
-
-
P
P
A
A
K
K
F
F
i
i
x
x
t
t
u
u
r
r
e
e
M
M
a
a
n
n
u
u
a
a
l
l
MIC TRAC MT-3000
3
2010 Gagemaker, LP
RCDMMT300010-10
Materials Needed:
• MIC TRAC MT-3000 base unit and CPU readout • 5/32" hex wrench
• Depth micrometer • 50 in/lb torque wrench
•
Depth gage fixture (TF-DG) and cap screws
•
• Flat face anvil (TF-1F Block) cap screws and washers • ZEP I.D. Red cleaner
• Depth gage support (TF-SS Block), for rods 6” and up
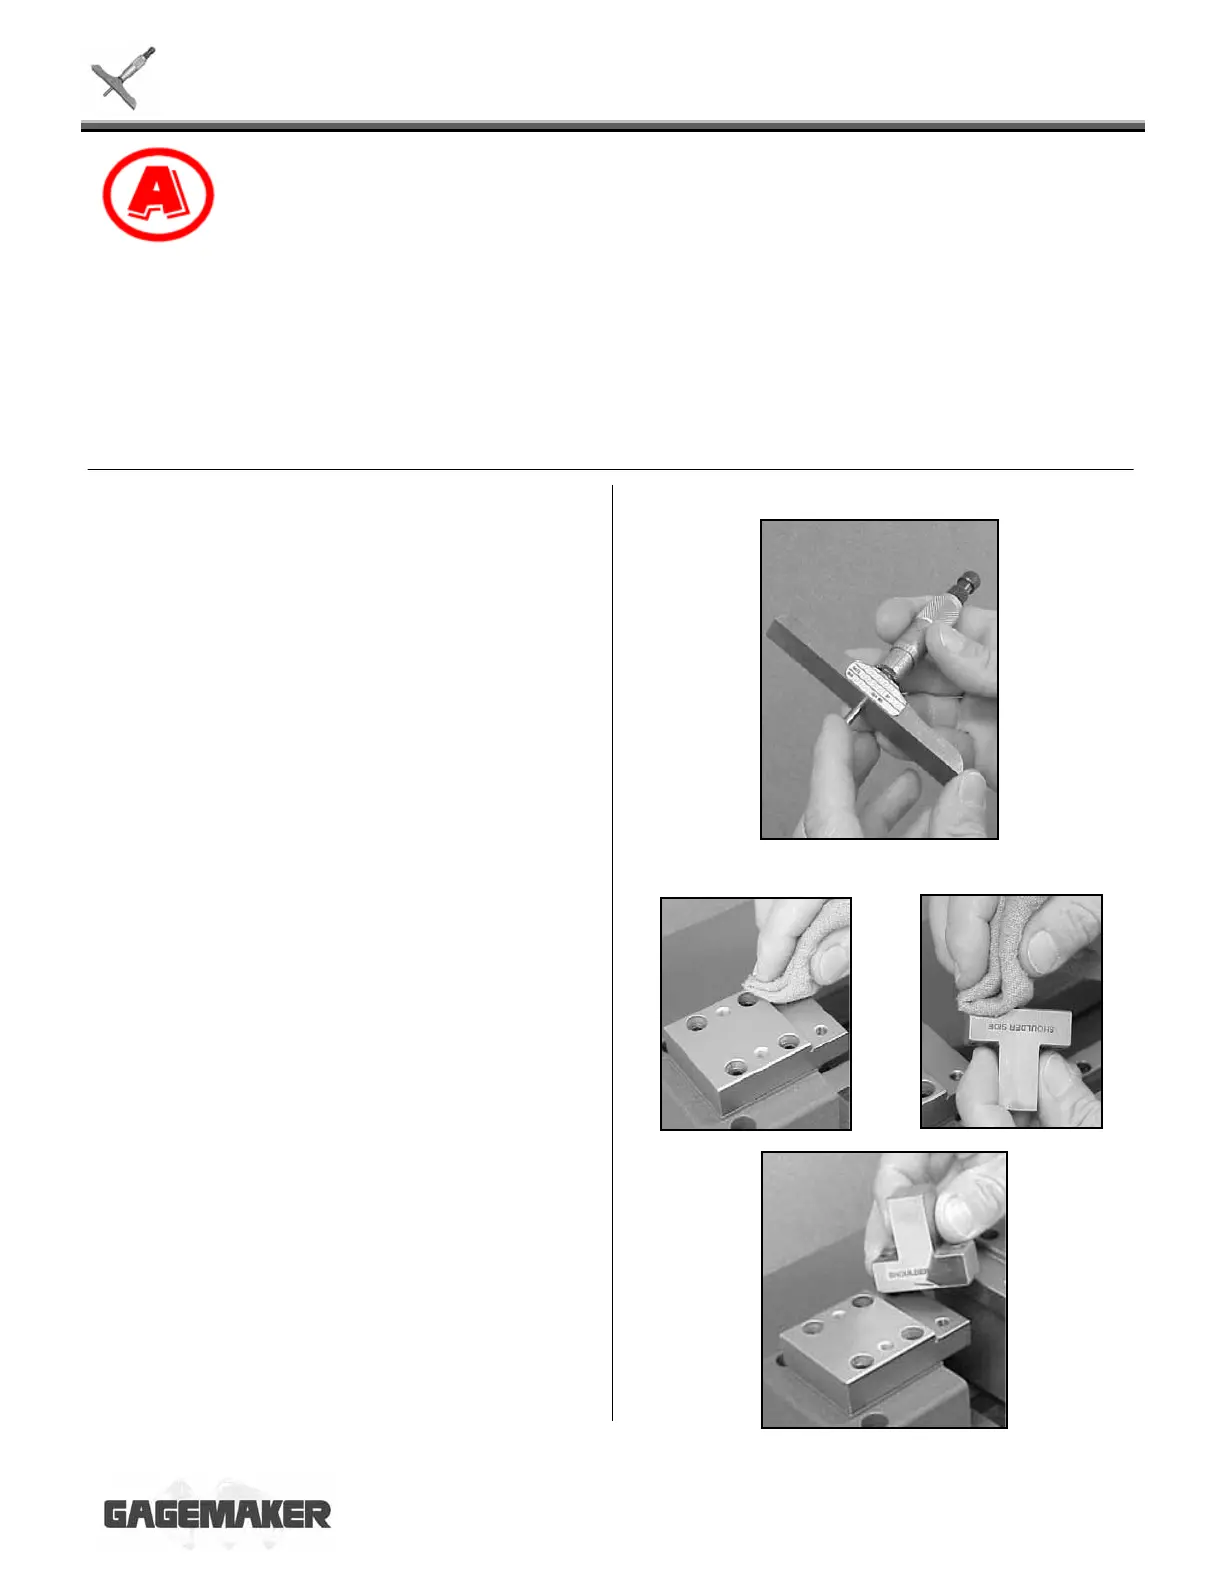
1. Inspect the depth micrometer visually as
follows:
• Check for damage and excessive wear.
• Check for burrs, nicks and wear on measuring
faces.
• Check for damage to measuring rods, rod
seating surfaces, and rod reading surfaces.
• Inspect for slack in the spindle thread by
pushing the assembly in and out. Adjust to
remove excess play.
• Check for proper function of the friction or
ratchet stop and spindle locking device.
• Check for smoothness of travel by rotating the
thimble throughout the range.
• Ensure all rods are straight.
2. Clean both of the receiver pads and the
mounting surfaces of the flat face anvil using
the cloth and ZEP I.D. Red cleaner.
3. Locate the left flat face anvil. Place the
shoulder side of the anvil against the left
receiver pad shoulder.

 Loading...