T
T
F
F
-
-
D
D
G
G
C
C
A
A
L
L
-
-
P
P
A
A
K
K
F
F
i
i
x
x
t
t
u
u
r
r
e
e
M
M
a
a
n
n
u
u
a
a
l
l
MIC TRAC MT-3000
4
2010 Gagemaker, LP
RCDMMT300010-10
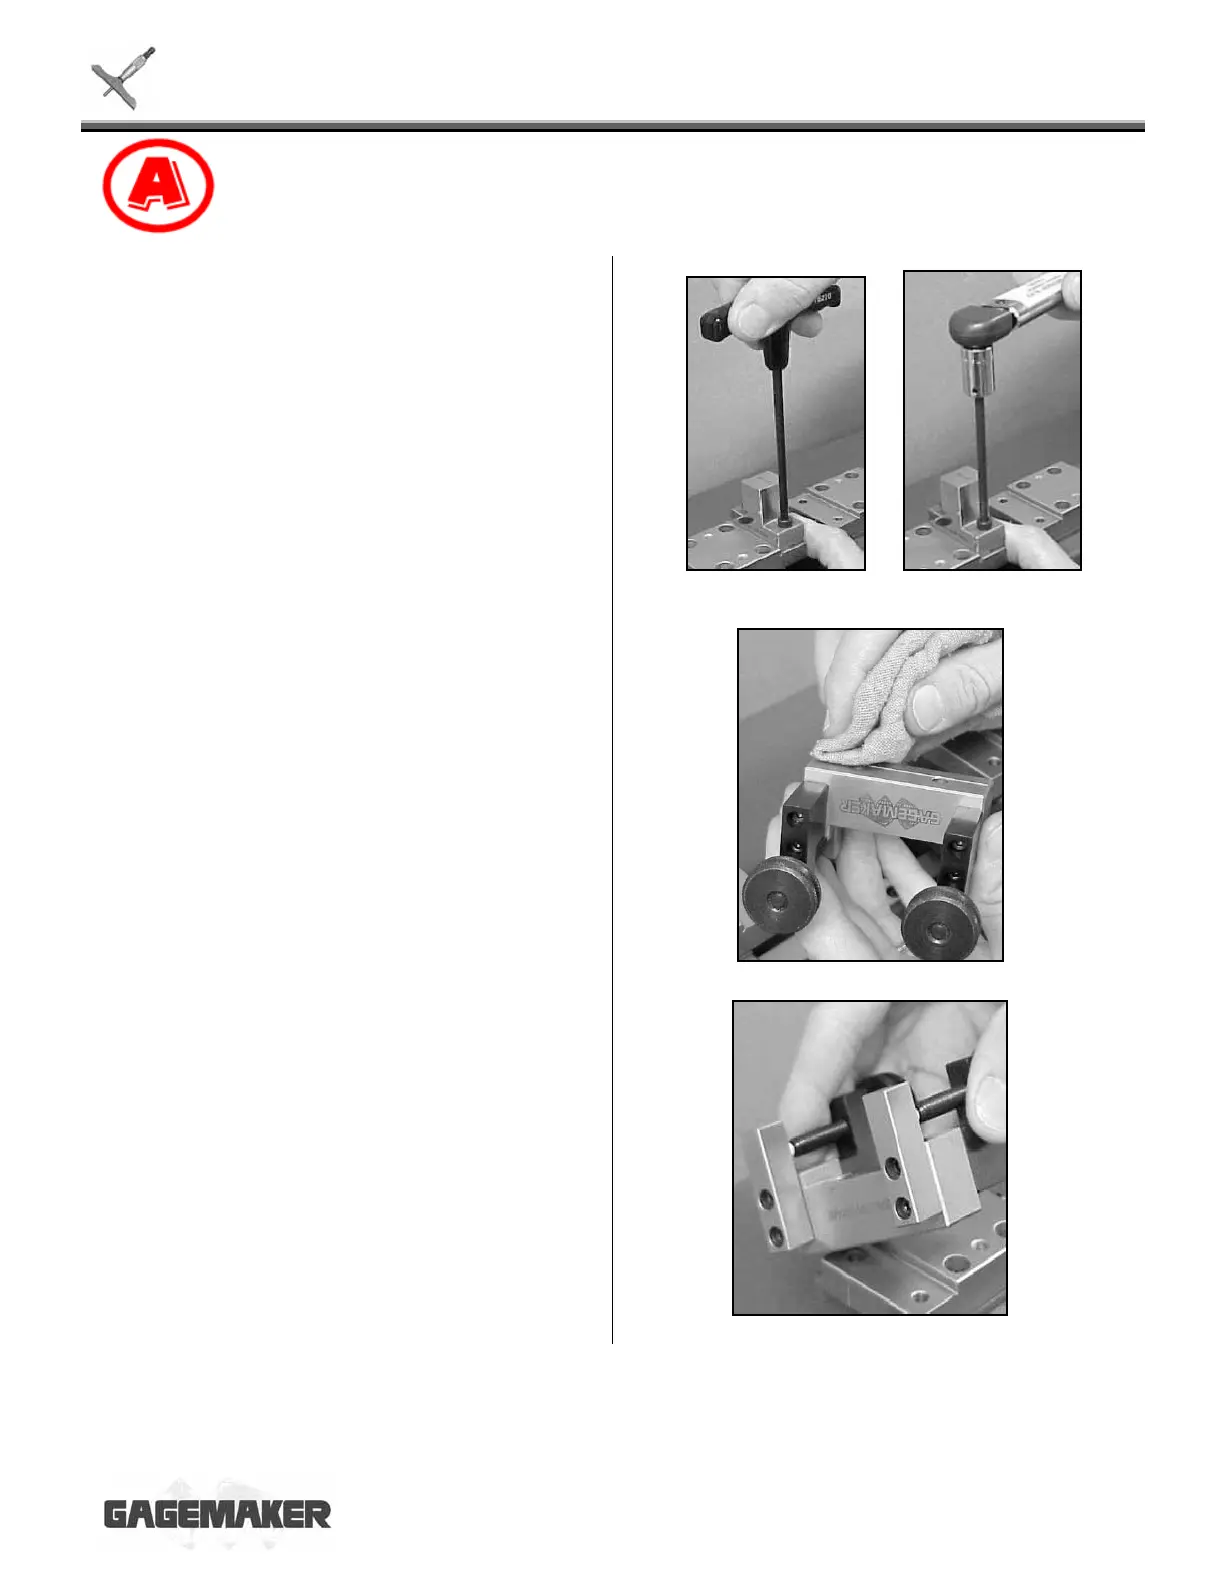
4. While holding the anvil against the receiver pad
shoulder, insert the two cap screws with
washers into the holes on either side of the
fixture.
5. While applying pressure toward the receiver
pad shoulder, use a 5/32" hex wrench to
slightly tighten the screws.
6. Use a 50 in/lbs torque wrench to secure the
cap screws.
7. Locate the depth gage fixture and clean the
mounting surfaces with the cloth and ZEP I.D.
Red cleaner.
8. Place the depth gage fixture against the right
receiver pad shoulder with the thumb screws
facing to the right. Insert the cap screws.

 Loading...