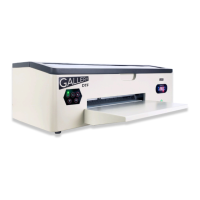
The Gallery 1390R DTF Printer is a Direct-to-Film (DTF) printing device designed for creating high-quality transfers for various applications. This user manual provides comprehensive instructions for setting up, operating, and maintaining the printer, ensuring optimal performance and longevity.
Function Description
The Gallery 1390R DTF Printer is primarily used for printing designs onto DTF film, which can then be transferred onto garments and other substrates. It utilizes a multi-color ink system, including white ink, to produce vibrant and detailed prints. The printer is designed to be user-friendly, with clearly labeled controls and a straightforward setup process.
Important Technical Specifications
The printer features a robust design with several key components:
-
Front Left Control Panel: This panel houses five buttons for controlling various printer functions:
- POWER (1): Turns the printer on and off. A solid green light indicates the printer is ready, while a blinking green light signifies it is busy.
- MAINTENANCE (2): Releases the print head from the capping station, allowing access for manual cleaning.
- END JOB (3): Stops the current job or pauses a job in progress.
- ENTER (REVERSE) (4): Pulls film back into the printer.
- EXIT (FORWARD) (5): Pushes film forward out of the printer.
- Note: The front panel Green LED must be ON whenever the PC wants to communicate with the printer.
-
Front Right Control Panel (Thermostat): This panel features a digital display and control buttons for managing the platen heater temperature.
- SET: Used to set the target temperature (default is 40 degrees Celsius).
- PLUS (+): Increases the target temperature.
- MINUS (-): Reduces the target temperature.
- CONFIRM: Saves the new target temperature to memory. The platen heater dries the color ink layers so that white ink can be printed on top almost immediately.
-
LED to Monitor White Ink Circulation: A blue LED on the front of the printer indicates the status of the white ink circulation system.
- BLUE: All parts of the ink circulation system are active and functioning correctly.
- GREEN: White ink stirring is actively occurring.
- PURPLE: White ink circulation through the lines is actively occurring.
- This LED provides a quick visual confirmation of the printer's readiness and health.
-
Back of the Printer:
- USB Port: Connects the printer to a Windows PC.
- Main Power Switch: The main power switch should always be left ON so that automatic ink circulation can occur.
- Film Roller and Holes: The back of the printer has screw holes to attach the film roller and holes for the waste ink bottle.
-
Right Side of Printer:
- Refillable Ink Tanks: The right side of the printer houses the refillable ink tanks for CMYK and white inks.
- Auto-Ink-Priming Button: This button avoids the need for needles and is used to pull ink through the lines by pressing and holding it.
Usage Features
The Gallery 1390R DTF Printer is designed for ease of use, from initial setup to daily operation.
Setting Up Your Gallery 1390R DTF Printer:
- Step 1: Remove Shipping Bracket: Remove the shipping bracket next to the printhead by opening the top cover and unscrewing it.
- Step 2: Attach Waste Ink Bottle: Attach the waste ink bottle holder to the back of the printer and connect the empty bottle to the waste ink line.
- Step 3: Screw Film Roller Brackets: Screw the left and right film roller brackets to the back of the printer.
- Step 4: Attach Film Flanges: Attach one flange to the film roller bar, place the film on the bar, and then attach the second flange.
- Step 5: Cut Film Edge: Cut the film edge to be exactly perpendicular to the film sides to ensure straight feeding.
- Step 6: Place Film and Feed: Place the film into the printer and press the "Exit (Forward)" button on the front control panel to pull the film through the printer.
- Step 7: Load Ink: Before loading ink, install the software and run a blank test job to verify that no circuitry or connections were damaged during shipping. Operating the printer for a short period without inks will not harm the printer.
Setting Up the PC Software (Windows 10/11):
- Step A: Find Activation Key: Locate the card in the printer box with the download link for the software and your software activation code.
- Step B: Download and Install RIP Software: Download and install the Gallery DTF RIP software. Select "Gallery 1390 Printer" and ensure the USB cable is attached and the printer front power LED is Green.
- Step C: Install Printer Driver: During installation, select "EPSON Stylus Photo 1390" as the communications port.
- Step D: Activate Software: Under the HELP menu, activate your software using the license key number on the card in the printer box. A video tutorial for the full software download/install sequence is available at galleryprinters.com/videos.
Continued Setup and Operation:
- Step 8: Load and Test Film: Once the software is installed, load a test film and try to print it. Observe that the printhead moves back and forth many times, the film advances, and the front control panel blinks green while printing and goes solid green shortly after printing ends.
- Step 9: Shake and Load Inks: Shake ink bottles. Pour ink into the ink tanks (right side of printer). Press/hold the auto-ink-priming button to feed ink through the lines.
Maintenance Features
Regular maintenance is crucial for the optimal performance and longevity of the Gallery 1390R DTF Printer.
Ink Management:
- CMYK Inks: Perform best when used within 9-12 months. Gallery bottles show date information.
- White Ink: Perform best when used within 6-9 months. Gallery bottles show date information.
- Powder Shelf Life: Powder, as soon as the white ink is not pooling and the ink appears sticky, not runny. If you print large contiguous areas with pooling white, you may have to wait several minutes, otherwise you can powder almost immediately.
- Cured DTF Print Shelf Life: Once cured, a DTF print lasts before it needs to be heat pressed onto a garment for up to a year from when they were created.
Cleaning and Troubleshooting:
- White Ink Circulation: The LED monitor helps ensure white ink is properly circulating, preventing clogs.
- Print Head Maintenance: The "MAINTENANCE" button releases the print head for manual cleaning.
- Nozzle Checks: Perform a nozzle check regularly. If the nozzle pattern does not look complete for one or more colors, perform additional head cleaning cycles.
- Foaming: Too many head cleanings in a row can cause foaming, which adds air. Pause 5-10 minutes between every 3 head cleanings.
Troubleshooting Guide:
-
Printer Will Not Print:
- Check that both rear power switch and front panel Green LED printer power switches are ON.
- On Windows PC, check under Settings->Devices->Printers&Scanners that EPSON Stylus Photo 1390 is not Offline.
- In Gallery DTF RIP software, check under Devices->Manage_Devices->Device_Properties that the Gallery 1390 port shows EPSON Style Photo 1390.
- If the above are checked, in the RIP software, try running a head clean to see if the printer responds.
-
Red LEDs Flash In An Alternating Fashion:
- This indicates that the waste ink counter has reached its maximum limit. Starting in 2024, the counter can be reset within Gallery DTF RIP software under: Devices->ManageDevices->DeviceProperties->ResetInkWastePadCounter.
- If RIP software issued prior to 2024 requires use of an external program, please contact your distributor for assistance.
-
Red LEDs Flash Simultaneously:
- This represents an error. Most likely cause is that the encoder ribbon cable has dust that needs to be cleaned. Contact USA based support to assist in reading the error code or cleaning the ribbon cable.
-
Red Ink LED Comes On Solid:
- This means that one of the ink channels is starved for ink. In most cases, this condition will clear itself and printing will continue. Otherwise a single short press of the ink button will clear the black channel and a short double-press will clear the other color channels.
-
One Of My Colors Is Not Printing, Or White Ink Is Not Printing Correctly:
- Check to see that the ink lines feeding the printhead do not have any air gaps. Press the auto-priming button.
- Perform a couple of head cleanings.
- Print a nozzle check. If the nozzle pattern does not look complete for one or more colors, perform additional head cleaning cycles.
- Note that performing too many head cleanings in a row can cause foaming which adds air. Pause 5-10 minutes between every 3 head cleanings.
The Gallery 1390R DTF Printer is a reliable and efficient solution for DTF printing, offering a balance of performance, user-friendliness, and maintainability.