en
4
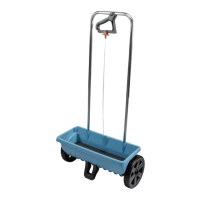
en INTENDED USE
The GARDENA Spreader L is intended to spread spreading material and
lawn seeds.
Do not use the product to spread chippings.
ASSEMBLY
To assemble the wheels and the foot [Fig. A ]:
1. Put the wheels
1
on the axles and push the hubcaps
2
on the axles
until it audibly engages (if necessary use a hammer).
2. Slide the foot
3
on the spreader and tighten the screws
4
.
To assemble the holms and the handle [Fig. B ]:
3. Slide the lower holm
5
into the spreader and tighten the screws
6
.
4. Slide the upper holm
7
into the lower holms
5
and tighten the screws
6
.
5. Slide the handle
9
on the upper holm
7
, put the screw
8
through the
hole in the upper holm
7
put the mother
0
on the screw
8
and tighten
the screw
8
.
To assemble the wire rope [Fig. C / D ]:
6. Route the wire rope
q
from above through the opening in the spreader.
7. Put the wire rope
q
into the holder
w
and pull the wire rope
q
until it
audibly engages.
8. Assemble the wire rope
q
into the clip
e
as shown in Fig. C.
9. Hook the clip
e
into the handle
r
so that the lower, half-width riders
are pushed onto the handle.
OPERATION
To adjust the spreading quantity [Fig. D ]:
Adjust the spreading quantity you require by referring to the dosage table
(see www.Gardena.en) on the scale
r
at the handle. Comply with the
instructions given by the spreading material manufacturer.
1. First pull the quantity adjustment clip
e
vertically upwards, slide the clip
to the desired position to the right or left and let the clip engage.
2. Fill in the spreading material.
Release the handle
9
during filling, interrupting the spreading process and
transport.
Note: Due to the different sizes of fertiliser and seeds, the infor-
mation on the dosage table is given for reference purposes
only. Always observe the safety instructions of the fertilizer manu-
facturer when applying an iron fertilizer.
To measure the spreading quantity [Fig. E ]:
A 1 m
2
smooth, dry and clean test area is required (e. g. garage).
1. Clean the test area (e.g. with a vacuum cleaner/broom).
2. Place the quantity adjustment clip
e
in position 4 and spread the
spreading material over a length of 2.15 m (corresponds to a 1 m
2
scattering area).
3. Sweep / vacuum up the spreading material, weigh it and compare it with
the recommended manufacturer specifications.
4. Repeat steps 1 to 3 with adjusted spreading adjustment
e
position until
the scattered spreading material quantity corresponds with the manu-
facturer specifications.
MAINTENANCE / STORAGE
[Fig. F ]: After use open the cylinder cover
t
and empty and clean
the spreader. If necessary, dispose of any spreading material residue
in accordance with local regulations.
WARRANTY / SERVICE
Product registration:
Please register your product at gardena.com/registration.
Service:
Please find the current contact information of our service on the back page
and online:
• United Kingdom: https://www.gardena.com/uk/support/advice/contact/
• Australia: https://www.gardena.com/au/support/advice/contact/
• New Zealand: https://www.gardena.com/nz/support/advice/contact/
• South Africa: https://www.gardena.com/za/support/contact/
FRFRFRFRFRfr
fr UTILISATION CONFORME
L’épandeur L GARDENA est destiné à répandre du produit d’épandage
et des semences de gazon.
N’utilisez pas le produit pour répandre des gravillons.
MONTAGE
Monter les roues et le pied [Fig. A ] :
1. Placez les roues
1
sur les axes et enfoncez les chapeaux de roue
2
sur les axes jusqu’à ce qu’ils s’enclenchent de façon audible (utilisez
éventuellement un marteau).
2. Poussez la base
3
sur l’épandeur et serrez les vis
4
fermement.
Installer les montants et la poignée [Fig. B ] :
3. Enfoncez les montants inférieurs
5
dans l’épandeur et serrez les vis
6
fermement.
4. Enfoncez le montant supérieur
7
sur les montants inférieurs
5
et serrez
les vis
6
fermement.
5. Enfoncez la poignée
9
sur le montant supérieur
7
, poussez la vis
8
au travers du trou dans le montant supérieur
7
, placez l’écrou
0
sur la
vis
8
et serrez la vis
8
fermement.
Installer le câble métallique [Fig. C / D ] :
6. Guidez le câble métallique
q
depuis le haut au travers de l’ouverture
dans le bac.
7. Insérez le câble métallique
q
dans le support
w
et tirez le câble ferme-
ment jusqu’à ce qu’il se verrouille de façon audible.
8. Montez le câble métallique
q
dans le clip
e
comme représenté dans la
fig. C.
9. Accrochez le clip
e
dans la poignée
r
de telle sorte que les crampons
inférieurs semi-arrondis soient poussés sur la poignée.
UTILISATION
Régler la quantité d’épandage [Fig. D ] :
Régler la quantité d’épandage souhaitée conformément au tableau de
dosage (voir www.Gardena.com) sur la graduation
r
située sur la poignée.
Respectez les remarques du fabricant de produit d’épandage.
1. Tirez le clip pour le réglage de quantité
e
tout d’abord à la verticale vers
le haut, déplacez ensuite le clip sur la position souhaitée vers la droite ou
la gauche et laissez le clip s’enclencher.
2. Remplissez le produit d’épandage.
Relâchez la poignée
9
lors du remplissage, d’une interruption de l’épan-
dage et du transport.
REMARQUE : en raison de la granulométrie différente des engrais
et des semences, les recommandations figurant sur le tableau
de dosage ne sont données qu’à titre de référence. Lors de l’épan-
dage d’engrais ferreux, respectez impérativement les consignes
de sécurité du fabricant d’engrais.
Calculer la quantité à répandre de produit [Fig. E ]:
Vous aurez besoin d’une surface de test d’1 m², lisse, sèche et propre
(par ex. garage).
1. Nettoyez la surface de test (par ex. avec un aspirateur/balai).
2. Placez le clip de réglage de la quantité
e
sur la position 4 et épandez le
produit d’épandage sur une longueur de 2,15 m (correspond à une sur-
face d’épandage d’1 m²).
3. Aspirez / balayez le produit d’épandage, pesez-le et comparez avec les
conseils indiqués par le fabricant.
4. Répétez les points 1 à 3 en corrigeant la position du réglage d’épan-
dage
e
jusqu’à ce que la quantité épandue corresponde aux indications
du fabricant.
MAINTENANCE / ENTREPOSAGE
[Fig. F ] : après utilisation, déplier le couvercle des rouleaux
t
, vider et net-
toyer l’épandeur. Si nécessaire, éliminer les restes du produit d’épandage
conformément aux règlements communaux.
GARANTIE / SERVICE APRÈS-VENTE
Enregistrement du produit:
Enregistrez votre produit sur gardena.com/registration.
GAR_00432-20.960.05_2024-02-05.indd 4GAR_00432-20.960.05_2024-02-05.indd 4 05.02.24 07:5405.02.24 07:54
 Loading...