13
GB
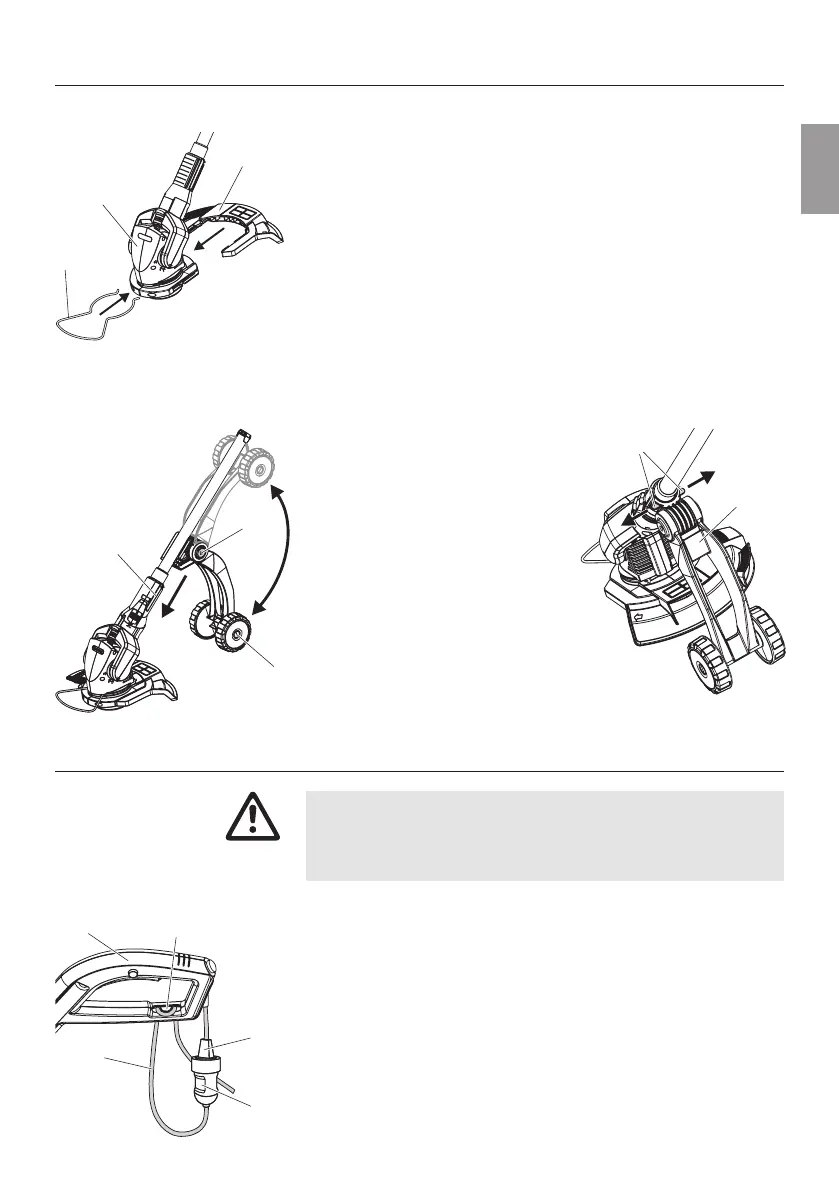
3. Assembly
1. Push the cover
3
into the guide of the cutting head from
behind
2
until the connection locks into place on both sides.
2. Push plant guard
1
onto the cutting head from the front
2
until it locks into place.
The additional wheel is available as an optional extra for the
EasyCut 400. The additional wheel is already fitted on the
ComfortCut 450 / PowerCut 500.
Fit additional wheel:
v Fit additional wheel
4
onto the
guides of the handle holder
5
until you hear the connection
lock into place on both sides.
Remove additional wheel:
v Pull both catches
6
out to the
side and remove the additional
wheel
4
from the guides of the
handle holder
5
.
Fold additional wheel up / down:
v Press adjusting buttons
z
T
on both
sides, fold additional wheel up / down
4
and release the adjustment buttons
z
T
again.
4. Operation
Risk of injury if the Turbotrimmer does not switch off when
you release the start button.
V Never bypass the safety devices or switches (e.g. by
tying the safety lock to the handle).
1. Insert the loop of the extension cable
7
into the cable strain
relief
9
from below through the upper part of the handle
8
and pull tight.
2. Plug the plug
0
of the trimmer into the socket
A
of the
extension cable
7
.
3. Plug the extension cable into a 230 V mains power supply.
Assembling the trimmer:
Fit additional wheel:
2
1
3
5
4
4
z
T
6
9
8
7
0
A
RISK OF INJURY !
Connecting the trimmer:

 Loading...