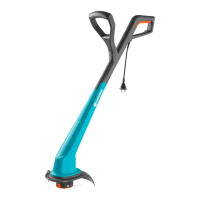
13
GB
Risk of injury!
Pulling the cutting filament
manually out of the filament
cassette:
5G
Only use original GARDENA Filament Cassettes. You can
order Replacement Filament Cassettes from your GARDENA
dealer or directly from the GARDENA Customer Service.
• Filament Cassette for Turbotrimmer SmallCut 300: Art. 5306
1. Unplug the mains plug.
2. Release the cassette cover
C
by pressing both locking clips
D
and remove the cover.
3. Remove the filament cassette
E
.
4. Remove any dirt.
5. Feed the cutting filament
5
of the new filament cassette
E
through the hole
F
and pull out about 10 cm.
6. Insert the filament cassette
E
.
Do not trap the cutting
filament
5
when you do this.
7. Fit the cassette cover
C
so that you hear both locking
clips
D
click into place.
v If the cassette cover
C
cannot be touched down, turn the
filament cassette
E
to and fro, until the filament cassette
E
is completely in the filament cassette holder.
7. Troubleshooting
Risk of injury from the cutting filament!
V Always unplug the mains plug of the Turbotrimmer be-
fore troubleshooting.
A cutting filament that is too short or no longer extends auto-
matically when the trimmer is turned on can be pulled out
manually.
1. Unplug the cable from the mains.
2. Hold the automatic slide feed
G
down with your hand and at
the same time pull on the cutting filament
5
.
If the cutting filament has disappeared into the filament cassette
or if the automatic filament extension still doesn’t work after pulling
the cutting filament
5
it may be fused together in the filament
cassette
E
.
1. Unplug the cable from the mains.
2. Remove the filament cassette
E
as described in
6. Maintenance
“Replacing the filament cassette”
.
3. Unwind the cutting filament
5
, clean the filament cassette
E
and the cutting filament
5
and wind the cutting filament
5
onto the cassette
E
once more.
4. Clean the automatic mechanism lever
G
.
The automatic lever
must move freely.
5. Insert the filament cassette again as described under
6. Maintenance
“Replacing the filament cassette”
.
Releasing a cutting filament
that has gone into the
cassette or which has fused:
D
E
F
5
C
D
E
F
5
G

 Loading...