Do you have a question about the GardePro A5 and is the answer not in the manual?
Describes the GardePro A5 trail camera's purpose and technology.
Details the key features and capabilities of the trail camera.
Lists various uses and applications for the trail camera.
Provides instructions for inserting batteries correctly.
Details the process of inserting and formatting the SD card.
Explains the purpose and function of the OFF mode.
Details the ON mode for settings adjustment and file download.
Describes how to enter and operate in surveillance mode.
Selects the camera's operational mode (Motion Detection, Time Lapse, Hybrid).
Chooses between capturing still photos or video clips.
Sets the desired resolution for still photos.
Configures the number of photos taken in a sequence.
Selects the video resolution and frame rate.
Sets the duration for recorded video clips.
Enables or disables audio recording for videos.
Chooses the video file format (MP4 or MOV).
Sets the waiting time between triggers to avoid redundant captures.
Adjusts the sensitivity of the motion sensor based on environmental conditions.
Controls the activation of side motion sensors for faster triggering.
Allows testing the camera's sensing angle and detection range.
Sets the time interval for capturing photos in Time Lapse mode.
Defines the time interval for automatic photo/video capture in Time Lapse.
Sets specific active time periods for Time Lapse or Hybrid modes.
Configures the current date and time for imprinting on captures.
Selects the display format for dates on the screen and captures.
Sets the time display format (12h or 24h).
Assigns a custom name to the camera for easier identification.
Enables or disables displaying capture information (date, time, temp, moon phase).
Manages SD card space by overwriting oldest files.
Sets specific daily operating hours for the camera.
Secures the camera with a 4-digit password.
Formats the SD card, erasing all data.
Resets all camera settings to the manufacturer defaults.
Displays the current software version of the camera.
Details the process of securely mounting the camera on a tree or tripod.
Explains how to test the camera's detection range and angle.
Guides on starting the camera and its different modes.
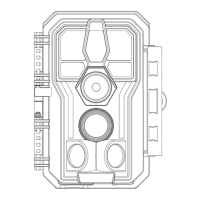
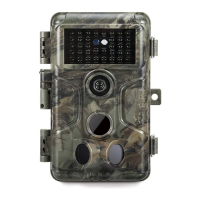
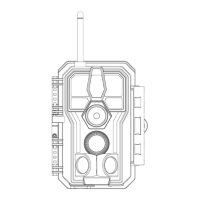
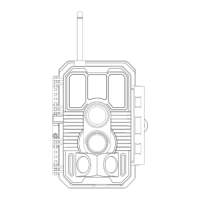
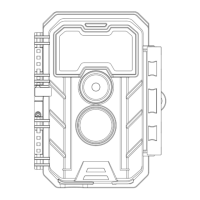
The GardePro A5 trail camera is a new generation of digital scouting camera designed for capturing high-quality images and videos of game and wildlife, as well as for security and surveillance applications. It is triggered by movement detected by its highly sensitive Passive Infra-Red (PIR) motion sensor.
The camera captures high-quality pictures (up to 48MP still photos) or 1296P 20fps or 1080P 30fps H.264 video clips with audio. It features innovative and ultra-clear Sony imaging technology, incorporating all-new software innovations, smart illumination technology, blur reduction technology, auto noise reduction, and dynamic exposure technology to deliver high-resolution image quality even in low light or dark environments. The camera is equipped with a Sony Starvis sensor and a premium f/1.6 great aperture lens, along with an exclusive imaging optimization algorithm.
For night vision, the camera utilizes 36 high-performance infrared no-glow 940nm LEDs, providing a flash range of up to 100ft that is invisible to the human eye. It offers a wide view angle of 70°. The camera supports three working modes: Motion Detection, Time Lapse, and Hybrid. The fast trigger time is approximately 0.1 to 0.5 seconds, thanks to pre-activated technology with three PIR sensors. It also boasts a fast recovery time of less than 0.5 seconds and a long trigger distance of up to 90ft. Each capture includes an info strip displaying Date, Time, Temperature, and Moon phase.
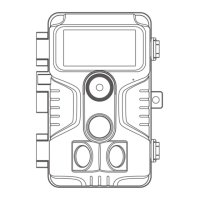
The GardePro A5 is designed for ease of use with well-designed operation buttons and a built-in 2.4-inch color screen, which simplifies programming and allows for on-screen review of pictures and videos. The camera operates in three basic modes: OFF, ON, and SURVEILLANCE.
In OFF mode, the camera is powered off, which is the "safe" mode for actions like replacing the SD card or batteries, or transporting the device. It's recommended to remove batteries if the camera will not be used for a long time, as it still consumes a small amount of power in this mode.
In ON mode, users can check and change camera settings via the built-in screen and menu. Settings such as photo or video resolution, interval between photos, and time imprint can be adjusted. The screen displays information like the number of images taken, battery level, and current mode. If no operation occurs within 5 minutes in ON mode, the camera automatically enters SURVEILLANCE mode. This mode also allows connection to a computer via a USB port to download images.
To enter SURVEILLANCE mode, after inserting batteries and an SD card, switch the camera to ON and press the START button. If "Motion Detection" is set, the camera will have a 30-second delay before being ready to capture images. If "Time Lapse" is set, it will immediately enter Time Lapse without delay. In surveillance mode, the camera operates automatically according to its settings, with no manual controls needed or possible. Pressing the START button again can wake up the camera for reprogramming.
The camera requires eight (8) 1.5V AA Alkaline or Lithium batteries for operation. Energizer AA Lithium batteries are recommended for maximum battery life. It is crucial to insert batteries with correct polarity and not to mix old and new batteries or different battery types. Rechargeable NiMH AA batteries can be used, but they may have a shorter lifetime. A "Low Battery" message will appear on screen when power is low. If the battery indicator is red, IR LEDs for night flash may not work, but the camera will still function during the daytime until "Low Battery" is indicated.
A standard-size SDHC/SDXC memory card (maximum capacity 512GB, Class 10) is required. SanDisk 32GB SDHC Class 10 memory cards are recommended for optimal performance. Before first use, the SD card should be formatted in the camera using the "Format SD Card" option in the menu settings. The SD card should be inserted with the label side upwards until a "click" is heard. It should only be inserted or removed when the camera is powered OFF.
The camera can be mounted on a sturdy tree (about 6in/15cm diameter) using the provided adjustable web belt or on a tripod using the 1/4-20 thread socket. For optimal picture quality, the camera should be placed 16-17ft (5m) away from the monitored area, at a height of 2.5-3.5ft (0.75-1m). For night captures, subjects should be within the ideal flash range of 10-100ft (3-30m).
A "Motion Test" feature helps aim the camera at the target area. In ON mode, press MENU and go to "Motion Test." The camera will count down a delay (up to 60 seconds) and then be ready to capture motions. During the test, a white motion indicator LED flashes RED when motion is detected within the central PIR sensor's 60° sensing area. The side sensors (each with a 30° angle) pre-activate the camera but do not trigger the RED light. This test helps determine the best placement and height (generally 3 to 6 feet from the ground) to avoid false triggers from heat sources, tree branches, or bushes. The camera should not be installed behind glass windows or aimed at glass objects.
Captured photos and videos are stored in the \DCIM\100MEDIA folder on the SD card, with filenames like DSCF0001.JPG and DSCF0001.MP4. MP4 video files are compatible with most popular media players. Files can be reviewed directly on the camera screen, downloaded to a computer via USB cable, or by inserting the SD card into an SD card reader.
The camera is built for any climate, with an IP66 waterproof rating, making it resistant to rain and snow. It operates in temperatures ranging from -4°F to 140°F (-20°C to 60°C). The camera supports loop recording, which overwrites the oldest files when the SD card reaches capacity, or this feature can be turned off to stop capturing images once the card is full. It also includes a password protection feature to prevent unauthorized access.
The black PIR lens may accumulate dirt or scratches over time, but this is designed not to affect performance. If cleaning is necessary, it is recommended to blow off the dirt or pick it out very lightly, avoiding wiping, which may cause more scratches.
For troubleshooting, users should ensure the camera is powered on and in the correct mode, format or replace the SD card if unstable, and replace batteries if night vision is not working as expected. To optimize night images, close-up obstacles that cause strong reflections should be removed or the camera's installation position adjusted. If issues persist, customer support can be contacted with the order number, or the website can be checked for the latest firmware.
| IR Flash Range | 65ft |
|---|---|
| Recovery Time | 0.5s |
| Operation Mode | Photo, Video, Photo + Video |
| Power Supply | 8 AA Batteries |
| Waterproof | IP66 |
| Memory | Supports up to 32GB SD Card |
| Battery Life | Up to 6 months |
| Night Vision Range | 65ft |
| Video Resolution | 1080P, 720P, VGA |
| PIR Sensitivity | High, Low |
| Multi-Shot | 1-3 Photos per Trigger |
| Operating Temperature | -4°F to 140°F |