EasyManua.ls Logo

Gardner Denver DGH Series - User Manual

Gardner Denver DGH Series
66 pages
Print Icon
To Next Page IconTo Next Page
Loading...
PRESSURE-SWING
DESICCANT TYPE
COMPRESSED
AIR DRYERS
For Sales and Service: (800) 883-2477
Or visit Sales and Service at www.gardnerdenverproducts.com
INSTRUCTION MANUAL
DGH SERIES
3162263 Rev. H 04/16
18-3-625 2nd Edition
MODELS
RATED
FLOW
REFER
AS
MODELS
DGH
SERIES
w/ Basic
Controller
DGH
SERIES
w/
Standard
Controller
DGH
SERIES
w/ Energy
Savings
Controller
DGH40B
DGH60B
DGH90B
DGH40S
DGH60S
DGH90S
DGH40E
DGH60E
DGH90E
40 SCFM
60 SCFM
90 SCFM
40
60
90
DGH115B
DGH165B
DGH260B
DGH115S
DGH165S
DGH260S
DGH115E
DGH165E
DGH260E
115 SCFM
165 SCFM
260 SCFM
115
165
260
DGH370B
DGH450B
DGH590B
DGH370S
DGH450S
DGH590S
DGH370E
DGH450E
DGH590E
370 SCFM
450 SCFM
590 SCFM
370
450
590
DGH750B
DGH930B
DGH1130B
DGH750S
DGH930S
DGH1130S
DGH750E
DGH930E
DGH1130E
750 SCFM
930 SCFM
1130 SCFM
750
930
1130
DGH1350B
DGH1550B
DGH2100B
DGH1350S
DGH1550S
DGH2100S
DGH1350E
DGH1550E
DGH2100E
1350 SCFM
1550 SCFM
2100 SCFM
1350
1550
2100
DGH3000B
DGH4100B
DGH5400B
DGH3000S
DGH4100S
DGH5400S
DGH3000E
DGH4100E
DGH5400E
3000 SCFM
4100 SCFM
5400 SCFM
3000
4100
5400
Contents
1. GENERAL SAFETY INFORMATION ................2
2. RECEIVING, MOVING, UNPACKING...............2
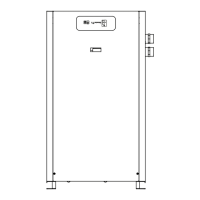
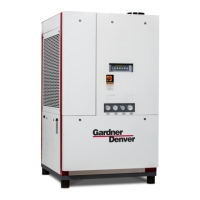
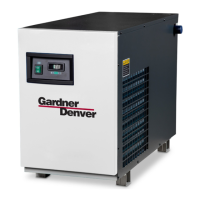
3. DESCRIPTION .................................................3
4. INSTALLATION .................................................8
5. CONTROLLERS – GENERAL ..........................16
6. CONTROLLER – BASIC TIMER BASED .........18
7. CONTROLLER – STANDARD .........................21
8. CONTROLLER – ENERGY SAVINGS ..............32
9. OPERATION .....................................................49
10. MAINTENANCE ................................................55
11. TROUBLESHOOTING ......................................56
12. NOTES ..............................................................57
13. REPLACEMENT PARTS ..................................58
WARRANTY

Questions and Answers

  • T
    thompsonthomasAug 2, 2025
    How to fix Gardner Denver Dehumidifier when indicator lights are not illuminated?
    • C
      Carolyn HayesAug 2, 2025
      If the indicator lights on your Gardner Denver Dehumidifier are not illuminated, there are several potential causes. First, ensure that the unit is receiving power by checking the voltage at the terminal board. Next, verify that the Off/On switch is in the On position. If the issue persists, inspect the fuse and replace it if it's blown. Finally, a malfunction in either the Off/On switch or the board itself could be the problem, requiring board replacement.
  • A
    Angela ClarkAug 6, 2025
    Why is excessive purge discharged during purge cycle of Gardner Denver Dehumidifier?
    • M
      michael41Aug 6, 2025
      If your Gardner Denver Dehumidifier is discharging excessive purge during the purge cycle, it may be due to several reasons. First, the purge pressure might be too high, so you should refer to Section 9 to determine the correct Purge Pressure Indicator setting. Second, the inlet switching valve might not be closing properly; in this case, verify the voltage to the pilot solenoid valve, check the pilot air pressure (60-120 psig required), and verify proper actuator operation, also check the valve for obstruction or seat damage. Finally, depending on your model (40 through 3000 or 4100 through 5400), the Shuttle Valve, Outlet Check, or Purge Check Valves might be failing to close; repair or replace the valve(s) as needed.
  • D
    Dr. Gerald FreemanAug 10, 2025
    What to do if Switching Failure Alarm appears on Gardner Denver Dehumidifier?
    • A
      Andrew WalkerAug 10, 2025
      If you're experiencing a Switching Failure Alarm on your Gardner Denver Dehumidifier (Standard & Energy Savings Controllers only), the issue could stem from several sources. Start by replacing the faulty pressure switches or control board. Also, the offstream tower might not have de-pressurized in time or below 10 psig, so you should check mufflers, check or shuttle valve(s), inlet switching and purge/repressurization valves, purge pressure adjustment, and controller settings. Finally, if the offstream tower did not re-pressurize in time or above 10 psig, check the air supply to dryer, purge/repressurization valve, purge pressure adjustment, and controller settings.
  • L
    lallenAug 19, 2025
    What causes tower to fail to repressurize to line pressure in Gardner Denver DGH Dehumidifier?
    • H
      hansenamandaAug 19, 2025
      If the tower in your Gardner Denver Dehumidifier fails to repressurize to line pressure, it could be because the purge/repressurization valve fails to close, leading to air loss from mufflers during the tower repressurization portion of the cycle. Verify the removal of voltage to the pilot solenoid valve and proper actuator operation. Check the valve for obstruction or seat damage, as it is a spring-assisted, normally closed valve. Another reason could be insufficient purge flow due to purge pressure being too low; refer to Section 9 to determine the correct Purge Pressure Indicator setting, noting that the Purge Pressure Adjustment Valve should never be completely closed.
  • C
    christopher13Aug 25, 2025
    Why moisture indicator turns yellow on Gardner Denver DGH Dehumidifier?
    • C
      Christopher RamseyAug 25, 2025
      If the moisture indicator on your Gardner Denver Dehumidifier turns yellow, indicating an elevated outlet dew point, several factors could be responsible. First, the design conditions might be exceeded, so refer to Sections 4 & 9 to determine if the dryer is being used outside of its design limitations. Second, the desiccant might be spent, meaning its useful service life has ended, so replace the desiccant. Third, the desiccant could be contaminated, for example, with oil; take corrective action and refer to Section 4.1 to determine proper prefiltration before changing the desiccant. Finally, the desiccant might be saturated with water; refer to 11.3 for corrective action, noting that operation at reduced flow may reactivate desiccant beds until the desired outlet dew point is achieved.
  • P
    phillipsbrookeAug 27, 2025
    How to prevent excessive desiccant dust downstream in Gardner Denver Dehumidifier?
    • M
      Mark ChurchAug 28, 2025
      Excessive desiccant dust downstream in your Gardner Denver Dehumidifier can be attributed to a couple of issues. Fluidization of the desiccant bed may occur if the design conditions for maximum rated flow are exceeded, so refer to Section 4 or 9 to determine if the dryer is being operated outside of design limitations. Also, fluidization can result from rapid repressurization of the offstream tower due to a faulty timer or insufficient purge flow (purge pressure too low); refer to Section 7 or 8 to verify proper time sequence and to Section 9 to determine the correct Purge Pressure Indicator setting.
  • B
    Bradley BellNov 14, 2025
    Why does desiccant saturate prematurely in Gardner Denver DGH?
    • D
      David HardyNov 14, 2025
      Premature saturation of desiccant in your Gardner Denver Dehumidifier can occur due to several factors. It may be caused by insufficient purge flow due to low purge pressure. Refer to Section 9 to determine the correct Purge Pressure Indicator setting. Another possible cause is incomplete tower depressurization because of clogged mufflers, which requires replacing the muffler inserts. Also, incomplete tower depressurization can occur if the purge/repressurization valve fails to open; verify the voltage to the pilot solenoid valve, check the pilot air pressure (60-120 psig required), and verify proper actuator operation. Insufficient purge time due to incorrect controller settings, may require you to refer to Section 7 or 8 to determine correct controller cycle settings. Lastly, a faulty co...

Summary

DGH SERIES

MODELS

Lists the DGH Series models with controller types and flow rates.

GENERAL SAFETY INFORMATION

1.1 Pressurized Devices

Safety precautions for pressurized equipment.

1.2 Electrical

Electrical safety requirements for operation and installation.

1.3 Breathing Air

Suitability of treated air for breathing and OSHA reference.

1.4 Noise

Caution regarding dryer operation without mufflers.

1.5 High Velocity Air

Caution regarding proximity during tower depressurization.

RECEIVING, MOVING, UNPACKING

2.1 Receiving

Procedures for checking shipment upon delivery for loss or damage.

2.2 Moving

Caution on proper lifting methods for equipment.

2.3 Unpacking

Steps for checking for concealed loss or damage after delivery.

DESCRIPTION

3.1 Dryer Function

Explains the dual tower regenerative desiccant dryer operation.

3.2 Automatic Purge Saving System

Details the energy-saving system for controllers at reduced loads.

Description of Operation - Dryer

3.3.2 Models 4100 to 5400 w; Check Valves

Describes operation for models using check valves for air flow.

3.3.3 Models 40 to 450 (High Pressure Option)

Explains operation for high-pressure models with shuttle valves.

3.4 Automatic Purge Saving System

INSTALLATION

4.1 Location in the compressed air system

Guidance on selecting an optimal location for dryer installation.

4.1.4 Heatless Pressure-Swing Desiccant Air Dryer

Describes the specific characteristics of heatless desiccant dryers.

4.1.5 Afterfilter(s)

Requirements for downstream filtration for air purity.

4.2 Physical Location

Requirements for dryer placement concerning access and protection.

4.3 Minimum & Maximum Operating Conditions

Checks for ensuring dryer operates within design parameters.

4.4 Maximum Operating Pressure (MOP)

Details standard and optional maximum operating pressures.

4.5 Minimum Operating Pressures

4.6 Maximum Compressed Air Temperature at Dryer Inlet

Sets the upper limit for inlet air temperature.

4.7 Ambient Temperatures

Defines minimum and maximum ambient operating temperatures.

4.8 Mounting

Instructions for installing the dryer on a level pad.

4.9 Piping

Guidance on connecting inlet and outlet piping.

4.10 Isolation Valves

Recommendations for using isolation valves during maintenance.

4.11 Electrical Connections

Points to controller sections for electrical connection details.

4.12 Provisions for Purge Exhaust

Requirements for routing purge exhaust safely.

4.13 Initial Desiccant Charge

Notes that the dryer ships with desiccant and is ready for operation.

4.14 Icon Identification

Illustrates common icons used on the dryer.

CONTROLLERS - GENERAL

5.1 Overview

Describes the solid-state controller's location and functional levels.

CONTROLLER - BASIC TIMER BASED

6.1 Reference Figures - Basic Timer Based Controller

Lists figures relevant to the Basic Timer Based Controller.

6.2 Connections - Basic Timer Based Controller

Details connections for the Basic Timer Based Controller.

CONTROLLER - STANDARD

7.1 Reference Figures - Standard Controller

Lists figures related to the Standard Controller.

7.2 Connections - Standard Controllers

Details input power, common alarm, and remote connections.

7.3 Control Board Jumpers - Standard Controllers

Explains functions of jumpers for pressure, alarm, and service intervals.

7.4 Front Panel Overlay - Standard Controllers

Identifies LEDs and switches on the Standard Controller front panel.

7.4.2 Front Panel Switches

Describes the function of front panel switches for operation and mode selection.

CONTROLLER - ENERGY SAVINGS

8.1 Reference Figures - Energy Savings Controller

Lists figures relevant to the Energy Savings Controller.

8.2 Connections - Energy Savings Controller

Details input power, common alarm, and remote connections for the controller.

8.3 Control Board Jumpers - Energy Savings Controller

Explains jumper functions for pressure, drains, and alarm configuration.

8.4 Front Panel Overlay - Energy Savings Controller

Identifies LEDs, switches, and display on the controller's front panel.

8.6 Front Panel Operation

Describes the five operating modes of the Energy Savings Controller.

8.7 Program Mode

Details entering and navigating the Program Mode for settings.

8.8 Setup Mode

Explains how to enter and use the Setup Mode for configuration.

8.9 Alarm & Service Mode

Explains how the controller displays alarm and service messages.

8.9.2 Service messages

Describes service intervals for filters, desiccant, and valves.

8.10 Display Mode

Explains the automatic screen scrolling in Display Mode.

8.11 Test Mode

Details how to enter and operate the Test Mode for diagnostics.

OPERATION

9.1 Start-up Procedures

Guides through initial setup, controller settings, and pressurization.

9.1.4 Adjusting the Purge Rate

Instructions for setting the purge rate based on MOP and ISO class.

9.2 Operational Check Points

Routine checks for power, moisture indicator, purge pressure, and alarms.

9.2.8 Process Valves

Describes the function and operation of various control valves.

9.2.8.1 & 9.2.8.2 Valve Descriptions

Details valve types and operation for different model ranges.

9.3 Operating Sequence & Dryer Shut Down

Refers to sequences and outlines safe shutdown procedures.

9.5 Loss of Power & 9.6 Operating Parameters

Explains power loss behavior and lists key operating parameters.

9.7 Max Inlet Flow & Purge;Outlet Flows

Instructions for calculating flow rates and understanding purge/outlet flows.

9.8 Purge and Outlet Flows & 9.9 EXAMPLE

Explains flow rates and provides an example calculation.

MAINTENANCE

10.1 Desiccant Replacement

Procedure and frequency for replacing desiccant material.

10.2 Purge Mufflers & 10.3 Valves

Guidance on checking mufflers and valves for proper operation.

10.4 Pilot Air Filter Element Replacement

Procedure for replacing the pilot air filter element.

TROUBLESHOOTING

Indicator Lights & Moisture Indicator Issues

Diagnoses causes for indicator light and moisture indicator problems.

Desiccant Saturation & Repressurization Failures

Addresses desiccant saturation, purge flow, and repressurization issues.

Excessive Purge & Switching Failures

Diagnoses excessive purge and switching alarm issues.

NOTES

REPLACEMENT PARTS

Models 40-450 Diagrams

Illustrates replacement parts for models 40-450 with numbered diagrams.

MAINTENANCE KITS (Models 40-450)

Lists recommended maintenance kits for different service intervals for models 40-450.

MAINTENANCE KITS (Models 590-930)

Lists recommended maintenance kits for models 590-930.

MAINTENANCE KITS (Models 1130-3000)

Lists recommended maintenance kits for models 1130-3000.

MAINTENANCE KITS (Models 4100-5400)

Lists recommended maintenance kits for models 4100-5400.

WARRANTY

Gardner Denver DGH Series Specifications

General IconGeneral
BrandGardner Denver
ModelDGH Series
CategoryDehumidifier
LanguageEnglish

Related product manuals